background image


34 

CAPTURING YOUR VIDEO 

1) 

Set the Mode Dial to 


Video


Mode

 or press the 


HD

 button to open the Video 

Capture Mode. 

2) 

While in Video Capture mode, use the LCD display to direct the camera at the scene you 

would like to capture. 

3) 

Use the 

Zoom


In

/

T

 and 

Zoom


Out/W

 lever to better set the camera display if desired. 


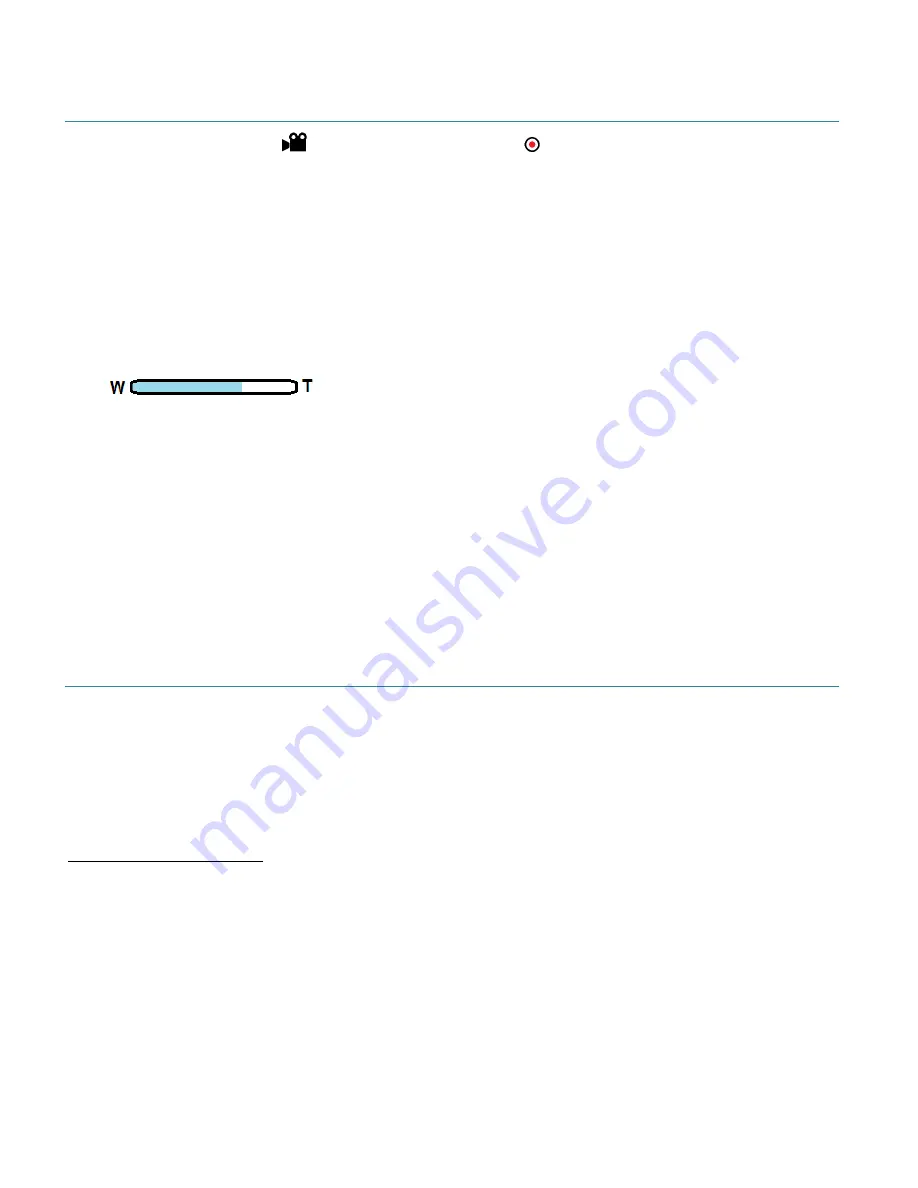
You can magnify your subject up to 18 times using the zoom. 


The following Digital Zoom Indicator appears on the top, right side of the LCD screen: 


4) 

Press the 

Shutter 

button to start recording. 

Press the 

Right

/

Exposure

 button to Pause/Resume the video recording. 

Press the 

Shutter

 button again to stop the recording. 

5) 

The video is 

automatically saved to the camera’s SD Memory Card.   


VIDEO CAPTURE MODE MENUS 

Using the Menu Button 

Press the 

Menu

 button to access Video Capture options while in Video Capture Mode.   

Note

: Depending on your settings, the displayed option icons in the Function menu may vary. 


To use the Menu Button: 

1) 

Press the 

Menu

 button. 

2) 

Press the 

Up

/

Down

 button to select a menu item. 

3) 

Press the 

OK

/

Right

 button to enter the submenu. 

4) 

Press the 

Up

/

Down

 button to select an option. 

5) 

Press the 

OK

 button to confirm the setting. 


Summary of Contents for ViviCam S1527

Page 1: ...l Camera User Manual 2009 2012 Sakar International Inc All rights reserved Windows and the Windows logo are registered trademarks of Microsoft Corporation All other trademarks are the property of their respective companies ...

Page 2: ...ng the Menus 15 ViviLink Feature 16 Photo Capture Mode 17 Video Capture Mode 33 Camera Settings 36 Playback Mode 38 Connecting the Digital Camera to an HDTV 47 Installing the Software 48 Connecting the Camera to the Computer 49 Getting Photos and Videos from the Camera to the Computer 50 Getting Started 51 Transferring Images from the Camera to the Computer Manually 51 Camera Maintenance 53 Sakar ...

Page 3: ...s a plug and play device You can download the pictures and videos captured by your camera without the software by directly accessing the camera s memory card from your computer It is recommended however that you install the Vivitar Experience Image Manager Software to enjoy the full Vivitar Experience Please read this manual carefully first in order to get the most out of your digital camera What ...

Page 4: ...3 Manual Flash Open Button 4 Flash Up Button 14 HDMI Port 24 Special Color Effects Button 5 Exposure Right Button 15 Tripod Mount 25 ISO Button 6 Delete Button 16 Optical Lens 26 Video Record Button 7 Menu Button 17 Battery Compartment 27 Mode Dial 8 OK Button 18 Lens Cover 28 Face Detect Button 9 Macro Down Button 19 SD Memory Card Slot 29 Anti Shake Button 10 Display Button 20 Zoom In T Zoom Out...

Page 5: ... Scrolls left in menus Toggles through the 4 self timer options 2 Up Flash Button Scrolls up in menus Toggle through the flash options 3 Right Exposure Button Scrolls right in menus Selects an EV value 4 Down Focus Button Scrolls down in menus Toggles between different focus modes 5 OK Button Confirms a chosen setting ...

Page 6: ...INITIAL CAMERA SETUP INSTRUCTIONS Installing the Batteries Installing the Memory Card Insert 4 AA 1 5V batteries Alkaline batteries recommended SD Memory card up to 32GB needed for normal use Turning On the Camera Using the Camera ...

Page 7: ...n inside the battery compartment 4 Close the battery compartment cover and then slide the clip to the left to securely lock the cover in place Note Remove the batteries from the camera when not in use for an extended period Do not mix alkaline and non alkaline batteries Rechargeable batteries not recommended Some features such as Flash will not work if the battery power level is low When the batte...

Page 8: ...roper direction to install the SD Card is shown on the SD icon by the SD card slot See images 1 and 2 below for reference 3 Push the SD card until you hear a click sound This indicates the SD card has been inserted correctly See images 3 and 4 below for reference 4 Close the SD Memory Card cover To remove the SD Memory Card 1 Open the SD Memory Card cover on the side of the camera to reveal the SD...

Page 9: ...he camera ATTACHING THE STRAP T o attach the lens and neck straps to your camera please follow the instructions below 1 Insert one end of the neck strap through the strap eyelet 2 Route it through the buckle as the inner loop 3 Route the other end of the neck strap to the other strap buckle to secure it Follow the above steps to attach the other side of the neck strap 4 Insert one end of the lens ...

Page 10: ...de Dial to Video To take a video aim your camera as desired and press the Shutter button to start the record A blinking red record indicator appears on the LCD screen while record is in progress To stop the record press the Shutter button again The video is automatically saved to your camera s memory card To access the various menus for the Video Capture Mode press the Menu button while in the Vid...

Page 11: ...ory SD Card up to 32GB LCD Display TXD 3 0 Inch TFT Lens f 28 504mm F3 2 6 5 Zoom 4X Digital Zoom 18X Optical Zoom Light Exposure 2 0 2 0 EV 0 3EV step White Balance Auto Daylight Cloudy Tungsten Fluorescent H Fluorescent L Custom ISO Auto 50 100 200 400 800 1600 Scene Scenery Backlight Night Scenery Building Kids Night Portrait Food Text Snow Fireworks Sunset HDR Blink Detect Smile Capture Flash ...

Page 12: ...vailable hard disk space 16 bit Color monitor 1024 X 768 recommended screen resolution CD ROM Drive QuickTime 6 or higher Microsoft Internet Explorer 7 or higher Windows Media Player 10 or higher DirectX 9 or higher Internet connection required MACINTOSH OS Intel processor running Mac OS X v10 5 x or later 1 GB RAM 250 MB available hard disk space Display 1024 x 768 or higher resolution monitor Qu...

Page 13: ...Mode 2 Press the Playback button The camera is turned on in Photo Capture Camera Mode After powering on the camera emits a sound and the LED light turns on briefly The LCD screen turns on with your camera in Photo Capture Mode to start POWERING THE CAMERA OFF While the camera is on you can press the Power button again at any point to turn your camera OFF A Goodbye screen appears and then the camer...

Page 14: ...a is first powered ON the Photo Capture Mode will be active The icons that appear on the LCD screen are the best default settings so that you can begin to capture and enjoy clear quality photos PHOTO CAPTURE MODE When in Photo Capture Mode this icon displays on the top left corner of the LCD display 1 Set the Mode Dial to the desired photo shooting mode 2 If you need to use the flash for shooting ...

Page 15: ...e Zoom lever to zoom in zoom out on the subject 4 Press the Right Exposure button to pause resume the video recording Press the Shutter button again to stop the video recording PLAYBACK MODE When in Playback Mode this icon displays on the top left corner of the LCD display 1 To switch to Playback mode press the Playback button 2 In Playback mode you can view captured photos or play recorded videos...

Page 16: ...ht Left button The Mode Menus include Icon Mode Description Photo Capture Mode Displays the Photo Capture Mode Menu options Video Capture Mode Displays the Video Capture Mode Menu options Playback Mode Displays the Playback Mode Menu options Camera Settings Displays the Camera Setting Menu options 3 Press the Menu button 4 Press the Up Down button to select Image Size 5 Press the OK Right button t...

Page 17: ... options Select a ViviLink option and press OK to save your selection and return to Capture mode Your selected ViviLink destination appears as an icon on the LCD screen and your camera is now ready to capture your photo or video with the selected ViviLink destination Note The ViviLink feature is deactivated by default and needs to be activated prior to capturing each photo or video VIVILINK PLAYBA...

Page 18: ...ear on the LCD display in Photo Capture Mode No Description 1 Shooting Mode 2 Flash Mode 3 Focus Mode 4 Image Size 5 Image Quality 6 Numbers of Shots Available 7 ISO 8 Face Tracking 9 White Balance 10 Exposure Value EV 11 Histogram 12 Battery Level 13 ViviLink Destination No icon appears if None selected 14 Face Detect No icon appears if Off selected ...

Page 19: ...Memory Card PHOTO CAPTURE MODE QUICK FUNCTION BUTTONS Your digital camera has a four directional pad that functions as Quick Function buttons Button Function Left Self Timer Opens the Self Time Menu The Self Timer menu allows you to set a delay between the time that the camera s Shutter button is pressed and the actual capture of the picture This is an optimal feature if you don t just want to tak...

Page 20: ...Menu screen ViviLink Opens the ViviLink for Photos options None Facebook Twitter Photobucket Flickr MySpace Picasa Albums YouTube Playback Opens the Playback Mode showing the last image captured Detect Opens the Detect Options Off Face Detect Smile Detect Blinking Detect Object Detect Anti Shake Opens the Anti Shake menu The Anti Shake feature reduces image distortion that can be caused by movemen...

Page 21: ...lash off The Flash offers additional light source usually used in a low light environment You can capture an image using one of the following flash modes Using the Flash There are several Flash options available on your camera The options appear on the Photo Capture Mode LCD screen in sequence To select the Flash mode 1 Set the Mode Dial to the desired Photo Capture Mode 2 Open the Flash by pressi...

Page 22: ...as close to the camera as possible The flash fires automatically based on the photographic conditions Forced On The flash is enabled for each photo The flash always fires regardless of the surrounding lighting conditions Select this mode when capturing images with high contrast backlighting and deep shadows Note If you use this option in a well lit environment your photo may be appear too bright l...

Page 23: ...NG MODE Rotate the mode dial to select one of the eight shooting modes No Icon Mode Description 1 Auto The camera detects the shooting condition and automatically switches to the appropriate scene mode 2 Program The camera automatically configures the appropriate settings so you can capture images with ease 3 Shutter Priority You can choose a shutter speed while the aperture value is automatically...

Page 24: ...d is needed To adjust the Aperture Priority Mode value 1 Set the Mode Dial to A 2 Press the OK button 3 Press Up Down button to adjust the aperture value 4 Press the OK button to confirm the setting Using Shutter Priority Mode Shutter priority is often used when shooting moving subjects In general use a shorter shutter speed to catch a fast moving object To adjust the shutter speed in Shutter Prio...

Page 25: ...Burst Press and release the Shutter button When the photo size you select is VGA Speedy Burst will shoot continuously at the speed of 30 shots per second This will stop after 1second or when the memory card is full AEB Auto Exposure Bracketing Automatically takes 3 pictures with slightly different settings in the shutter speed or the aperture value T o select a Continuous Shooting Mode 1 Set the M...

Page 26: ...ime to shoot firework trails It is recommended to keep the camera steady or use a tripod while using this mode Snow Used under a very bright light environment such as snow scenes Text Improves clarity and contrast when taking a close up picture of documents Food Captures food by enhancing color brightness and giving more vivid colors Night Portrait Captures portrait in low lighting conditions Kids...

Page 27: ...mages taken by your camera Keep in mind that images with a higher resolution will also take up more of your camera s memory The Image Size options include Icon Description Icon Description 16M 16 mega pixels 4608 x 3456 Default 6M 6 mega pixels 2560 x 1920 14M 14 mega pixels 4300 x3255 3M 3 mega pixels 2048 x 1536 12M 12 mega pixels 4000 x 3000 2M 2 mega pixels 1920 x 1080 10M 10 mega pixels 3648 ...

Page 28: ...tion 5 Press the OK button to confirm the setting Note The selected option appears on the LCD screen Metering Menu The Metering setting will affect how your camera focuses when capturing an image Depending on your selection the camera will be more sensitive to focusing on particular areas in the display and adjust the image color and lighting accordingly The Metering options include Center Default...

Page 29: ...te balance automatically Daylight Used in bright daylight conditions Cloudy Used in twilight or shady conditions Tungsten Used when subjects lit by tungsten Incandescent lighting Fluorescent H Fluorescent L Adjusts for fluorescent lighting Corrects the green hue of fluorescent lighting Ideal for indoor photos under fluorescent lighting without a flash Custom Used when you want to manually adjust w...

Page 30: ...r ISO 400 800 1600 film Used it in a low light environment or where the flash light is not allowed To select the ISO option 1 Press the Menu button 2 Press the Up Down button to select ISO 3 Press the OK Right button to enter the submenu 4 Press the Up Down button to select an option 5 Press the OK button to confirm the setting Exposure Menu EV Exposure Value lightens or darkens the entire image A...

Page 31: ...ge Sharpness options include Sharp Normal Default Soft To select the Image Sharpness option 1 Press the Menu button 2 Press the Up Down button to select Image Sharpness 3 Press the OK Right button to enter the submenu 4 Press the Up Down button to select an option 5 Press the OK button to confirm the setting Color Effect Menu The Color Effect menu adds color filter effects to the image or video yo...

Page 32: ...eddish Green The image becomes greenish To select the Color Effect option 1 Press the Menu button 2 Press the Up Down button to select Color Effect 3 Press the OK Right button to enter the submenu 4 Press the Up Down button to select an option 5 Press the OK button to confirm the setting Date Stamp Menu This setting allows you to adjust the system time which can be display on the photos 1 Press th...

Page 33: ...ce from the camera The subject s face must be no further than 8 to 9 feet 3 5 meters from the camera and the face must cover at least 20 1 5th of the picture as seen on the LCD screen Facing the camera The face of the subject s you are photographing must be facing the camera and must hold the pose for at least 4 to 5 seconds until the green square s appears around the subject s face Face Detect wi...

Page 34: ... below Turn the Mode Dial to Video Press the HD button LCD ICONS AND DESCRIPTION The following icons appear on the LCD display in Video Capture Mode No Description 1 Shooting Mode 2 Image Quality 3 Frames Per Second 4 Aspect Ratio Resolution 5 Available time left to capture video 6 Battery Level 7 ViviLink Destination No icon appears if None selected ...

Page 35: ...er button to start recording Press the Right Exposure button to Pause Resume the video recording Press the Shutter button again to stop the recording 5 The video is automatically saved to the camera s SD Memory Card VIDEO CAPTURE MODE MENUS Using the Menu Button Press the Menu button to access Video Capture options while in Video Capture Mode Note Depending on your settings the displayed option ic...

Page 36: ...elected option appears on the LCD screen White Balance Menu White Balance compensates for color temperatures in different lighting conditions so white and other colors can display properly when you capture images The White Balance options include Icon Mode Description Auto Default Adjusts white balance automatically Daylight Used in bright daylight conditions Cloudy Used in twilight or shady condi...

Page 37: ...e following menu options Icon Mode Description Silent Mode Shutter Sets the Shutter sound ON and OFF Start up Set the type of the startup sound 1 2 3 None Beep Sets the button excluding shutter sound ON and OFF sound on and off Volume Adjusts the volume of the Shutter sound startup sound operation sound and playback sound Frequency 50Hz 50HZ for Europe and Japan 60Hz 60HZ for the U S Auto Adjusts ...

Page 38: ...sure the camera displays battery level correctly set the type to match the batteries used Carbon Zinc batteries are not recommended Alkaline When using Alkaline batteries NiMH When using NiMH batteries Lithium When using Lithium batteries Oxyride When using Oxyride batteries Format Memory Card Format You can use the Format Memory Card menu to delete all of the content that is currently on your cam...

Page 39: ...mage appears on the LCD screen If there are no images stored a message No File appears LCD ICONS AND DESCRIPTION The following icons appear on the LCD display in Playback Mode Item Description 1 Playback Icon Indicates that the camera is in Playback Mode 2 Date and time when the file was created 3 File number 4 Histogram 5 File name file size shutter speed and aperture value 6 White Balance 7 Flas...

Page 40: ...om back to the full size image Playing a Video To view a video clip 1 Press the Playback button to enter Playback Mode 2 Press the Left Right button to scroll and select the video you want to playback 3 Press the Up button to start playing the video 4 Press the Left Right button to fast forward rewind the playing video 5 Press the Menu button to stop playing the video THUMBNAIL VIEW Easily navigat...

Page 41: ... enter Playback Mode 2 Press the Right Left button to select a file Press the Delete button while in Playback Mode to enter the Delete menu 3 The Delete this file menu appears Select Yes to delete the selected file or No to exit the menu without deleting Press the OK button to confirm your selection Note If you chose Yes the selected image is deleted The next image then appears with the delete opt...

Page 42: ...eleting Press the OK button to confirm your selection OPTIONS FOR PLAYBACK AND EDITING When the camera is in Playback mode press the Left Right button to preview the Next Previous recorded files Press the Menu button to select any of the following options Protecting files Pictures and videos taken with your camera can be protected or locked to prevent any deletion or alteration being made to the f...

Page 43: ...ffect by intersecting an image You can set the interval between 1 3 5 10 seconds 4 Select whether you want to repeat the Slide Show 5 Select Start and press the OK button to play the Slide Show DPOF The Digital Print Order Format DPOF setting allows you to select images on the memory card for printing and specify the number of print copies in advance using the camera This is extremely convenient f...

Page 44: ... You can add special effects to your captured images Mode Description Normal No effect is added to the image Red Eye Removal Reduces red eye in captured images B W Converts image to black white Sepia Recorded image isd stored in a sepia tone Negative Colors become the opposite of what they were in the original image Mosaic Applies a mosaic tile effect to the image Vivid Red The image becomes reddi...

Page 45: ...press the OK button Once you have finished rotating the image select Save then press the OK button to confirm The selected image is shown rotated in the Play Note To exit the Rotate menu at any time select Back and press the OK button Resize The Resize option changes an image file to a smaller size and overwrites the image file or saves it as another new file To resize an image 1 Press the Playbac...

Page 46: ...the Voice Memo recording To play back a Voice Memo 1 Press the Up button to play the Voice Memo Press the Up button again to pause and press once again to continue playing 2 Press the Menu button to exit the Voice Memo playback Startup Image The Startup Image feature sets the welcome screen when the camera is powering on To select a Startup Image 1 Press the Playback button to enter Playback Mode ...

Page 47: ...er you can choose to print using PictBridge You can directly print images by connecting your camera to a PictBridge compatible printer without using a computer To print images from a PictBridge compatible printer 1 Open the USB AV port cover 2 Connect the end of the smaller plug of the USB cable to the camera 3 Connect the other end of the USB cable to an available USB port on your printer 4 Turn ...

Page 48: ... an HDTV with an HDMI Cable purchased separately 1 Connect the digital camera to an HDTV with the HDMI cable purchased separately by inserting the smaller end of the cable into the HD slot of the camera and the larger end into the HDMI port on the television 2 Power on the HDTV and the digital camera and select the appropriate HDMI source from your television menu settings 3 Set the TV format on t...

Page 49: ... installer 3 MAC OS Click the icon that appears on the desktop to install the Vivitar Experience Image Manager 4 If you do not have internet access at the time of inserting the CD ROM connect to the internet and then click the Install Vivitar Experience Image Manager button to begin the installation Note If you do not have Internet access you can still download media from the camera Click the How ...

Page 50: ...e button when the installation is complete Click the Launch Vivitar Experience Image Manager to open the application 13 MAC OS Click the Quit button when the installation is complete Click the Launch Vivitar Experience Image Manager to open the application 14 If you close the application you can run the Vivitar Experience Image Manager from the Programs WINDOWS OS or Applications MAC OS menu on yo...

Page 51: ...n it will be selected automatically 5 Select a location on the computer where to place the new photo and video files 6 Add the new photo and video files to albums if desired 7 Select to remove the media files from the selected device removable disk after the import 8 Click the Get Media button to transfer the photos and videos from your camera to your computer 9 A media download progress bar appea...

Page 52: ...n s Home screen Transferring Images from the Camera to the Computer Manually TRANSFERRING PHOTOS AND VIDEOS WINDOWS OS 1 Use the USB cable that came with your camera to connect your camera to your computer 2 MSDC appears on the LCD 3 A window appears with a list of options select Open folder to view files and click OK 4 Open the DCIM folder and the folder inside to view the media files 5 Select th...

Page 53: ... for compatibility with the iPad Apple iPad Camera Connection For models that are compatible with the iPad photos and videos can be imported from your digital camera to your iPad by following either one of the options below 1 Connecting your digital camera to your iPad using an iPad Camera Connector Plug the Camera Connector into the dock connector port on your iPad and then attach your digital ca...

Page 54: ...t resulting from defects in material or workmanship and damages or malfunctions from other than normal use including but limited to repair by unauthorized parties tampering modification or accident What To Do When Service Is Required When returning your defective product postage pre paid for service your package should include 1 Copy of original bill of sale 2 A detailed written description of the...

Page 55: ...er button to take some sample photos and then try downloading them again With test photos if the camera s power is off before you upload them to the computer the photos are not stored in the camera s memory These photos should be uploaded quickly before the camera s power is off If the photos are saved to the SD memory card then all the photos should appear Q How do I make sure I don t lose import...

Page 56: ...sed continuously over a long period of time The LCD screen is black The lens cover is on Remove the lens cover No image is displayed on the screen and the camera beeped three times The lens cover is on Remove the lens cover I cannot adjust the flash mode The flash is closed Open the flash The flash does not fire The camera flash is turned off Set the flash to Auto Flash The light source is suffici...

Page 57: ...ot even when pressing the Shutter button The batteries are running low Replace the batteries The camera is not in Capture mode Switch to Capture mode The Shutter button was not pressed all the way down Press the Shutter button all the way down The internal memory or memory card does not have any free space Load a new card or delete unwanted files The flash is recharging Wait until the flash mode i...

Reviews: