19
4) A red, blinking icon appears at the top of the LCD screen indicating that the recording is in progress.
On the top right, the recording time appears, indicating the amount of elapsed time as the video is
being captured.
5) To STOP the video record, press the
Shutter
button again.
6) The video is automatically saved to the camcorder
’s Micro SD memory card.
Taking Videos using the Flip LCD Screen
You can also capture your videos using the flip screen.
1)
When you would like to quickly include yourself in the video, simply open the LCD display and flip
it around
– 180 degrees.
2)
H
old the camera steady facing towards you at arm’s length (30~45cm).
3)
Make sure you can see yourself on the LCD screen.
4)
Look at the camera lens.
5)
Press the
Shutter
button to begin recording your video.
It’s as easy as twist and shoot!
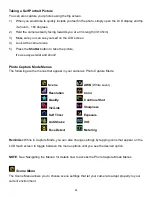
Video Capture Mode Menus
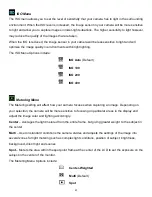
The following are the menus that appear in your camcorder
’s Video Capture Mode:
Scene
Color
Resolution
Sharpness
Quality
Exposure
ViviLink
ISO
AWB
(White Level)
Metering
Reminder
: While in Capture Mode, you can also change settings by tapping icons that appear on the
LCD touch screen to toggle between the menu options until you arrive at your desired setting.
NOTE
: See ‘Navigating the Menus’ for details how to access the Video Capture Mode Menus.


