


EN-20
○ ○ ○ ○ ○ ○ ○ ○ ○ ○ ○
User’s Manual
Projector
Changing settings procedure (using either the Projector Control Panel or the Remote
Controller):
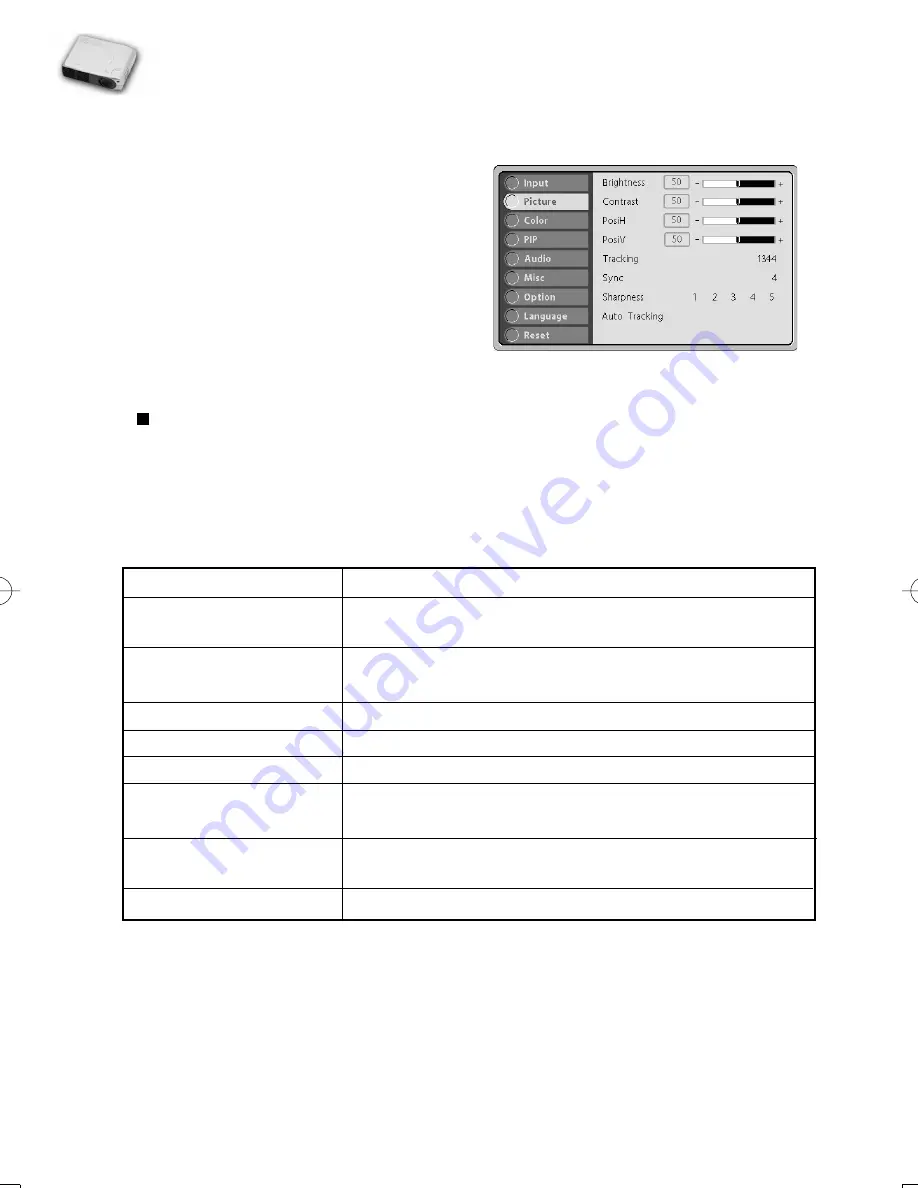
1.Press the MENU button to display OSD
menu.
2.Press the or button to select
PICTURE menu.
3.To enter the sub-menu setting, press the
MENU button once again.
4.Press the or button to select the
sub-menu item.
5.Press the or button to adjust the value of desired sub-menu item.
On the Auto Tracking sub-menu, press the button to confirm the selection.
6.After you have done with the adjustment of a sub-menu item:
a.To resume changing another sub-menu item: press the or button.
b.To exit from the current menu: toggle the MENU button.
The following table provides detail of the available sub-menu choices:
Sub-Menu
Description
Brightness
The higher the setting, the brighter the image.
The lower the setting, the darker the image.
Contrast
The higher the setting, the greater the contrast.
The lower the setting, the lower the contrast.
PosiH
Adjusts the horizontal position.
PosiV
Adjusts the vertical position.
Tracking
Adjusts the horizontal pixel of the image.
Sync
Adjusts the dot phase of the input signal.
Adjusts the picture to where it looks best.
Sharpness
The higher the setting, the sharper the image.
The lower the setting, the softer the image.
Auto Tracking
Automatically scans the projected image to fine tune.


![NEC MT800[1].PART1 User Manual preview](http://thumbs.mh-extra.com/thumbs/nec/mt800-1-part1/mt800-1-part1_user-manual_250403-1.webp)


