background image

18

EN

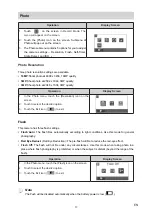
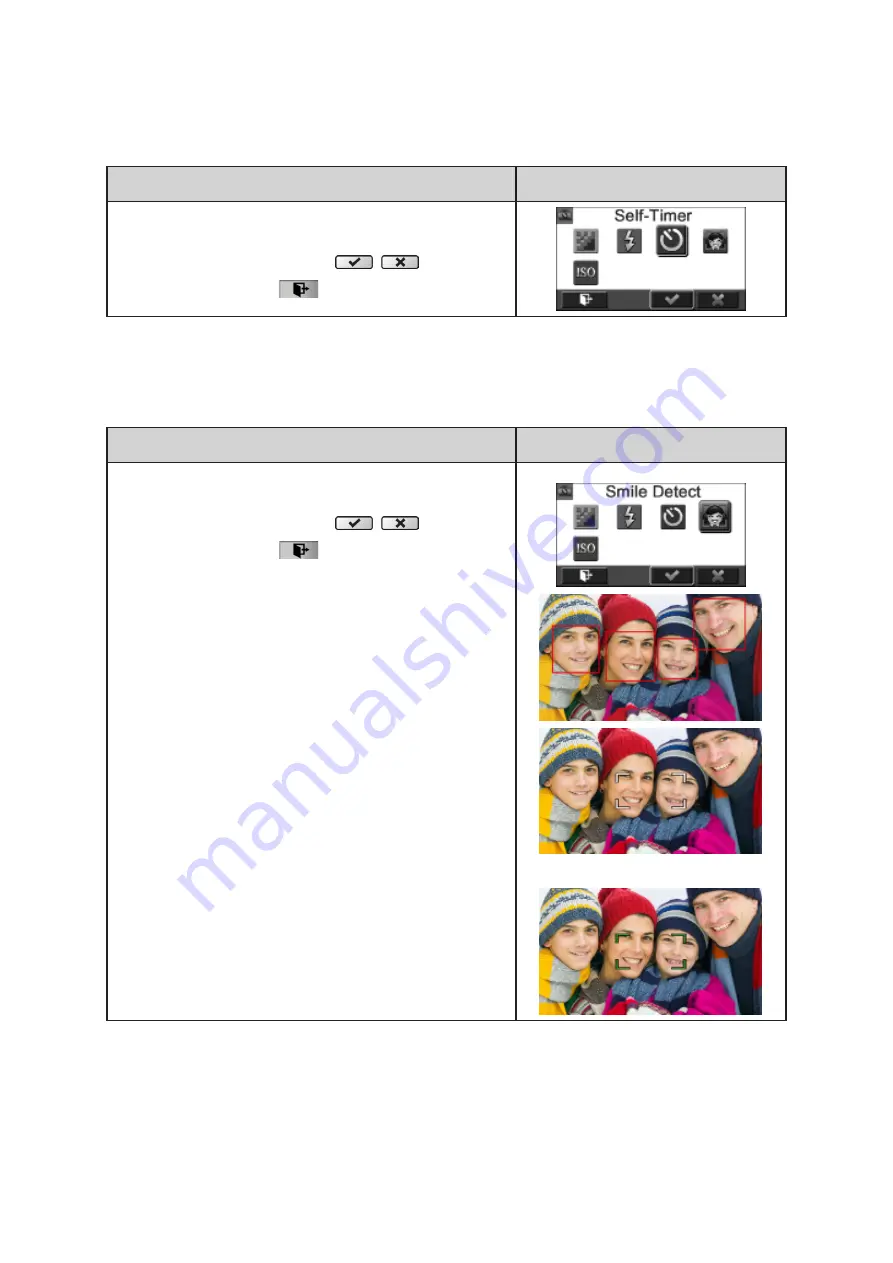
Self-Timer

The Self-Timer allows you to take photos with a ten-second time delay. The Self-Timer light on the front
of the camera will also blink. The speed of blinking will increase just before the photo is taken.

Operation

Display Screen

1.  In  the  Photo  menu,  touch  the  [Self-Timer]  icon  on  the 

screen.

2.  Touch to select [Off] or [On] (


 ).

3.  Touch the Exit icon (


 ) to exit.

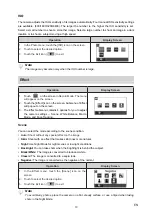
Smile Detection

Capture an image automatically when the camera detects a smile.

Operation

Display Screen

1.  In the Photo menu, touch the [Smile Detect] icon on the 

screen.

2.  Touch to select [Off] or [On] (


 ).

3.  Touch the Exit icon (


 ) to exit.


Summary of Contents for 990HD

Page 1: ...Camera 990HD User s Manual 2009 2011 Sakar International Inc All rights reserved Windows and the Windows logo are registered trademarks of Microsoft Corporation All other trademarks are the property...

Page 2: ...before using the camera Only use accessories supplied by the manufacturer Use only the type of battery that came with your camera Remove the battery if the camera is not going to be used for long per...

Page 3: ...rd Mode 9 Section 4 Enjoying the Playback Mode 21 Section 5 Setting Your Camera 26 Section 6 Viewing Photos and Videos on TV 30 Section 7 Using the Software 31 Section 8 Transferring Media 34 Section...

Page 4: ...With the exclusive Vivitar Experience Image Manager application you can upload videos and photos captured by the camera to online social network sites effortlessly ISO sensitivity and color balance c...

Page 5: ...EN Front View Rear View Lens Microphone Photo Button Tele Wide Button Flash Self timer LED LCD Touch Panel HDMI Port Mini USB 2 0 Port Video Button TV Port Record LED Indicator Playback LED Indicator...

Page 6: ...6 EN Side View Bottom View Speaker Power Button Playback Button Stabilization Button Digital Light Button Pause Button Tripod Socket Battery SD card Cover...

Page 7: ...epends on the battery conditions Inserting and Removing an SD Card Optional The camera comes with an internal memory that allows you to store photos and videos You can expand the memory capacity by us...

Page 8: ...ecord video To stop recording press it again To pause recording Press Pause Button to pause recording To continue the recording press it again To take a photo during video recording When recording vid...

Page 9: ...the image Tele Button 1 Zoom In Wide Button 1 Zoom out Power Button 1 Press down for one second to turn on or turn off the camera Playback Button 1 Switch between Record Playback Mode 2 For quick rev...

Page 10: ...p 60 fps HD 720p 30 fps VGA 640X480 Slow Motion Record video at 432x240 QVGA resolution Photo Resolution 16MP 5MP 3MP 2 Recording time of the video that can still be taken at current resolution Number...

Page 11: ...ode Time Lapse Smile Detection 12 Macro Focusing On 13 Daylight Fluorescent Tungsten 14 Scene Skin Night Backlight Black White Classic Negative 15 Date Printing On 16 Battery full power Battery medium...

Page 12: ...ess Playback Button or touch on the screen to view the recorded video Four resolution settings are available Video Quality Full HD 1080p 30 fps HD 720p 60 fps HD 720p 30 fps VGA 640X480 Note The image...

Page 13: ...recording or press Photo button to take photo Using Stabilization Function To record with an effect of reducing camera shake to result in more stable video To use the Stabilization function 1 Press S...

Page 14: ...lease refer to Section 5 for the detailed information about Setting Operations for Record Mode Operation Display Screen 1 Touch on the screen in Record Mode The menu will appear on the screen 2 Touch...

Page 15: ...80x720p 60 fps resolution HD 720p 30 Record videos at 1280x720p 30 fps resolution VGA 640X480 Record videos at 640x480p 30 fps resolution Operation Display Screen 1 In the Video menu touch the Resolut...

Page 16: ...rding time Operation Display Screen 1 In the Video menu touch the Slow Motion icon on the screen 2 Touch to select Off or On 3 Touch the Exit icon to exit Note Pause function can not be used when Slow...

Page 17: ...the Resolution icon on the screen 2 Touch to select the desired option 3 Touch the Exit icon to exit Flash This camera has three flash settings Flash Auto The flash fires automatically according to li...

Page 18: ...before the photo is taken Operation Display Screen 1 In the Photo menu touch the Self Timer icon on the screen 2 Touch to select Off or On 3 Touch the Exit icon to exit Smile Detection Capture an imag...

Page 19: ...menu of Effect will pop out on the screen 3 The Effect submenu contains 4 options for you to adjust the camera settings Scene White Balance Macro Mode and Face Tracking Scene You can select the mode a...

Page 20: ...rding close up videos and photos Operation Display Screen 1 In the Effect menu touch the Macro Mode icon on the screen 2 Touch to select Off or On 3 Touch the Exit icon to exit Face Tracking The camer...

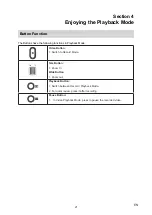
Page 21: ...owing functions in Playback Mode Video Button 1 Switch to Record Mode Tele Button 1 Zoom In Wide Button 1 Zoom out Playback Button 1 Switch between Record Playback Mode 2 For quick review press it aft...

Page 22: ...p 30 fps HD 720p 60 fps HD 720p 30 fps VGA 640X480 Slow Motion 432x240 QVGA Photo Resolution 16MP 5MP 3MP Dual Record The image resolution captured during videos recording is the same as the video res...

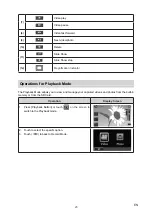
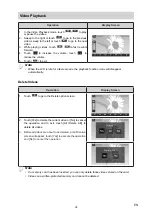
Page 23: ...cator Operations for Playback Mode The Playback Mode allows you to view and manage your captured videos and photos from the built in memory or from the SD Card Operation Display Screen 1 Press Playbac...

Page 24: ...a few seconds the playback function icons will disappear automatically Delete Videos Operation Display Screen 1 Touch to go to the Delete option screen 2 Touch Yes to delete the current video or No t...

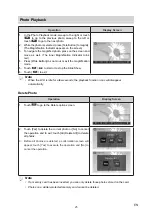
Page 25: ...ation mode 5 Touch to start or to stop the Slide Show 6 Touch to exit Note When the LCD is idle for a few seconds the playback function icons will disappear automatically Delete Photo Operation Displa...

Page 26: ...Sound Enable or disable the keypad tone and the operation sound Operation Display Screen 1 In the Setting menu touch the Sound icon on the screen 2 Touch to select Off or On 3 Touch the Exit icon to e...

Page 27: ...icon on the screen to enter the time setting screen 2 Touch Year Month Day Hour Minute and AM PM to set 3 Adjust the numeric value by touching 4 Touch the OK icon to validate the setting 5 Touch the E...

Page 28: ...enter the confirmation screen 3 Touch the Yes icon to execute the operation and the No icon to cancel the operation Note All the data will be erased if the SD card is formatted Make sure all the data...

Page 29: ...D 1080p 30 for Video 5MP for Photo Stabilization Off Motion Detection Off Slow Motion Off Time Lapse Off Self Timer Off Smile Detection Off ISO Auto Scene Auto White Balance Auto Face Tracking Off Fla...

Page 30: ...put source of your TV to HDMI 4 The steps for viewing stored videos and photos on HDTV are exactly the same as for viewing them on the LCD monitor Connecting to a non high definition 4 3 TV 1 Connect...

Page 31: ...nserting the CD ROM connect to the internet and then click the Install Vivitar Experience Image Manager button to begin the installation Note If you do not have internet access you can still download...

Page 32: ...o open the application 13 On Macintosh Click the Quit button when the installation is complete Click the Launch Vivitar Experience Image Manager to open the application 14 If you close the application...

Page 33: ...deos from your camera to your computer 9 A media download progress bar appears on the bottom left showing the number of media files downloading to your computer A message appears when the download is...

Page 34: ...My Videos folder 7 Do not disconnect the cable during transfer Doing so will cancel the transfer of any files on their way to your computer Transferring Videos and Photos Using Macintosh To transfer m...

Page 35: ...le 2 A detailed written description of the problem 3 Your return address and telephone number Daytime MAIL TO ADDRESS BELOW Sakar US Sakar UK Europe Sakar Australia Sakar International Attention Servi...

Page 36: ...t support up to 64GB Image resolution High 4608 x 3456 16M pixels Interpolated Standard 2592x1944 5M pixels Low 2048x1536 3M pixels Video resolution FHD 1080p 30 1920X1080 30fps HD 720p 60 1280X720 60...

Page 37: ...rectX 9 or higher Internet connection required MACINTOSH OS To be able to download photos and videos to your MAC you will need the following minimum configuration Intel processor running Mac OS X v10...

Page 38: ...era is currently charging and the light becomes constant after the charging is completed In AC charging Mode the light will turn itself off automatically after 3 5 minutes The full charge time is abou...

Page 39: ...e to prevent unintentional data loss 8 I deleted images using the Vivitar Experience Image Manager The images were also deleted from my computer How do I recover images that I accidently deleted All i...

Reviews: