Vision TC-WIRELESS Product Manual Download Page 6

10

11

12 Declaration of conformity

Concerning CE, EMC, and LVD safety regulations, VISION products are certified and comply with all known local regulations. 

VISION commits to ensure all products are fully compliant with all applicable certification standards for sale in participating 

countries.

Concerning EU directive 2011/65/EU regarding “Restriction of use of certain Hazardous Substances in Electrical and Electronic 

Equipment” (RoHS), this directive sets out that electrical components should not contain unsafe levels of dangerous chemical 

compounds. All VISION products certifiably comply with RoHS regulations including the Commission Delegated Directive (EU) 

2015/863 of 31 March 2015, amending Annex II to Directive 2011/65/EU as regards to the list of restricted substances, to include 

phthalates. This product should be returned to the place of purchase at the end of its useful life for recycling. 

WEEE Registration: GD0046SY

Concerning REACH restricted chemicals, VISION neither produces nor imports chemicals. Therefore, as Downstream User 

we are under no obligation to provide safety data sheets. According to ongoing audits based on information provided by 

our suppliers, our products contain no substances > 0.1 % by weight, included in the candidate list in accordance with Article 

59 (1,10) of the REACH regulation. In order to guarantee product safety and to secure our supply chain, we require consistent 

implementation of REACH by our suppliers. The assurance of REACH-conformity is part of our supplier qualification standards.

Declaration of origin


All VISION products are made in the People’s Republic of China (PRC). VISION products are imported into the EU by VISION 

who is wholly owned by ‘Azlan Logistics Ltd.’, Registered in England Nr. 04625566 at Redwood 2, Chineham Business Park, 

Crockford Lane, Basingstoke, Hampshire, RG24 8WQ.

Lifetime return-to-base warranty

This product comes with a lifetime return to base warranty. If you have a problem, you are required to provide a DETAILED 

DESCRIPTION of the fault.  Some Vision products are very technical and require troubleshooting all elements of the installation 

as it may not be the Vision product at fault. Because of this the manufacturer may refuse to replace the item if an adequate 

description is not provided. 

• This warranty applies only to the original purchaser and is not transferable. 

• This warranty protects you against the following:

• Failure of any components, including the power supply

• Damage when the product is first removed from its packaging if reported within 24 hours of purchase.

• If the product is DOA (dead on arrival), you have 21 days from purchase date to notify the national distributor via your AV 

reseller. 

• The original purchaser is responsible for shipment of the product to the Vision’s appointed service centre.

• The liability of Vision is limited to the cost of replacement of the faulty unit under warranty except for death or injury 

(EU85/374/EEC). 

• If the product is end of line (EOL) the Vision will provide a credit instead of replacement. 

• This warranty does not protect this product against faults caused by abuse, misuse, incorrect installation, unstable or faulty 

power input, or modification. 

Vision aims to send a replacement item within 5 working days however this may not always be possible, in which case it will 

be sent as soon as practicably possible. UK End users and resellers can request support at http://www.visionaudiovisual.com/

support 
LEGAL DISCLAIMER: Because we are committed to improving our products, the details above may change without prior 

warning. This User Manual is published without warranty and any improvements or changes to the User Manual necessitated 

by typographical errors, inaccuracies of current information, or improvements to programs and/or equipment, may be made 

at any time and without notice. Such changes will be incorporated into new editions of the User Manual.

Warnings 
For electronic products

Caution – risk of electric shock. Do not open. 

Use only domestic AC outlets. Connecting to an outlet supplying a higher voltage may create a fire hazard. Do not disconnect 

the plug from the AC outlet by pulling the cord; always pull the plug itself. If you do not intend to use the product for any 

considerable length of time, unplug the unit. Ensure power cable is not twisted, squeezed, or sheared. 

Do not install this product in a location exposed to direct sunlight or close to heating equipment, extremely cold locations, 

places subject to excessive vibration or dust, and or poorly ventilated places. Do not expose this appliance to excessive 

humidity, rain, moisture, dripping, or splashing. Do not place objects filled with liquids on or near this product.

Before moving the unit, be sure to pull out the power cord from the AC outlet and disconnect the interconnection cords with 

other units. If you detect an abnormal smell or smoke, turn this product off immediately and unplug the power cord. Contact 

your reseller or Vision.

For motorised products

• This product uses a very powerful motor to lift heavy displays. Read and understand this manual before installation. 

• Failure to comply with the safety and installation instructions may cause serious bodily injury.

• This stand should only be operated by users over 18 years old. 

• The stand should not be operated by persons under the influence of alcohol or recreational drugs

• Use the correct safety equipment AND adhere to workplace health and safety laws

• The SWL (safe working load) for this product is available on VISION’S website 

• Ensure it is installed in an appropriate place – for example not obstructing an emergency exit.

• Check stability after installation. Ensure display is clipped into place securely.

• Installation must be done by a specialist audio-visual installer

• Allow 500mm x 500mm space around the floor stand.

• Avoid installing in a moist environment, or in direct sunshine, or near corrosive gas or liquid.

• Routing of cables through the bracket must comply with local regulations. 

• Use a memory position to set the upper limit, to prevent the display going into ceiling. 
Use extreme care lowering stand. Keep obstacles well clear. The stand might crush a person, or the display could become 

dislodged and fall on a person. Serious injury may occur. If left unattended the control should be left out of reach of children.

For wireless and bluetooth products

Never use this product near an aircraft or medical facility. It can cause interference. Use of product in the following locations 

may result in abnormal video/audio output:
• Product installed in walls made of concrete

• Product situated near refrigerator, microwave oven or other metal items

• A cluttered room where the wireless signals may be blocked
This product has been tested and manufactured to comply with each country’s safety rules, however there is no guarantee 

that interference will not occur in some scenarios. If interference happens, adjust distance between transmitter and receiver. 

This product may interfere 5GHz wireless devices. If interference occurs configure your 5GHz router to 2.4 GHz band only.

Federal Communications Commission Interference Statement

This equipment has been tested and found to comply with the limits for a Class B digital device, pursuant to Part 15 of the 

FCC Rules. This equipment generates, uses and can radiate radio frequency energy and may in extreme cases cause harmful 

interference to radio communications. If this happens the user should try:
• Relocating the receiving antenna

• Increasing the separation between the equipment and receiver

• Connect the equipment to a different power circuit.

Radiation Exposure Statement

This equipment complies with IC radiation exposure limits set forth for an uncontrolled environment. This equipment should be 

installed and operated with minimum distance 20cm between the radiator and your body.

Summary of Contents for TC-WIRELESS

Page 1: ...Product Manual TC WIRELESS vav link tc wireless EN DA DE ES FR IT NL PL PT Manual in other languages 2 12 22 32 42 52 62 72 82...

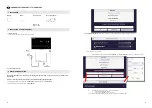
Page 2: ...ls are not supported EN PRODUCT MANUAL TC WIRELESS 1 INCLUDED Receiver Transmitter 2 x HDMI Cables 5V 2A Power adapter 300 mm 1 m 1 ft 3 3 ft 2 RECEIVER RX SETUP 1 Connect Rx as shown Optional 50 x 50...

Page 3: ...ower from either a PC USB port or mobile phone charger 2 Wait several seconds The Tx automatically starts sharing To optimise display on laptop right click on desktop and select display settings 6 AIR...

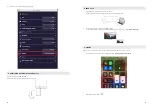
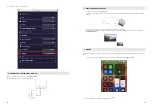
Page 4: ...ING Sharing from an Android device will only work if the Rx is connected to the same WiFi as your Android device 1 Scan QR code on display to download android app 2 Install app 3 Click connect to in a...

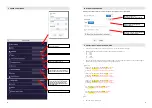
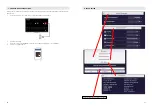
Page 5: ...e name attribution Test image 2 image name used for OSD duration 5 5 seconds interval before playing next image_url media usb0 usbwallpaper 3 jpg file name attribution Test image 3 image name used for...

Page 6: ...ithout notice Such changes will be incorporated into new editions of the User Manual Warnings For electronic products Caution risk of electric shock Do not open Use only domestic AC outlets Connecting...

Page 7: ...PRODUKTVEJLEDNING TIL TC WIRELESS 1 INKLUDERET Modtager Sender 2 x HDMI kabler 5V 2A str madapter 300 mm 1 m 1 fod 3 3 fod 2 INDSTILLING AF MODTAGER RX 1 Tilslut Rx som vist Valgfri 50 x 50 M4 huller...

Page 8: ...t Tx kr ver str m fra enten en USB port p en pc eller en mobiltelefonoplader 2 Vent flere sekunder Tx en starter automatisk delingen For at optimere sk rmen skal du h jreklikke p skrivebordet p comput...

Page 9: ...ANDROID Deling fra en Android enhed fungerer kun hvis Rx er tilsluttet det samme Wi Fi som din Android enhed 1 Scan QR kode p sk rmen for at downloade Android appen 2 Installer appen 3 Klik p Opret fo...

Page 10: ...image 2 billednavn brugt til OSD duration 5 5 sekunders interval inden n ste afspilning image_url media usb0 usbwallpaper 3 jpg filnavn attribution Test image 3 billednavn brugt til OSD duration 5 5...

Page 11: ...elst og uden varsel S danne ndringer vil blive inkluderet i nyere udgaver af brugermanualen Advarsler For elektroniske produkter Forsigtig risiko for elektrisk st d M ikke bnes Brug kun stikkontakter...

Page 12: ...IRELESS BEDIENUNGSANLEITUNG 1 IM LIEFERUMFANG ENTHALTEN Empf nger Sender 2 x HDMI Kabel 5V 2A Netzteil 300 mm 1 m 1 ft 3 3 ft 2 EMPF NGER EINRICHTEN 1 Schlie en Sie den Empf nger wie gezeigt an Option...

Page 13: ...t eines Mobiltelefons mit Strom versorgt 2 Warten Sie einige Sekunden Der Sender beginnt automatisch mit der Freigabe Um die Anzeige zu optimieren klicken Sie auf dem Laptop mit der rechten Maustaste...

Page 14: ...s funktioniert nur wenn der Empf nger mit demselben WLAN verbunden ist wie Ihr Android Ger t 1 Scannen Sie den QR Code auf dem Display um die Android App herunterzuladen 2 Installieren Sie die App 3 K...

Page 15: ...5 Sekunden Intervall vor der n chsten Wiedergabe image_url media usb0 usbwallpaper 3 jpg Dateiname attribution Test image 3 f r OSD verwendeter Bildname duration 5 5 Sekunden Intervall vor der n chst...

Page 16: ...d verursacht werden Ziehen Sie das Netzkabel immer am Stecker aus der Steckdose niemals am Kabel selbst Wenn das Produkt f r einen l ngeren Zeitraum nicht verwendet werden soll die Stromverbindung tre...

Page 17: ...O TC WIRELESS 1 INCLUIDO Receptor Transmisor 2 cables HDMI Adaptador de corriente de 5 V y 2 A 300 mm 1 m 1 ft 3 3 ft 2 CONFIGURACI N DEL RECEPTOR RX 1 Conecte el receptor como se muestra Orificios op...

Page 18: ...del PC o de un cargador de tel fono m vil 2 Espere unos segundos El transmisor comenzar a compartir autom ticamente Para optimizar la visualizaci n haga clic con el bot n derecho del rat n en el escri...

Page 19: ...tenido desde un dispositivo Android si el receptor est conectado a la misma red Wi Fi que su dispositivo Android 1 Escanee el c digo QR de la pantalla para descargar la aplicaci n para Android 2 Insta...

Page 20: ...i n en pantalla OSD duration 5 intervalo de 5 segundos antes de reproducir lo siguiente image_url media usb0 usbwallpaper 3 jpg nombre de archivo attribution Test image 3 nombre de la imagen utilizado...

Page 21: ...y nos reservamos el derecho a realizar mejoras o cambios en el mismo seg n resulte necesario y debido a errores tipogr ficos imprecisiones de la informaci n vigente o mejora de los programas y o equip...

Page 22: ...rge FR MANUEL DU PRODUIT TC WIRELESS 1 PRODUITS INCLUS R cepteur metteur 2 c bles HDMI Adaptateur secteur 5 V 2 A 300 mm 1 m 1 pi 3 3 pi 2 INSTALLATION DU R CEPTEUR RX 1 Connectez le Rx comme indiqu T...

Page 23: ...c un chargeur de t l phone mobile 2 Attendez quelques secondes Le Tx commence automatiquement le partage Pour optimiser l affichage cliquez avec le bouton droit sur l ordinateur portable et s lectionn...

Page 24: ...droid ne fonctionne que si le Rx est connect au m me r seau wi fi que votre appareil Android 1 Scannez le code QR affich pour t l charger l application Android 2 Installez l application 3 Cliquez sur...

Page 25: ...ion Test image 2 nom d image utilis pour l OSD duration 5 Intervalle de 5 secondes avant la lecture suivante image_url media usb0 usbwallpaper 3 jpg nom du fichier attribution Test image 3 nom d image...

Page 26: ...ique Ne pas ouvrir Utilisez uniquement des prises CA domestiques Le raccordement de l unit une prise fournissant une tension sup rieure peut faire encourir un risque d incendie Ne d branchez pas la fi...

Page 27: ...IN DOTAZIONE Ricevitore Trasmettitore 2 cavi HDMI Adattatore di alimentazione da 5V 2A 300 mm 1 m 1 ft 3 3 ft 2 CONFIGURAZIONE RICEVITORE RX 1 Collegare il ricevitore come mostrato Fori opzionali da 5...

Page 28: ...una porta USB del PC o da un caricabatterie per telefoni cellulari 2 Attendere alcuni secondi Il trasmettitore avvia automaticamente la condivisione Per ottimizzare la visualizzazione fare clic con il...

Page 29: ...dispositivo Android funziona solo se il ricevitore collegato alla stessa rete WIFI del dispositivo Android 1 Scansionare il codice QR sullo schermo per scaricare l app per Android 2 Installare l app...

Page 30: ...tion Test image 2 nome immagine utilizzato per l OSD duration 5 Intervallo di 5 secondi prima della riproduzione successiva image_url media usb0 usbwallpaper 3 jpg nome file attribution Test image 3 n...

Page 31: ...anuale Avvertenze Per prodotti elettronici Attenzione pericolo di scosse elettriche Non aprire Utilizzare solo prese di rete di alimentazione domestica CA Il collegamento a una presa di corrente con t...

Page 32: ...DUCTHANDLEIDING TC WIRELESS 1 INHOUD Ontvanger Zender 2x HDMI kabel Lichtnetadapter 5 V 2 A 300 mm 1 m 1 ft 3 3 ft 2 INSTELLEN ONTVANGER RX 1 Sluit de Rx aan zoals afgebeeld Optionele gaten 50 x 50 M4...

Page 33: ...rt van een pc of een oplader voor mobiele telefoons 2 Wacht enkele seconden De Tx begint automatisch met delen Klik met de rechtermuisknop op het bureaublad op de laptop en selecteer weergave instelli...

Page 34: ...en vanaf een Android apparaat werkt alleen als de Rx is verbonden met dezelfde wifi als uw Android apparaat 1 Scan de QR code op het scherm om de Android app te downloaden 2 Installeer de app 3 Klik o...

Page 35: ...gebruikt voor OSD duration 5 Interval van 5 seconden voordat volgende wordt afgespeeld image_url media usb0 usbwallpaper 3 jpg bestandsnaam attribution Test image 3 naam afbeelding gebruikt voor OSD d...

Page 36: ...rden Dergelijke wijzigingen zullen in nieuwe edities van de handleiding worden opgenomen Waarschuwingen Voor elektronische producten Waarschuwing risico op elektrische schok Niet openen Gebruik uitslu...

Page 37: ...IRELESS 1 W ZESTAWIE Odbiornik Nadajnik 2 kable HDMI Zasilacz 5 V 2 A 300 mm 1 m 1 ft 3 3 ft 2 KONIFIGURACJA ODBIORNIKA RX 1 Pod cz odbiornik Rx zgodnie z ilustracj Opcjonalne otwory 50 x 50 M4 na spo...

Page 38: ...aga zasilania przez port USB komputera lub za pomoc adowarki do telefonu kom rkowego 2 Odczekaj kilka sekund Nadajnik Tx automatycznie rozpoczyna udost pnianie Aby zoptymalizowa spos b wy wietlania kl...

Page 39: ...id dzia a tylko wtedy gdy odbiornik Rx jest po czony z t sam sieci Wi Fi co urz dzenie z systemem Android 1 Zeskanuj kod QR widoczny na ekranie aby pobra aplikacj dla systemu Android 2 Zainstaluj apli...

Page 40: ...sekundowy odst p przed odtworzeniem nast pnego image_url media usb0 usbwallpaper 3 jpg nazwa pliku attribution Test image 3 nazwa obrazu wy wietlana na ekranie duration 5 5 sekundowy odst p przed odtw...

Page 41: ...nia Zmiany takie zostan w czone do nowych wyda Instrukcji obs ugi Ostrze enia Produkty elektroniczne Przestroga ryzyko pora enia pr dem elektrycznym Nie otwiera U ywa tylko domowych gniazd elektryczny...

Page 42: ...AL DO PRODUTO TC WIRELESS 1 INCLUI Recetor Transmissor 2 cabos HDMI Adaptador de alimenta o de 5 V 2 A 300 mm 1 m 1 ft 3 3 ft 2 CONFIGURA O DO RECETOR RX 1 Ligue o recetor como ilustrado Orif cios opc...

Page 43: ...um PC ou de um carregador de telem vel 2 Aguarde alguns segundos O transmissor come a a partilhar automaticamente Para otimizar a visualiza o clique com o bot o direito do rato no ambiente de trabalh...

Page 44: ...um dispositivo Android apenas funciona se o recetor estiver ligado mesma rede Wi Fi que o seu dispositivo Android 1 Digitalize o c digo QR no ecr para transferir a aplica o Android 2 Instale a aplica...

Page 45: ...attribution Test image 2 nome da imagem usado para OSD duration 5 intervalo de 5 segundos antes de reproduzir seguinte image_url media usb0 usbwallpaper 3 jpg nome do ficheiro attribution Test image 3...

Page 46: ...aviso pr vio Essas altera es ser o introduzidas em novas edi es do Manual de Utilizador Avisos Para produtos eletr nicos Cuidado risco de choque el trico N o abrir Utilize apenas tomadas de corrente C...

Page 47: ...www visionaudiovisual com...

Reviews: