48
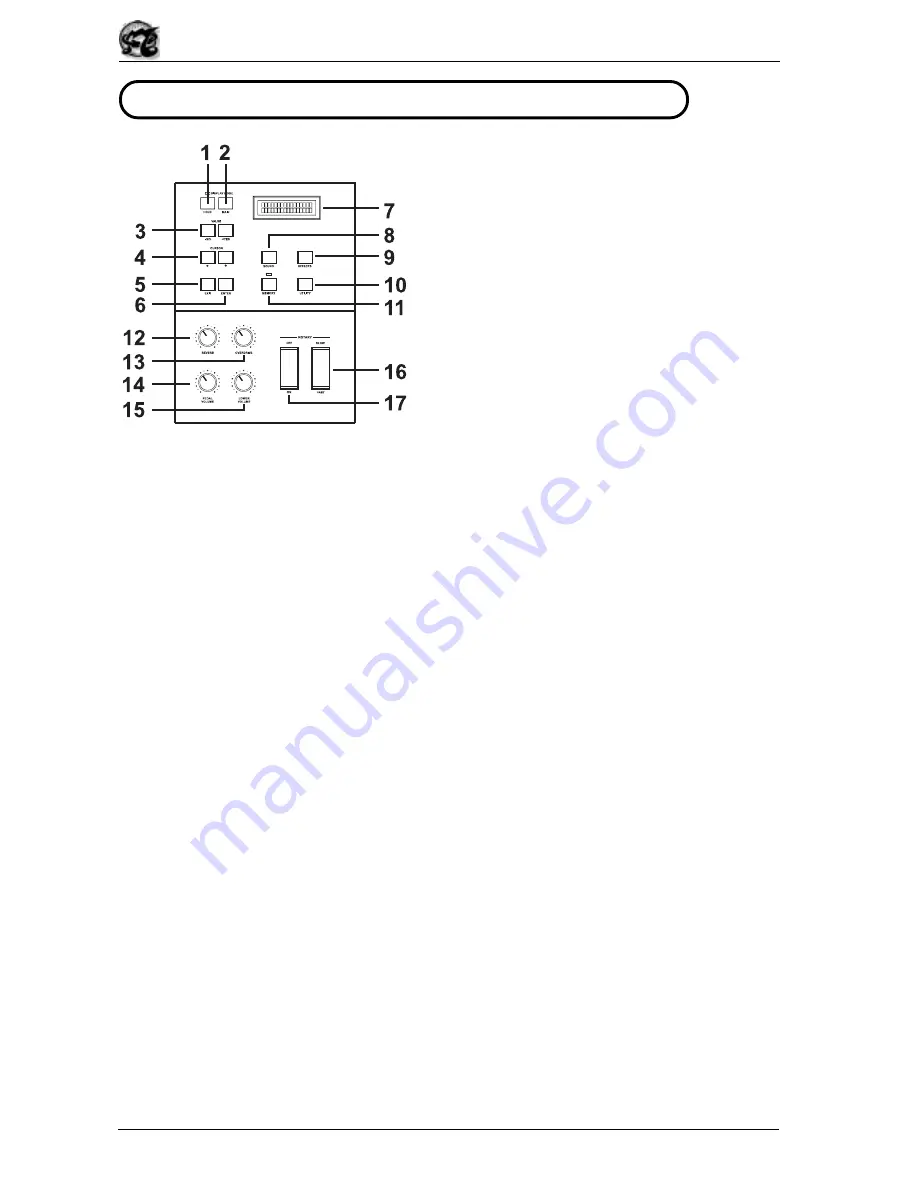
2.2 THE PANELS ON THE LEFT OF THE MANUALS
1. [HOLD] button.
This switch enables the display HOLD
function. When this function is disabled, the
display continues to show a given video page
for a time of about 10 seconds after the last
operation carried out, after which it again
displays the main video page. With the
HOLD function enabled, each video page
displayed remains on the screen until the
page is changed. The [DISPLAY MODE]
LED illuminates to show that the HOLD mode
is activated.
2. [MAIN] button.
Whenever it is pressed, this button returns to the
MAIN
video page
(see section 3),
regardless of the page displayed when the key is pressed.
3. VALUE [-/NO] and [+/YES] buttons.
These controls allow the user to modify the values of the OB5 programming parameters.
The buttons both increase ([+/YES] button) or decrease ([-/NO] button) the value concerned,
and confirm ([+/YES] button) or abort ([-/NO] button) the setting.
4. CURSOR [
ï
] and [
ð
] buttons.
With these buttons, the user can move the cursor around inside the video page shown on
the display, to the right ([
ð
] button) or to the left ([
ï
] button).
5. [EXIT] button.
The user can press this key to leave the video page shown on the display and return to the
one immediately before it in the menu hierarchy
6. [ENTER] button.
This button allows the user to select the options in the programming menus and to carry
out special functions when the OB5 requests this.
7. Display.
This is a 2x16 backlit display for display of the video pages relating to the OB5’s functions/
settings.
8. [SOUND] button.
You can use this button to access the menu and display its internal pages, relating to the
equalisation of the Drawbars, the percussion modes, the way the Bass works, and regulation
of the Click volume and the volume of the specially re-created background noise.
9. [EFFECTS] button.
This switch allows immediate selection of the menu relating to the Reverb, Rotary and


