background image

91

Viscount Concerto III - Operating Manual

o

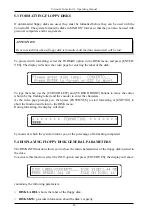
FREE SPACE: 

indicates the amount of empty space on the disk.

o

FILE ON DISK: 

states the number of files currently stored on the floppy disk.

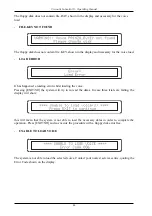
Press the [EXIT/NO] button to return to display of the DISK menu.

5.5 SAVING THE ORGAN’S MEMORIES AND SETTINGS ON DISK

The  FILE  SAVE  function  allows  you  to  save  all  the  organ’s  general  memories  and/or  settings
(including those in the MIDI&UTILITY and SET-UP menus) on floppy disks.
To recall this function, place the cursor on the SAVE field in the DISK menu and press [ENTER/
YES].
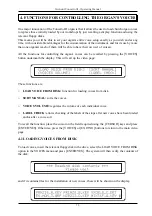
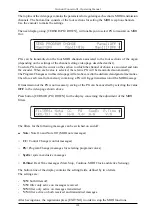
The display will show:

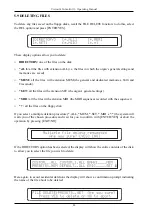
Through this display it is possibile to inform the system about the type of file you wish to save, i.e:

o

ALL:

 All the general and dedicated memories (of the 8 banks, including the Tutti and Crescen-

do), the main video page settings (Temperament, Tuning and Transposer) and the settings of
the MIDI&UTILITY and SET-UP menus will be saved in an ALL file.

o

MEMORY:

  this  function  will  save  a  .MEM  file  containing  all  the  memories  (general  and

dedicated) of the 8 banks, the Tutti and the Crescendo.

o

SETUP:

 this saving operation creates a .SET file containing the main video page settings and

those of the MIDI&UTILITY and SET-UP menus.

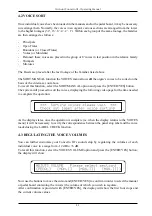
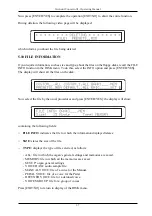
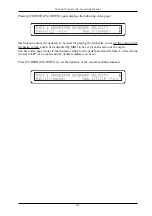
Now use the cursor keys and the [ENTER/YES] button to select the type of saving operation you
require. The display will show the video page for composition of the name of the file to be saved:

With the usual procedure, use the [CURSOR] keys to move the cursor and the encoder to select the
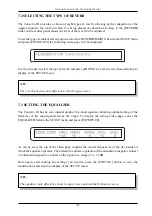
letter you require. Press [ENTER/YES] again to go ahead with the saving operation.
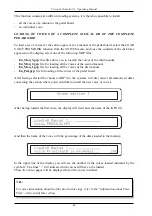
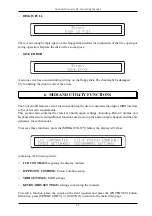
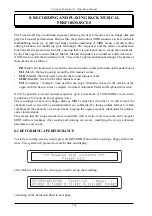
After the saving procedure is started, the following video page will appear for a few moments:

Summary of Contents for Concerto III

Page 1: ...Manuale Operativo Operating Manual viscount Concerto III Ver EU 1 1 ...

Page 2: ......

Page 3: ...ssaggi di errore Menu Voices 23 5 Funzioni riguardanti i floppy disk 25 5 1 Visualizzare il contenuto dei floppy 26 5 2 Copia di interi floppy disk 26 5 3 Formattazione dei floppy disk 28 5 4 Visualizzare i parametri principali dei floppy disk 28 5 5 Salvataggio su disco delle memorie e impostazioni dell organo 29 5 6 Caricare le memorie e o le impostazioni dell organo salvate su disco 30 5 7 Copi...

Page 4: ...e 47 8 3 Attivare e impostare il metronomo 48 8 4 Impostare la divisione musicale 49 8 5 Quantizzazione degli eventi MIDI nelle basi registrate 49 8 6 Funzioni di modifica delle sequenze MIDI 51 8 7 Messaggi di errore sezione Sequencer 54 9 Il telecomando 56 10 Local Off delle voci 56 11 Appendice 57 11 1 Aggiornamento dei sistemi operativi 57 11 2 Factory Settings 59 ...

Page 5: ...fferrarli per il connettore e non per il cavo stesso avvolgendoli inoltre evitate nodi e torsioni Prima di effettuare i collegamenti accertatevi che le altre unità in particolar modo sistemi di amplificazione e di diffusione che state per collegare siano spente Eviterete rumorosi se non pericolosi picchi di segnale In caso di lunghi periodi di inutilizzo dell organo scollegate la spina della presa...

Page 6: ...ue momento e senza impegnarsi ad aggiornare tempestivamente questa pubblicazione Tutti i diritti sono riservati è vietata la riproduzione di qualsiasi parte di questo manuale in qualsiasi forma senza l esplicito permesso scritto del costruttore Leggete attentamente tutte le informazioni descritte Eviterete inutili perdite di tempo ed otterrete le migliori prestazioni dallo strumento Le sigle od i ...

Page 7: ...II in questa sezione sono presenti i registri del terzo manuale 4 Interruttore EXT SPK tramite questo interruttore viene fornita l alimentazione alle casse esterne amplificate eventual mente collegate ai connettori MAIN OUTPUTS del pannello posteriore 5 Interruttore POWER interruttore per l accensione e spegnimento dell organo 6 Registri MAN I qui sono raccolti i registri del primo manuale NOTA Le...

Page 8: ...MAN I volume del primo manuale o ORCHESTRA volume delle voci Orchestra presente solo nella versione con voci Orchestra o REVERB livello del riverbero o GENERAL volume generale dell organo 8 Barra a Led CRESCENDO questi Led visualizzano gli step del Crescendo selezionati con l omonimo pedale ATTENZIONE Sotto i Led del Crescendo è posizionato il sensore agli infrarossi per la ricezione del teleco ma...

Page 9: ...zionare la voce Custom dalle 128 disponibili nello standard GM tenere premuto per qualche istante il pulsante CUSTOM della sezione desiderata verrà visualizzata la prima videata di selezione del gruppo di strumenti tramite i tasti cursore LEFT RIGHT UP e DOWN sotto il display selezionare il gruppo desiderato e premere ENTER YES verranno visualizzate le otto voci facenti parte del gruppo richiamato...

Page 10: ...la pedaliera o I P i registri e le voci Orchestra del primo manuale suonano anche sulla pedaliera o III II i registri e le voci Orchestra del terzo manuale suonano anche sul secondo manuale o I II i registri e le voci Orchestra del primo manuale suonano anche sul secondo manuale o III I i registri e le voci Orchestra del terzo manuale suonano anche sul primo manuale 2 3 I COMANDI SUI DIVISORI DEI ...

Page 11: ...e questi pulsanti attivano le unioni con il Man II ovvero o III unione del terzo manuale con il secondo III II o I unione del primo manuale con il secondo I II 20 Pulsante III questo pulsante abilita l unione del terzo manuale con il primo III I 21 Pulsante ENC premendo questo pulsante potrete controllare il volume generale dell organo tramite il pedale MAN III 22 Pulsante A P questo pulsante abil...

Page 12: ... premuto il pulsante HR delle memorie generali 28 Pedale MAN I pedale d espressione con il quale regolare il volume del primo manuale 29 Pedale MAN III questo pedale d espressione permette di controllare il volume del terzo manuale 30 Pistone MIDI SUSTAIN pistone del Sustain delle voci Orchestra e tramite il quale trasmettere il Control Change 64 sulla MIDI OUT nella versione priva della voci Orch...

Page 13: ... IN potrete ricevere i messaggi MIDI generati da sorgenti MIDI esterne la presa OUT trasmette i messaggi MIDI generati dal Concerto III la presa THRU trasmette gli stessi dati MIDI ricevuti dalla presa IN 36 Prese INPUT prese RCA di ingresso tramite le quali suonare altri strumenti con l amplifica zione interna dell organo In caso di sorgente monofonica utilizzare esclusivamente la presa L MONO 37...

Page 14: ...lle liturgiche verranno suddivise in base alle impostazioni della funzione AMPLIFICATION SYSTEM regolabile a display o ORCHESTRA collegando questi Jack in queste prese saranno presenti le voci Orchestra mentre nelle OUT 1 e OUT 2 saranno presenti le voci liturgiche in base alle impostazioni della funzione AMPLIFICATION SYSTEM Nella versione del Concerto III senza voci Orchestra le uscite ad esse d...

Page 15: ...iscount Concerto III Manuale Operativo ESEMPI DI UTILIZZO DELLE USCITE MAIN OUTPUTS Collegamento di tutte le uscite MAIN OUTPUTS Collegamento delle uscite OUT 1 e OUT 2 Collegamento della sola uscita OUT 1 ...

Page 16: ...rasto del display cap 6 o SET UP regolazione dell equalizzatore del Tremolo e del Riverbero cap 7 3 Sequencer in questa sezione sono raccolti i pulsanti per la gestione del sequencer multitraccia di cui è dotato il Concerto III cap 8 o RECORD pulsante per avviare una sessione di registrazione par 8 1 o PLAY tramite questo pulsante è possibile eseguire le sequenze MIDI registrate par 8 2 o METRONOM...

Page 17: ...versioni dei software attualmente installati Il primo numero a sinistra indica la versione del software Loader il secondo quella del software System il terzo quella del Sound Driver Dopo qualche istante verrà visualizzata la videata principale in cui sono presenti i seguenti parametri o MEMORY BANK tramite questa voce è possibile selezionare uno degli otto banchi di memoria sul quale si desiderano...

Page 18: ...ra fissa come l organo ed il cembalo si adeguarono a tale situazione adottando un sistema di temperamento detto mesotonico che privilegiava l intervallo di terza maggiore rispetto a quello di quinta Questo temperamento riveste un importanza particolare in quanto usato normalmente in Europa nei secoli XVI e XVII fino ai primi del 700 Ecco quindi i sei temperamenti di cui dispone il Concerto III pri...

Page 19: ...lay il quale visualizzerà la videata Queste funzioni risultano essere o LOAD VOICE FROM DISK funzione per il caricamento delle voci da disco o SORT MANUAL ordinamento delle voci o VOICES VOLUME regolazione del volume di ogni singola voce o LABEL CHECK permette di verificare le etichette dei registri dopo aver caricato nuove voci e o aver eseguito un ordinamento delle stesse Per richiamare la funzi...

Page 20: ... le voci del primo manuale Eu_Ped grp file per caricare tutte le voci della pedaliera Dopo aver selezionato il file GRP desiderato il sistema procederà con la cancellazione dei dati in memoria relativi la sezione di cui si stanno installando le nuove voci e successivamente il nome della voce ed una percentuale dei dati caricati in memoria Nella riga superiore della videata vengono inoltre riportat...

Page 21: ...si desidera caricare nella memoria interna dell organo ovvero i file KEY PED o DET Il display visualizzerà Tramite questa videata lo strumento chiede in che posizione inserire la nuova voce Utilizzare l encoder per impostare il registro desiderato che come sarà possibile notare verrà acceso sul pannello Per facilitare l operazione il display riporta la nuova voce parametro New e quella che verrà s...

Page 22: ...lunque sia la sua estensione o Non modificare il contenuto dei file GRP KEY PED e DET o Non cancellare dai floppy disk i file forniti insieme al GRP Qualora uno di questi file venisse a mancare durante il caricamento delle voci verrà visualizzato un errore a display per cui il sistema non sarà in grado di salvare in memoria la le voci o Tenete presente che caricando una voce nella memoria dell org...

Page 23: ... piedaggio delle famiglie sopra riportate vengono posizionate le Ance La funzione SORT MANUAL del menu VOICES permette di ordinare tutte le voci dell organo in base ai criteri sopra riportati Per richiamare la funzione in oggetto selezionare la voce SORT MANUAL e premere il pulsante ENTER YES Il sistema procederà con l ordinamento delle voci visualizzando per il tempo necessario a completare l ope...

Page 24: ...attivata Sarà quindi necessario verificare la corrispondenza tra voce e registro e qualora questa non sia più corretta sostituire l etichetta A tal fine è disponibile la funzione LABEL CHECK Per richiamare la funzione in oggetto selezio nare la voce LABEL CHECK nel menu VOICES e premere ENTER YES Il campo STOP indica il registro che si stà controllando il quale sarà acceso a luce fissa sul pannel ...

Page 25: ...nel registro Estrarre quindi l etichetta tramite le dita o utilizzando un piccolo cacciavite come riportato in figura e inserire quella corretta la quale sarà fornita con il set di dischi per l installazione delle voci 4 5 MESSAGGI DI ERRORE MENU VOICES NO FILES Questo errore viene visualizzato qualora venga richiamata la funzione LOAD VOICE FROM DISK ed il floppy disk inserito non contenga file p...

Page 26: ...presente il file KEY visualizzato sul display necessario per il caricamento della voce LOAD ERROR UNABLE TO LOAD VOICE Si è verificato un errore nella lettura del floppy disk durante il caricamento di una voce Premendo EXIT NO il sistema tenterà di rieseguire la lettura dei dati necessari Qualora dopo tre tentativi di lettura falliti venga visualizzata la videata ciò sta ad indicare che il sistema...

Page 27: ...nerali riguardanti il disco inserito nel drive La riga inferiore invece contiene le funzioni di gestione dei file o SAVE salvataggio su disco di tutte le memorie generali e dedicate Tutti e Crescendo e delle impostazioni dello strumento parametri della videata principale e funzioni dei menu MIDI UTILITY e SET UP o LOAD caricamento delle memorie e o impostazioni dell organo salvati tramite la funzi...

Page 28: ...e presenti sia maggiore di sei utilizzare i pulsanti CURSOR PG UP e CURSOR PG DOWN per visualizzare le restanti pagine a display Premere infine EXIT NO per abbandonare la funzione corrente e tornare al menu DISK 5 2 COPIA DI INTERI DISCHI Per copiare tutto il contenuto di un floppy disk in un altro inserire il disco che si desidera copiare nel driver e richiamare il menu DISK Dato che il sistema e...

Page 29: ...e la copia inoltre premendo il pulsante EXIT NO sarà possibile interrompere l operazio ne In questo caso attendere per un tempo necessario alla chiusura dei file eventualmente aperti la visualizzazione del menu DISK A copia ultimata il display tornerà a visualizzare il menu DISK ATTENZIONE La funzione Disk Copy sovrascrive tutti i file originali presenti nel disco di destinazione inserire ora il f...

Page 30: ...pulsanti CURSOR LEFT e CURSOR RIGHT per muovere il cursore indicato dalla lettera lampeggiante e l encoder per inserire i caratteri Come informa la videata premere quindi ENTER YES per avviare la formattazione o EXIT NO per abbandonare la funzione e tornare al menu DISK Durante la formattazione il display visualizzerà tramite la quale il sistema informa circa la percentuale di formattazione esegui...

Page 31: ...ovvero o ALL vengono salvate in un file ALL tutte le memorie generali e dedicate degli 8 banchi compresi il Tutti e il Crescendo e le impostazioni della videata principale Temperament Tuning e Transposer e dei menu MIDI UTILITY e SET UP o MEMORY tramite questa funzione verrà creato un file MEM contenente tutte le memorie generali e dedicate degli 8 banchi il Tutti e il Crescendo o SETUP questo sal...

Page 32: ... un file non desiderato Come informa la videata premere di nuovo ENTER YES per caricare i dati in memoria premere invece EXIT NO per annullare l operazione In caso di conferma il sistema procederà con il caricamento del file selezionato nella memoria interna visualizzando per tutto il tempo necessario a completare l operazione la videata NOTA IMPORTANTE Tenete presente che caricando un file le imp...

Page 33: ...n estensione MEM le memorie generali e dedicate Tutti e Crescendo o SET tutti i file con estensione SET le impostazioni generali dell organo o MID tutti i file con estensione MID le sequenze MIDI registrate con il sequencer o tutti i file contenuti nel floppy disk Dopo aver selezionato l opzione di copia desiderata premere ENTER YES ed il sistema procede rà con la lettura del primo file con l este...

Page 34: ...file In caso di copia multipla ALL MEM SET MID e e di file ancora da copiare sarà necessario estrarre il disco di destinazione e rieseguire un altra sessione di lettura e scrittura seguendo le videate sopra riportate Al termine delle copie di tutti i file il sistema chiederà di reinserire il disco sorgente dopodichè tornerà a visualizzare il menu DISK NOTA Tenete presente che eventuali file presen...

Page 35: ...E informa circa l attuale nome del file selezionato NEW NAME invece permette di comporre il nuove nome Come al solito servirsi dei pulsanti CURSOR per muovere il cursore e l encoder per inserire la lettera desiderata Composto il nuovo nome premere ENTER YES per completare l operazione Premere invece EXIT NO per abbandonare la funzione lasciando così inalterato il nome del file Confermando la rinom...

Page 36: ...l Tutti e il Crescen do o SET tutti i file con estensione SET le impostazioni generali dell organo o MID tutti i file con estensione MID le sequenze MIDI registrate con il sequencer o tutti i file contenuti nel floppy disk Selezionando una cancellazione multipla ALL MEM SET MID e il sistema avviserà della modalità scelta attendendo una conferma con ENTER YES o l annullamento dell operazio ne preme...

Page 37: ...n le procedure ormai note e premere ENTER YES il display visualizzerà in cui sono contenuti i campi o FILE INFO indica il file di cui si stanno visualizzando le informazioni o SIZE riporta la dimensione del file o TYPE visualizza il tipo di file selezionato ovvero ALL file in cui sono memorizzate tutte le memorie e le impostazioni generali dell organo MEMORY file in cui sono memorizzate tutte le m...

Page 38: ...ormattato Il sistema avvia automaticamente la procedura di formattazione DISK IS WRITE PROTECTED Il disco è protetto in scrittura per cui non è possibile completare l operazione in corso Rimuovere la protezione la finestrella in alto a destra del floppy deve essere chiusa e rieseguire l operazione WRONG TARGET SIZE E stato inserito durante una copia di floppy disk un disco di destinazione con capa...

Page 39: ...onalizzare in base alle proprie esigenze l interfaccia MIDI dell organo Oltre a ciò in questa sezione sono raccolte classiche impostazioni dell organo liturgico quali il Piston Combine ed il Keyboard Inversion e altre funzioni tramite le quali configurare i canali audio di uscita e la dinamica delle note per ogni manuale Per accedere alle funzioni in oggetto premere il pulsante MIDI UTILITY verrà ...

Page 40: ...maticamente attivata anche la stessa memoria della pedaliera Per attivare la funzione in oggetto selezionare il campo II P PISTON COMBINE nel menu MIDI UTILITY verrà visualizzata la videata Tramite l encoder impostare enable per attivare la funzione o disable per disattivarla Lo stato del Piston Combine viene inoltre indicato dal Led II P PIST COMB posizionato sulla destra del display a Led acceso...

Page 41: ...a Per inviare un PG posizionare il cursore sulla sezione a cui è associato il canale desiderato e ruotare l encoder Ad ogni valore selezionato verrà automaticamente trasmesso il relativo PG I Program Change impostati in questa videata verranno inoltre memorizzati nelle memorie dedicate e generali Ogni richiamo di una memoria in cui è memorizzato un PG comporterà la trasmissione del messaggio MIDI ...

Page 42: ...T NO sarà possibile tornare al menu MIDI UTILITY mentre utilizzando CURSOR PG DOWN verrà visualizzata la funzione AMPLIFICATION SYSTEM Nella riga inferiore del display sono presenti i campi di impostazione definiti da due lettere Per cui si avrà N N entrambi i filtri disattivati Y N filtro attivo solo sui messaggi ricevuti N Y filtro attivo solo sui messaggi trasmessi Y Y filtro attivo sia sui mes...

Page 43: ...ortata tramite questa funzione è possibile regolare per ogni sezione dell organo la dinamica con cui suonare le voci Orchestra nella versione dell organo con voci Orchestra e da trasmettere via MIDI La prima videata riguarda la regolazione della dinamica per la pedaliera e per il Man I sarà possibile selezionare un valore fisso da 1 a 127 o dinamica sensibile al tocco sense Premere CURSOR PG DOWN ...

Page 44: ...zionare il cursore sul campo interessato tramite i pulsan ti CURSOR e premere ENTER YES Premere invece EXIT NO o SET UP per abbandonare il menu corrente e tornare a visualizzare la videata principale 7 1 REGOLAZIONE DEI TREMOLI Tramite la funzione TREMULANT è possibile regolare la velocità e per ogni manuale la profon dità di modulazione dei Tremoli Dopo aver selezionato il campo TREMULANT nel men...

Page 45: ...UP NOTA La selezione del tipo di riverbero ha effetto solo sulle voci liturgiche 7 3 REGOLAZIONE DELL EQUALIZZATORE Il Concerto III è dotato di un proprio equalizzatore interno grafico a cinque bande tramite il quale controllare la timbrica del suono generato dall organo Per visualizzare la videata di regolazione selezionare il campo EQUALIZER e premere ENTER YES Come è possibile notare la videata...

Page 46: ...I Man III traccia per gli eventi del terzo manuale CM Common traccia comune dedicata ai registri voci Orchestra nella versione dell organo con voci Orchestra Unioni Enclosed Automatic Pedal e Keyboard Inversion Sarà possibile memorizzare sequenze musicali sino ad un massimo di 60 000 eventi MIDI con una risoluzione di 192 tpqn tick per quarter note tick per nota di durata di un quarto Le registraz...

Page 47: ...Concerto III la traccia selezionata viene disattivata Gli eventi eseguiti sulla sezione interessata non vengono registrati Accendere quindi i registri e le voci Orchestra desiderate e premere START STOP per avviare la registrazione il sequencer inizierà con le misure di precount precedentemente impostate 1 di default ed il Led del pulsante START STOP che lampeggierà sincronizzato con l attuale tem...

Page 48: ...da un modulo MIDI esterno la traccia viene esclusa dalla registrazione esecuzione Il disegno sotto riportato illustra le differenze tra le registrazioni Record e Overdub Tramite i tasti CURSOR sarà inoltre possibile posizionare il cursore sui campi TEMPO per modificare il valore del tempo metronomico e MEAS per selezionare la misura da cui si desidera iniziare a registrare In questo caso verrà vis...

Page 49: ...re il salvataggio ATTENZIONE Onde evitare di perdere precedenti registrazioni durante la composizione del nome della song abbiate cura di non inserire un nome già presente nel disco In caso contrario infatti il file originale verrà sovrascritto 8 2 RIPRODURRE UN ESECUZIONE MUSICALE Per eseguire una base registrata con il sequencer inserire il floppy disk nel drive e premere PLAY Il sistema procede...

Page 50: ...videata Dopo aver impostato i parametri desiderati premere ENTER dopodichè START STOP per iniziare a riprodurre la sequenza MIDI Il Led del tasto inizierà a lampeggiare sincronizzato con il tempo metronomico e il Time Signature corrente Premere il pulsante PLAY qualora si desideri arrestare temporaneamente la riproduzione ripremere il medesimo pulsante per riavviare la base Per terminare la riprod...

Page 51: ...lmente caricata 8 5 QUANTIZZAZIONE DEGLI EVENTI MIDI NELLE BASI REGISTRATE La quantizzazione è una funzione molto utile in quanto permette di correggere piccole imperfezio ni ritmiche in una registrazione Può difatti accadere che alcune note non vengano suonate e quindi registrate nell esatto istante temporale quindi con un piccolo anticipo o ritardo rispetto al punto desiderato Tramite questa fun...

Page 52: ...lla riga inferiore a sinistra viene inoltre riportato il nome della song attualmente in fase di modifica Premendo ora ENTER verrà richiesta una conferma a procedere Premere di nuovo ENTER YES per confermare o EXIT NO per annullare In caso di conferma il sistema procederà con la quantizzazione visualizzando sul display per tutto il tempo necessario a completare la modifica la videata Terminata la q...

Page 53: ...ne le tre funzioni sopra elencate Utilizzare i pulsanti CURSOR per muovere il cursore e ENTER per richiamare la funzione desiderata TRASPOSIZIONE DELLA TONALITA Per eseguire una trasposizione della tonalità della song caricata selezionare il campo TRANSPOSE nel menu EDIT il display visualizzerà la videata Tramite l encoder impostare il valore della trasposizione tenendo presente che la stessa vien...

Page 54: ...l tempo metronomico della base attualmente caricata selezionare il campo TEMPO nel menu EDIT e premere ENTER YES verrà visualizzata la videata Tramite l encoder impostare il nuovo valore premere quindi ENTER YES per procedere con il salvataggio della base Il display visualizzerà una richiesta di conferma a procedere Anche in questo caso premere ENTER YES per continuare o EXIT NO per annullare la m...

Page 55: ...do ALL verranno cancellati i dati in tutte le tracce o FROM M imposta il numero di misura iniziale dal quale eliminare gli eventi MIDI o TO M imposta il numero di misura finale entro il quale eliminare i dati o MODE seleziona la modalità di cancellazione ovvero DELETE con questa modalità tutti gli eventi MIDI presenti dopo l intervallo di misure cancellato non vengono spostati ERASE selezionando q...

Page 56: ...netico Qualora durante l operazione di salvataggio delle modifiche si salvi una base con un nome di un file già presente nel floppy verrà visualizzato il messaggio con cui il sistema chiede se sovrascrivere il file originale premendo ENTER YES o annullare il salvataggio premendo EXIT NO 8 7 MESSAGGI DI ERRORE SEZIONE SEQUENCER DISK NOT IN DRIVE E stato richiamato il sequencer Play o Record senza f...

Page 57: ...k protetto in scrittura Rimuovere la protezione e rieseguire la procedura SAVE ERROR Si è verificato un grave errore di scrittura su floppy disk Il disco potrebbe essere rovinato Tentare di correggere gli errori eseguendo una formattazione DISK FULL Il disco in cui si è tentato di salvare una song non ha spazio sufficiente a completare l operazione Liberare spazio su disco o utilizzare un altro fl...

Page 58: ... tivo sempre con un angolo non superiore ai 30 verticale e orizzontale rispetto al pannello dell organo 10 LOCAL OFF DELLE VOCI Impostare una voce in Local Off significa fare in modo che questa non suoni tramite la generazione interna del Concerto III ma che ne venga trasmesso alla sua attivazione il relativo messaggio MIDI Sistema Esclusivo così da poter essere accesa e suonata su uno strumento c...

Page 59: ...ntati nel Concerto III sono due e più precisamente SYSTEM software per la gestione di tutte le sezioni dell organo dell interfaccia utente del sequencer e della MIDI Il file di aggiornamento di questa sezione è nominato CE3__XXX SYS SOUND DRIVER software per la generazione sonora Il file di aggiornamento di questa sezione è nominato CEA__XXX DRV Le XXX indicano la versione dei software AGGIORNAMEN...

Page 60: ...zione Sound Driver inserito nel drive Il sistema procederà con la verifica del file presente nel floppy disk Le videate inerenti alla lettura il salvataggio in memoria del software e relativa verifica sono quelle riportate nella descrizione dell aggiornamento del software System MESSAGGI DI ERRORE AGGIORNAMENTO SISTEMI OPERATIVI SYSTEM FILE NOT FOUND SYSTEM FILE ERROR Il file per l aggiornamento d...

Page 61: ...nel caricamento in memoria dei software Rieseguire l aggiornamento dopo aver effettuato un Factory Settings dello strumento Qualora l errore sia ancora presente contattare il più vicino centro di assistenza 11 2 FACTORY SETTINGS La procedura di Factory Settings permette di ripristinare le impostazioni di fabbrica di tutti i parametri interni dello strumento annullando così le modifiche apportate d...

Page 62: ...installazioni Se questo apparecchio dovesse essere causa di interferenza nella ricezione radio e TV la quale può essere verificata spegnendolo e riaccendendolo potete cercare di eliminare il problema seguendo una delle seguenti misure Spostare o riorientare l antenna dell apparecchio sul quale si manifesta l interferenza Spostare questo strumento o l apparecchio sul quale si manifesta l interferen...

Page 63: ......

Page 64: ......

Page 65: ...the stop labels 84 4 5 Error messages Voices menu 85 5 Floppy disk functions 87 5 1 Displaying the contents of floppy disks 88 5 2 Copying whole floppy disks 88 5 3 Formatting floppy disks 90 5 4 Displaying floppy disk general parameters 90 5 5 Saving the organ s memories and settings on disk 91 5 6 Loading the organ s memories and settings saved on disk 92 5 7 Copying individual files 93 5 8 Rena...

Page 66: ...09 8 3 Switching on and setting the metronome 110 8 4 Setting the time signature 111 8 5 Quantizing the MIDI events in the songs recorded 111 8 6 MIDI sequences modification functions 113 8 7 Error messages Sequencer section 116 9 The remote control 118 10 Voice Local Off 118 11 Appendix 119 11 1 Updating of the operating systems 119 11 2 Factory Settings 121 ...

Page 67: ...lways take hold of the connector and not the cable itself when winding cables do not knot or twist them Before making the connections ensure that the other units especially amplification and diffusion systems you are about to connect are switched off This will prevent noisy or even dangerous signal peaks If the organ is to be out of use for lengthy periods disconnect the plug from the power socket...

Page 68: ...uction or commercial nature at any time and without undertaking to update this publication immediately All rights reserved the reproduction of any part of this manual in any form without the manufacturer s specific written permission is forbidden Read all the information described carefully You will avoid wasting time and will obtain the best performance from your instrument The codes or numbers i...

Page 69: ...board stops 3 4 5 6 3 MAN III stops this section contains the stops of the third manual 4 EXT SPK Switch this switch supplies power to any remote amplified speakers connected to the MAIN OUTPUTS connectors on the rear panel 5 POWER Switch the switch used to switch the organ on and off 6 MAN I stops this section contains the stops of the first manual N B The remote speakers are optional Contact you...

Page 70: ...d manual volume o MAN I first manual volume o ORCHESTRA volume of the Orchestra voices on version with Orchestra voices only o REVERB reverb level o GENERAL the organ s general volume 8 CRESCENDO LED bar these LEDs display the steps of the Crescendo set with the pedal of the same name WARNING The infrared sensor for receiving remote control commands is located underneath the Crescendo LEDs Take ca...

Page 71: ...e Custom voice from the 128 available in the GM standard keep the CUSTOM button of the section of choice pressed for a few moments the first video page for selecting the group of instructions will appear use the cursor keys LEFT RIGHT UP and DOWN underneath the display to select the group you require and press ENTER YES the eight voices in the selected group will be displayed use the cursor keys a...

Page 72: ...o play on the pedal board o III II the stops and Orchestra voices of the third manual will also play on the second manual o I II the stops and Orchestra voices of the first manual will also play on the second manual o III I the stops and Orchestra voices of the third manual will also play on the first manual 2 3 THE MANUAL SPLITTER CONTROLS 15 16a 17 18c 16c 16d 18a 18b 25 16b 20 19 21 22 23 24 15...

Page 73: ... II as follows o III coupling of the third manual with the second III II o I coupling of the first manual with the second I II 20 III button this button enables the coupling of the third manual with the first III I 21 ENC button pressing this button allows you to control the organ s general volume by means of the MAN III pedal 22 A P button this button enables the AUTOMATIC PEDAL used to play the ...

Page 74: ...your choice press S keep it pressed and then press the general memories HR button 28 MAN I pedal swell pedal used to control the volume of the first manual 29 MAN III pedal you can use this pedal to control the volume of the third manual 30 MIDI SUSTAIN piston Sustain piston for the Orchestra voices It also transmits Control Change CC64 on Midi Out in the Concerto III without Orchestra section tra...

Page 75: ...The IN connector allows receipt of MIDI messages generated by remote MIDI sources the OUT connector transmits the MIDI messages generated by the Concerto III and the THRU connector transmits exactly the data received at the IN connector 36 INPUT connectors RCA input connectors which allow other instruments to be played using the organ s internal amplification If the source is monophonic use the L ...

Page 76: ...s will be subdivided on the basis of the AMPLIFICATION SYSTEM function which can be set on the display o ORCHESTRA if these jacks are also connected these connectors will carry the Orchestra voices while the OUT 1 and OUT 2 will carry the church organ voices on the basis of the AMPLIFICATION SYSTEM function In the Concerto III version without Orchestra voices the outputs dedicated to these voices ...

Page 77: ...75 Viscount Concerto III Operating Manual EXAMPLES OF USE OF THE MAIN OUTPUTS OUTPUTS Connection of all the MAIN OUTPUTS outputs Connection of outputs OUT 1 and OUT 2 Connection of output OUT 1 only ...

Page 78: ...Combine and display contrast chap 6 o SET UP setting of the equalizer Tremolants and Reverb chap 7 3 Sequencer this section contains the buttons of the multi track sequencer of your Viscount Concerto III chap 8 o RECORD button for starting a recording session point 8 1 o PLAY this button allows playback of the MIDI sequences recorded point 8 2 o METRONOME press quickly to activate the audio metron...

Page 79: ...ase the second the System software and the third the Sound Driver software After a few moments the main video page will be displayed containing the following parameters o MEMORY BANK this option can be used to select one of the eight memory banks for saving the general and or dedicated memories As well as providing a total of 24 memories this function is especially important if the instrument is u...

Page 80: ... were adapted to this situation by using a system of temperament known as meantone which gave priority to the major third over the fifth This temperament is particularly important since it was in normal use in Europe in the 16th and 17th Centuries until the beginning of the 18th Here are the six temperaments offered by the Concerto III first of all the MEANTONE MEANTONE 8 pure major thirds E flat ...

Page 81: ...ing the VOICES button underneath the display This will call up the video page These functions are o LOAD VOICE FROM DISK function for loading voices from disk o SORT MANUAL sorts the voices o VOICES VOLUME regulates the volume of each individual voice o LABEL CHECK allows checking of the labels of the stops after new voices have been loaded and or after a voice sort To recall the function place th...

Page 82: ...nd manual Eu_Man_1 grp file for loading all the voices of the first manual Eu_Ped grp file for loading all the voices of the pedal board After having selected the choosen GRP file the systems will first cancel all memorized datas concerning the section where you would like to install the new voice or voices And then the name of the voice with the percentage of the datas loaded in the memory In the...

Page 83: ...ou wish to load in the internal memory of the organ files KEY PED or DET The display will show The instrument uses this video page to ask where you wish to place the new voice Use the encoder to set the stop you have chosen you will see that it lights up on the panel To simplify the procedure the display shows the new voice New parameter and the voice to be replaced Old parameter Now press ENTER Y...

Page 84: ...gardless of its extension o Do not modify the contents of the GRP KEY PED and DET files o Do not delete the files supplied together from the GRP file from the floppy disks If any of these files is missing during loading of the voices an error will appear on the display so the system will not be able to save the voice s in the memory o Please note that when you load a new voice in the organ the ori...

Page 85: ...tages 32 16 8 4 2 1 Within each group of the same footage the families are then arranged as follows Principals Open Flutes Bourdons or Closed Flutes Violas or Mordents Detuned these voices are placed in the group of 8 voices in last position in the relative family Trumpets Mixtures The Reeds are placed after the last footage of the families listed above The SORT MANUAL function the VOICES menu all...

Page 86: ... the tabs do not correspond to the voices Therefore please verify this and in case it does not correspond please change the name plates The LABELCHECK function is available for this purpose To recall this function select the LABEL CHECK option in the VOICES menu and press ENTER YES The STOP field indicates the stop being checked which will be constantly illuminated on the panel while the right of ...

Page 87: ... they are just pressed into the stop Remove the label with your fingers or using a small screwdriver as shown below and fit the correct one supplied with the set of disks for loading the voices 4 5 ERROR MESSAGES VOICES MENU NO FILES This error is displayed if you recall the LOAD VOICE FROM DISK function and the floppy disk inserted does not contain voice files SELECTED VOICE IS WRONG This error m...

Page 88: ...splay The floppy disk does not contain file KEY shown in the display and necessary for the voice load LOAD ERROR UNABLE TO LOAD VOICE It has happened a reading error whilst loading the voice Pressing EXIT NO the system will try to re read the datas In case three trials are failing the display will show this will mean that the system is not able to load the necessary datas in order to complete the ...

Page 89: ...ng o INFO general information about the disk inserted in the drive The bottom line contains the file management functions o SAVE saving on disk of all the memories general and dedicated Tutti and Crescendo and of the instrument s settings main video page parameters and functions of the MIDI UTILITY and SET UP menus o LOAD loading of the memories and or of the organ settings saved using the SAVE fu...

Page 90: ... disk If there are more than six files use the CURSOR PG UP and CURSOR PG DOWN buttons to display the other video pages Finally press EXIT NO to exit the current function and return to the DISK menu 5 2 COPYING WHOLE FLOPPY DISKS To copy the contents of a whole floppy disk onto another one insert the disk to be copied in the drive and recall the DISK menu Since the system makes a physical copy i e...

Page 91: ...erations During copying the procedure can be aborted by pressing the ESC button In this case wait until the DISK menu is displayed to allow any open files to be closed When the copy is complete the display will return to the DISK menu ATTENTION When using the Disk Copy function you will re write the original files on the disk now insert the floppy disk to proceed with writing of the data Since a p...

Page 92: ... DISK menu During formatting the display will show by means of which the system informs you of the percentage of formatting completed 5 4 DISPLAYING FLOPPY DISK GENERAL PARAMETERS The DISK INFO function allows you to show the main characteristics of the floppy disk inserted in the drive To activate this function select the INFO option and press ENTER YES the display will show 5 3 FORMATTING FLOPPY...

Page 93: ...of the 8 banks including the Tutti and Crescen do the main video page settings Temperament Tuning and Transposer and the settings of the MIDI UTILITY and SET UP menus will be saved in an ALL file o MEMORY this function will save a MEM file containing all the memories general and dedicated of the 8 banks the Tutti and the Crescendo o SETUP this saving operation creates a SET file containing the mai...

Page 94: ...gs and memories currently present in the organ will be lost To avoid this it is best first to carry out a File Save of the memories and settings and then to load the file required the system is warning you that the floppy disk already contains a file with the name and of course the extension you have just typed Press ENTER YES to overwrite the original file or EXIT NO to abort the saving operation...

Page 95: ...d o MEM all the files with extension MEM the general and dedicated memories Tutti and Crescendo o SET all the files with extension SET the organ s general settings o MID all the files with extension MID the MIDI sequences recorded with the sequencer o all the files on the floppy disk After selecting the copy option you require press ENTER YES and the system will proceed to read the first file with...

Page 96: ...rite the file In case of a multiple copying operation ALL MEM SET MID and if there are more files to be copied you will have to extract the destination disk and carry out another reading and writing session following the video pages shown above When all the files have been copied the system will prompt you to reinsert the source disk and then return to display of the DISK menu N B Bear in mind tha...

Page 97: ...sting of two files ACTUALNAME indicates the current name of the selected file NEW NAME allows you to type the new name As usual use the CURSOR buttons to move the cursor and the encoder to enter the letter you require Once you have created the new name press ENTER YES to complete the operation Press EXIT NO to abort the function and leave the name of the file unchanged If you confirm the rename th...

Page 98: ...escendo o SET all the files with extension SET the organ s general settings o MID all the files with extension MID the MIDI sequences recorded with the sequencer o all the files on the floppy disk If you select a multiple deletion procedure ALL MEM SET MID e the system will warn you of the chosen procedure and wait for you to confirm with ENTER YES or abort the operation by pressing EXIT NO If the...

Page 99: ...he disk Now select the file by the usual procedures and press ENTER YES the display will show containing the following fields o FILE INFO indicates the file to which the information displayed relates o SIZE states the size of the file o TYPE displays the type of file selected as follows ALL file in which the organ s general settings and memories are saved MEMORY file in which all the memories are ...

Page 100: ...inserted The disk starts the formatting procedure automatically DISK IS WRITE PROTECTED The disk has write protection so it is not possible to complete the current operation Remove the protection the window in the top right hand corner of the floppy disk must be closed and repeat the operation WRONG TARGET SIZE During a floppy disk copy operation a destination disk with capacity different from the...

Page 101: ...his or her own requirements This section also contains the classical church organ settings including Piston Combine and Keyboard Inversion and additional functions used to set up the audio output channels and the note dynamics for each manual To access these functions press the MIDI UTILITY button the display will show containing the following fields o LCD CONTRAST regulates the display contrast o...

Page 102: ...e system will display the following video page Use the encoder to set enable to activate the function or disable to deactivate it The status of the Piston Combine function is also indicated by the II P PIST COMB LED on the right of the display when the LED is on the function is active Press ESC to save the setting and return to the MIDI UTILITY menu 6 3 MIDI FUNCTIONS To access the Concerto III s ...

Page 103: ...d general memories Therefore each recall of a memory containing a PG will trigger transmission of the MIDI message If transmission of the PG is not necessary saving of the PG can be cancelled by selecting the value OFF in the video page shown above Press button CURSOR PG DOWN for the display concerning the adjustment of the MIDI filters The filters for the following messages can be switched on and...

Page 104: ...played relates to the KEYBOARD INVERSION function allowing the positions of Man I and Man II to be reversed Select enable to activate the function or disable to deactivate it The status of this setting will also be displayed by the I II KEYB INV LED on the right of the display when the LED is on the function is active Now press EXIT NO to return to the MIDI UTILITY menu or CURSOR PG DOWN to displa...

Page 105: ...ng the Orchestra voices in the version with Orchestra voices and to be transmitted by MIDI to be set for each section of the organ The first video page relates to the dynamic setting for the pedal board and for Man I a fixed value from 1 to 127 or a touch sensitive dynamic sense can be set Press CURSOR PG DOWN to set the dynamic of the second and third manuals ...

Page 106: ...e cursor on the field required using the CURSOR buttons and press ENTER YES Otherwise press EXIT NO or SET UP to exit the current menu and return to the main video page 7 1 SETTING THE TREMULANTS The TREMULANT function can be used to set the speed depth and modulation of the tremulants for each manual After the TREMULANT field is selected in the SET UP menu the display will show the video page con...

Page 107: ... N B The reverb selection only affects the church organ voices 7 3 SETTING THE EQUALIZER The Concerto III has its own internal graphic five band equalizer allowing optimal setting of the character of the sound generated by the organ To display the setting video page select the EQUALIZER field in the SET UP menu and press ENTER YES As can be seen the top of the video page contains the central frequ...

Page 108: ...econd manual events M III Man III track for the third manual events CM Common common track used for the stops Orchestra voices in the version of the organ with Orchestra voices couplers Enclosed Automatic Pedal and Keyboard Inversion It will be possible to record musical sequences up to a maximum of 60 000 MIDI events with a resolution of 192 tpqn ticks per quarter note The recordings are saved on...

Page 109: ...ent connected to the Concerto III the selected track is deactivated The events performed on the relative section are not recorded Then press START STOP to start the recording The sequencer will start with the number of precount bars set earlier 1 in default condition and the Led of the START STOP button will flash in time with the current tempo and the Time Signature set To modify the number of pr...

Page 110: ... MIDI module the track is not included in the playback recording The diagram below explains the differences between Record and Overdub recording modes The CURSOR keys can also be used to locate the cursor on the TEMPO field to modify the metronome tempo and the MEAS field to select the bar from which recording is to start In this case the following video page will be displayed Use the encoder to s...

Page 111: ... sure that existing recordings are not lost when entering the name of the song take care not to enter a name already on the disk In this case the original file will be overwritten 8 2 PLAYING BACK A PERFORMANCE To play back a song recorded using the sequencer insert the floppy disk in the drive and press The system will proceed to read the floppy disk after which all the songs mid files saved on t...

Page 112: ...e function After having setted the parameters you wish press ENTER YES and then START STOP in order to start reproduction of the MIDI sequence The LED of the key will start to flash in time with the current tempo and Time Signature If you wish to stop playback temporarily press the PLAY button press the same button again to restart the song To stop the playback press START STOP again press EXIT NO...

Page 113: ... abort it If you press the TIME SIGN button with the sequencer in Play mode the system will inform you about the Time Signature of the MIDI sequence currently loaded 8 5 QUANTIZING THE MIDI EVENTS IN THE SONGS RECORDED Quantizing is a very useful function since it allows small errors in the rhythm of a recording to be corrected Often some notes may be played slightly before or after the correct mo...

Page 114: ...ng operation The name of the song currently being modified also appears on the left of the bottom line Now press ENTER YES and a confirmation prompt will appear Press ENTER YES again to confirm or EXIT NO to abort If you confirm the system will proceed with the quantizing operation displaying the following video page for all the time needed to complete the operation After which you will be prompte...

Page 115: ... which contains the three functions listed above Use the CURSOR buttons to move the cursor and ENTER YES to recall the function you require TRANSPOSING THE KEY To transpose the key of the loaded song select the TRANSPOSE field from EDIT menu the display will show the video page Use the encoder to set the transposition value bearing in mind that it is set in semitones After selecting the value you ...

Page 116: ...THE TEMPO To modify the tempo of the currently loaded song select the TEMPO field in the EDIT menu and press ENTER YES the following video page will be displayed Use the encoder to enter the new value then press ENTER YES again to go ahead with saving the song The display will show a confirmation prompt Here again press ENTER YES to continue or EXIT NO to abort the change and return to display of ...

Page 117: ...sets the number of the initial bar measure from which the deletion of the MIDI events will start o TO M sets the last bar number to be affected by the clear operation o MODE selects the cancellation mode as follows DELETE with this mode all the MIDI events present after the deleted group of bars will not be moved ERASE with this mode all the MIDI events present after the deleted group of bars will...

Page 118: ... If a song is saved with a file name already present on the floppy during saving of modifications the following message will appear in which the system asks you if you wish to overwrite the original file by pressing ENTER YES or to abort the save operation by pressing EXIT NO 8 7 ERROR MESSAGES SEQUENCER SECTION DISK NOT IN DRIVE The sequencer Play or Record has been recalled with no floppy disk i...

Page 119: ... a write protected floppy disk Remove the protection and repeat the procedure SAVE ERROR A serious error has occurred during writing on the floppy disk The disk might be damaged Try formatting the disk to correct the errors DISK FULL There is not enough room on the disk where you have attempted to save a song to complete the operation Free space on the disk or use another one NO FILES ...

Page 120: ... an angle of not more than 30 vertical or horizontal to the organ s panel 10 VOICE LOCAL OFF Setting a voice in Local Off mode means that it will not be played by the Concerto III s internal sound generation system but when it is activated the relative MIDI System Exclusive message will be transmitted so that it can be turned on and played on a connected instrument For setting the Local off of the...

Page 121: ...eo pages to execute the update The operating systems of the Concerto III are two i e SYSTEM software for the organ sections user interface sequencer and MIDI The updating file of this section is called CE3__XXX SYS SOUND DRIVER software for the sound sources The updating file of this section is called CEA__XXX DRV XXX indicate the software release UPDATING OF THE SOFTWARE SYSTEM Switch on the orga...

Page 122: ...aining the updating files in the disk drive The system will proceed with the verification of the file The displays concerning the reading and the saving in the memory of the software as well as its verification are those described in the updating of the System software ERROR MESSAGES UPDATING OF OPERATING SYSTEMS SYSTEM FILE NOT FOUND SYSTEM FILE ERROR The file for the updating of the System softw...

Page 123: ...ror in the software loading in the memory Repeat the updating after having resetted the instrument with a Factory Settings In case the error is still present contact your nearest service center 11 2 FACTORY SETTINGS The Factory Settings procedure resets all the user parameters as they were set on delivery of the instrument deleting all the changes made by the user To perform the Factory Settings p...

Page 124: ......

Page 125: ...O O O O O O O O O O O O O O O O O O Data Entry MSB 2 Volume Expression Data Entry LSB 2 Sustain RPN LSB 2 RPN MSB 2 All sound off Reset all controllers All note off PROGRAM CHANGE True O X 1 SYSTEM EXCLUSIVE O O SYSTEM Song Pos COMMON Song Sel Tune X X X X X X SYSTEM Clock REAL TIME Commands O O O O 3 AUX Local On Off MESSAGES All note Off Active Sense Reset X O O X X O O X NOTES 1 see chapt 6 3 f...

Page 126: ......

Page 127: ... a particular installation If this equipment does cause harmful interference to radio or television reception which can be determinated by turning the equipment off and on the user is encuraged to try to correct the interference by one or more of the following measures Reorient or relocate the receiving antenna Increase the separation between the equipment and receiver Connect the equipment into a...

Page 128: ...S p A Via Borgo n 68 70 47836 Mondaino RN ITALY From Italy TEL 0541 981700 FAX 0541 981052 From all other countries TEL 39 0541 981700 FAX 39 0541 981052 E MAIL organs viscount it WEB http www viscount organs com http www viscount it ...

Reviews: