15
PLANTING & GROWING
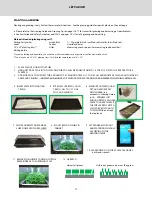
Planting and growing is easy. Follow these simple instructions. See the growing guide for specific plants on the next page.
Please refer to the Growing Guide and Growing Tips on pages 16-17 for successful growing and harvesting of specific plants.
See Sanitation and Safety Guidelines and FAQ’s on pages 20-21 for safe growing and harvesting.
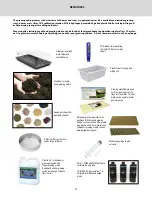
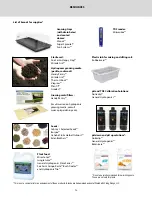
Materials Needed (planting using soil)*:
Potting Soil (sterile)
Screen/Mat
1—20 gal plastic tub (unsifted soil); smaller tub (sifted soil)
Seeds
Shaker
Humidity
domes
10” x 20” planting trays**
Sifter
Measuring cups & spoons (for measuring seed quantities)
Misting bottle
*If you are planting hydroponically, you will need a soil-free medium such as perlite or soil free mat instead of soil
**You may also use 10” x 10” planting trays; 2 will fit in the same space as a 10” x 20”
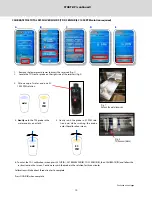
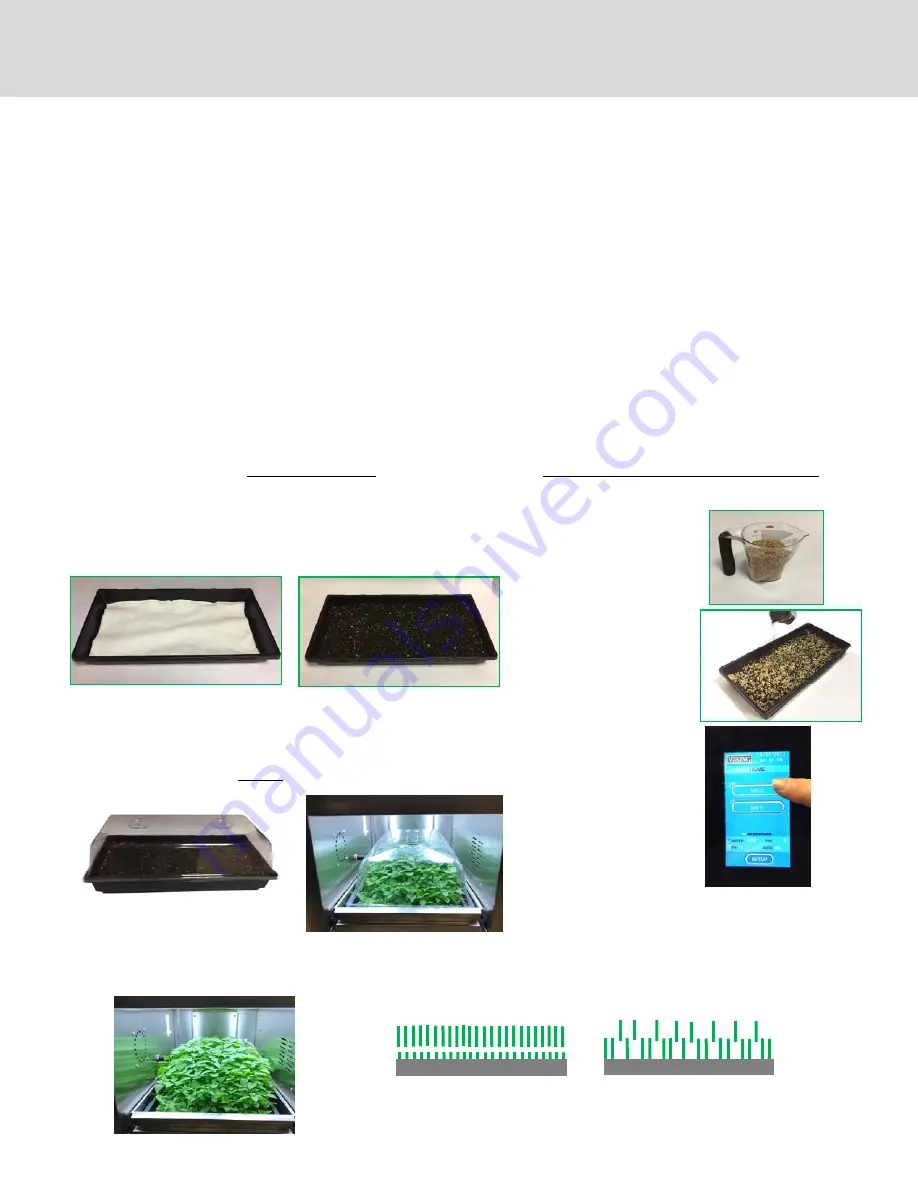
4. INSERT MATS INTO PLANTING
TRAY(S)
5. PUT MOIST UNSIFTED SOIL IN
TRAY(S), FILL TO 1/2 TO 3/4
FULL, AND SMOOTH
6. MEASURE OUT SEED QUAN-
TITY AND SEED EVENLY
WITH SHAKER (see
amounts in Growing Guide,
p. 15). SPRINKLE JUST
ENOUGH SIFTED SOIL OVER
SEEDS TO COVER THEM. IF
THE TOP LAYER OF SIFTED
SOIL IS DRY, MIST LIGHTLY
TO MOISTEN (do not soak
the top layer).
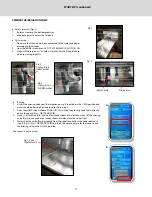
8. PLACE TRAY(S) ON SHELF IN
CABINET
9. SET PROGRAM FOR LIGHT
AND WATERING SCHEDULE
ACCORDING TO THE
GROWING GUIDE
10. LEAVE DOME(S) ON FOR AT LEAST 48 HOURS
(until seeds sprout)
11. REMOVE THE HUMIDITY DOME(S) FOR THE
REMAINDER OF THE GROWING CYCLE
12. HARVEST!
Harvest all greens
Or thin out greens and use as they grow
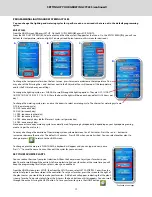
1.
PLACE SOIL INTO ONE OF THE TUBS
2.
USING SIFTER, SIFT SOIL INTO THE SECOND TUB; YOU WILL NEED ABOUT ONE TO 1.5 CUPS OF SIFTED SOIL PER TRAY TO BE
PLANTED
3.
ADD MORE SOIL TO THE FIRST TUB, ENOUGH TO FILL PLANTING TRAYS 1/2 TO 3/4 FULL AND MOISTEN SOIL ENOUGH TO MAKE IT
DAMP AND CRUMBLY—NOT WET AND MUDDY; STIR WHEN ADDING WATER; DO NOT ADD WATER TO THE TUB OF SIFTED SOIL
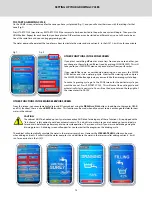
7. SECURE HUMIDITY DOME. MAKE
SURE DOME VENTS ARE CLOSED
LETS’ GROW!


