


E
MBROIDERY
S
TITCH
-O
UT
8:3
Set needle
point icons
Control
Zoom to cursor
Design Positioning
Wizard – Steps 1-4
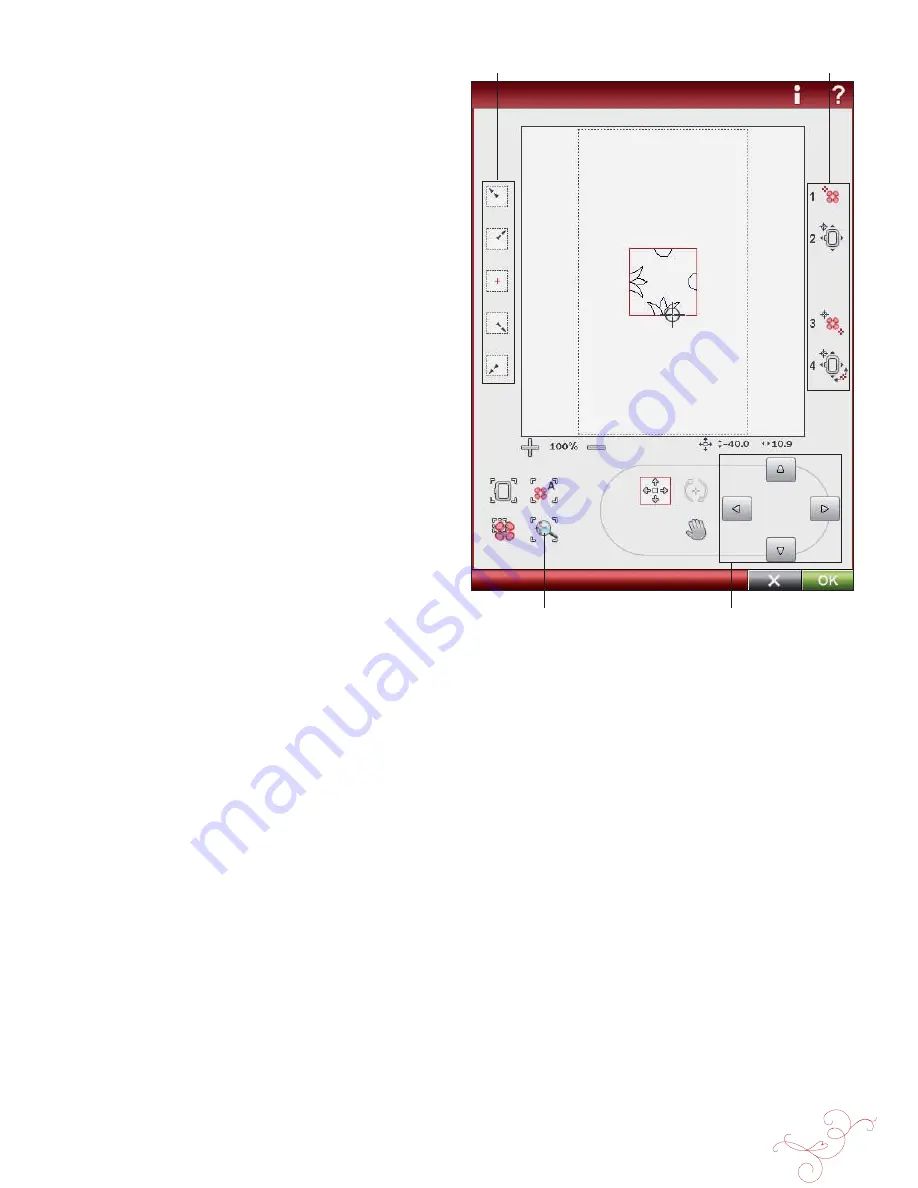
DESIGN POSITIONING
Touch the Design Positioning icon to open the Design
Positioning screen. Design Positioning allows you to place
a design on an exact location on your fabric. When adding
one design to a previously embroidered design, or when
matching a design to a patterned fabric, Design Positioning
is very useful.
Note: If you just want to move your embroidery in Embroidery
Stitch-Out, open the Design Positioning window and move your design
using the Control or your stylus.
Use Zoom and Pan to be sure that you are placing the
design exactly where you want it. Fine tune with the arrows
in the Control.
Zoom to Cursor
Maximizes the zoom and pans the embroidery area so the
cursor position is centered on the screen.
Set needle point
Move the needle point to any of the selected corners or the
center of the designs. Set needle point can be used to trace
the design
À
eld by touching each of the four corner icons.
Summary of Contents for Designer Ruby
Page 1: ...User s Guide KEEPING THE WORLD SEWING...
Page 5: ...1GETTING TO KNOWYOUR MACHINE...
Page 18: ...1 18 Script Alphabet Cyrillic Alphabet Hiragana Alphabet...
Page 19: ...SET UP 2...
Page 31: ...SETTINGS FUNCTIONS 3...
Page 43: ...SEWING 4...
Page 63: ...PROGRAM 5...
Page 69: ...EMBROIDERY SET UP 6...
Page 75: ...7EMBROIDERY EDIT...
Page 87: ...EMBROIDERY STITCH OUT 8...
Page 99: ...FILE MANAGER 9...
Page 105: ...MAINTENANCE 10...


