


7:2
EMBROIDERY EDIT
When you touch the Sewing/Embroidery Mode on the toolbar to activate Embroidery Mode or turn the machine on with
the embroidery unit attached, Embroidery Edit will be opened. In Embroidery Edit you can adjust, combine, save and
delete designs. You do not need to have the embroidery unit connected to your machine to edit your design(s). The loaded
design(s) are shown in the Embroidery
À
eld. We will go through the icons, starting on the upper left hand side.
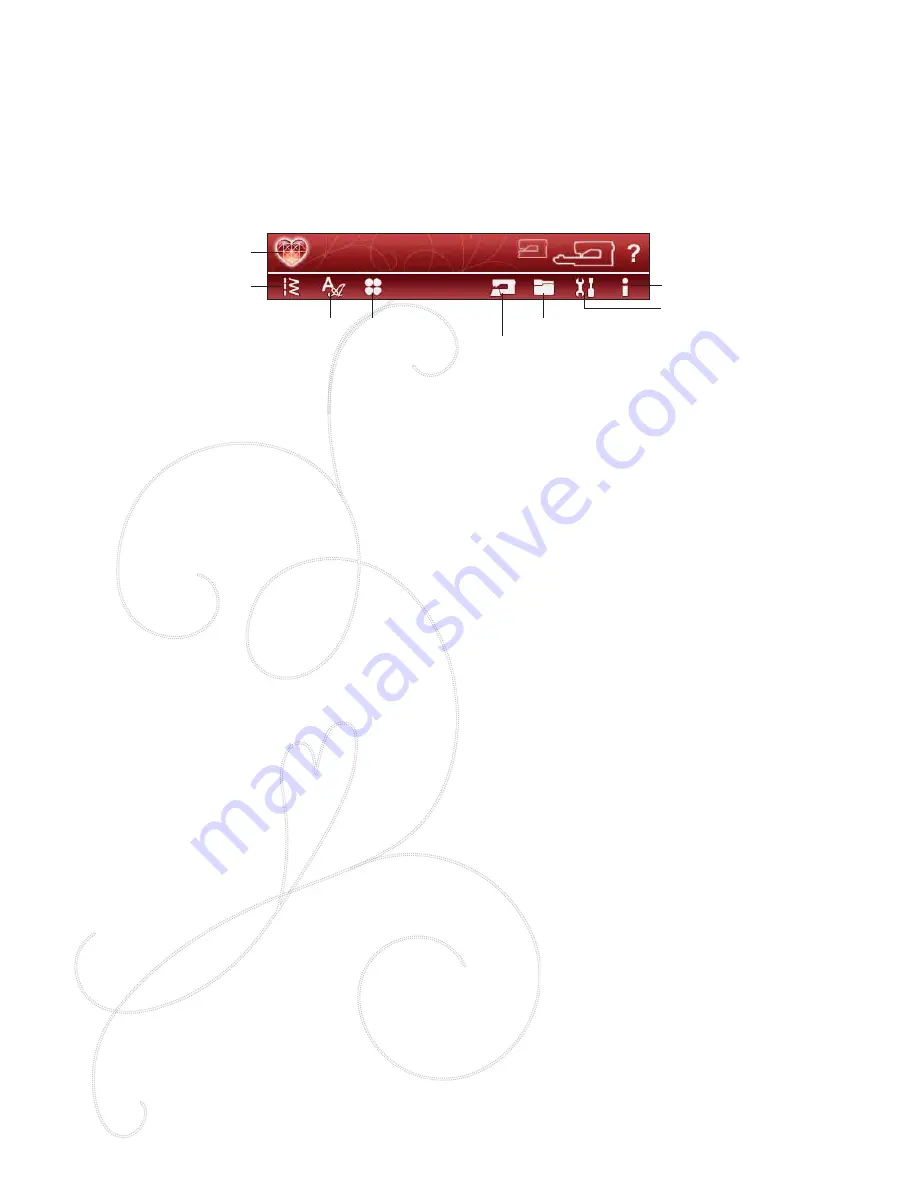
MAIN FUNCTIONS IN THE EXTENDED EMBROIDERY EDIT TOOLBAR
Touch the Start Menu icon to open the Extended toolbar.
FILE MANAGER
The File Manager helps you add, move, remove and copy
designs, fonts and stitch
À
les in an easy way. Touch the File
Manager icon to open File Manager to save to the machine
memory or external devices connected to the USB-ports,
such as your computer or the HUSQVARNA VIKING®
USB embroidery stick. Select the place you want to save
your design. Touch a folder to select it and Touch & Hold it
to open it. Read more about File Manager in chapter 9.
SET MENU
In the SET Menu, you can override automatic settings and
make manual adjustments to the Sewing Settings, Machine
Settings, Sound Settings, and Screen Settings.
Touch the icons to activate a function or open a list of
choices. Read more about the SET Menu in chapter 3.
INFORMATION MENU
Use the Information menu to easily get Help topics and
information. The Info menu is a built-in, abridged version
of the User’s Guide. Read more about the Information
menu on page 3:10.
LOAD A STITCH
To load a stitch, touch the Stitch Menu icon on the
Extended toolbar. Select a menu and the Program window
will open. Touch your desired stitch/stitch program and
touch OK to load to Embroidery Edit. Read more about
how to make a stitch program in chapter 5.
Load a buttonhole
Buttonholes can be embroidered in a hoop. Touch the
Stitch Menu icon on the Extended toolbar and select menu
B. Select desired buttonhole in the window that opens, and
set the buttonhole stitch length, width and density. Touch
OK to load the buttonhole to the embroidery area.
LOAD A FONT
Text can be created both with embroidery fonts and stitch
fonts. Load a font by selecting the Font Menu from the
extended toolbar and touch your desired font on the screen.
Embroidery fonts will be loaded into the Embroidery Font
Edit window. Stitch fonts will be loaded to Program. The
text created will then be loaded into Embroidery Edit.
Note: You can also load designs, fonts and stitches from File Manager.
LOAD A DESIGN
To load a design, touch the Start Menu icon to
automatically open the dropdown list. Select designs from
the dropdown list. Your personal designs will be shown in
the menu. To load a design, touch it on the screen and it
will be loaded into Embroidery Edit.
EXCLUSIVE EMBROIDERY ADVISOR™
The Exclusive EMBROIDERY ADVISOR™ feature
recommends the best needle, stabilizer and thread
recommendation for your fabric. Select the fabric you want
to embroider on and follow the recommendations. Touch
OK to close the EMBROIDERY ADVISOR™ feature.
SET Menu
Information
File Manager
Design Menu
Font Menu
Stitch Menu
Start Menu icon
EMBROIDERY ADVISOR™
Summary of Contents for Designer Ruby
Page 1: ...User s Guide KEEPING THE WORLD SEWING...
Page 5: ...1GETTING TO KNOWYOUR MACHINE...
Page 18: ...1 18 Script Alphabet Cyrillic Alphabet Hiragana Alphabet...
Page 19: ...SET UP 2...
Page 31: ...SETTINGS FUNCTIONS 3...
Page 43: ...SEWING 4...
Page 63: ...PROGRAM 5...
Page 69: ...EMBROIDERY SET UP 6...
Page 75: ...7EMBROIDERY EDIT...
Page 87: ...EMBROIDERY STITCH OUT 8...
Page 99: ...FILE MANAGER 9...
Page 105: ...MAINTENANCE 10...


