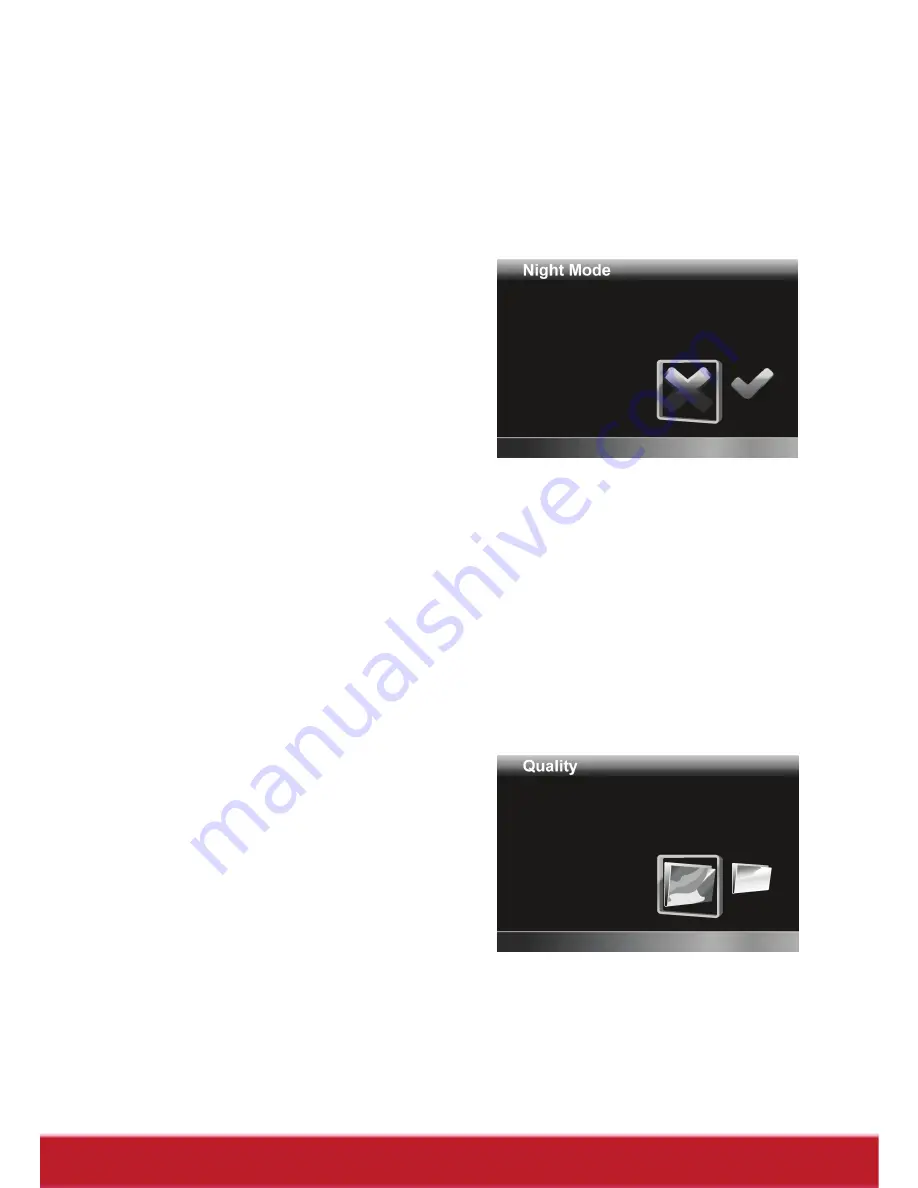
background image


3.2.4     Night  Mode 

The Night Mode menu allows you to enable or disable the night 
mode feature. 
To set night mode, do the following: 

1. Use 

the 

left/right 

Navigation Button

 to   

select: 


X

: Turn night mode 

off. 


: Turn night mode 

on. 

2. Press 

the 

middle 

Navigation Button

 to confirm.   

3.2.5     Quality 

The Quality menu allows you to set the recording quality. Higher 
quality videos contain more details and therefore use more memory 
space. 
To set the quality, do the following: 

1. Use 

the 

left/right Navigation Button

 to select: 


Fine

: Select for 

higher recording 
quality. 


Normal

: Select for 

normal recording 
quality. 

2. Press 

the 

middle Navigation 

Button

 to confirm.   


32

Summary of Contents for VC3D2

Page 1: ...ing your product for future service Warranty information contained in this User Guide will describe your limited coverage from ViewSonic Corporation which is also found on our web site at http www vie...

Page 2: ...eiving antenna Increase the separation between the equipment and receiver Connect the equipment into an outlet on a circuit different from that to which the receiver is connected Consult the dealer or...

Page 3: ...ent of the obsolete outlet 10 Protect the power cord from being walked on or pinched particularly at plugs Convenience receptacles and the point where they exit from the unit Be sure that the power ou...

Page 4: ...ed biphenyls PBB 0 1 0 1 Polybrominated diphenyl ethers PBDE 0 1 0 1 Certain components of products as stated above are exempted under the Annex of the RoHS Directives as noted below Examples of exemp...

Page 5: ...iewSonic Corporation Product Registration To meet your future needs and to receive any additional product information as it becomes available please register your product on the Internet at www viewso...

Page 6: ...4 1 Front view 6 1 4 2 Top view 7 1 4 3 Bottom view 7 1 4 4 Back view 8 1 4 5 Left view 8 1 4 6 Right view 9 1 4 7 Operating the camcorder 13 2 Getting started 15 2 1 Inserting an SD card 15 2 2 Inser...

Page 7: ...he Camcorder 26 3 1 Recording Videos 26 3 2 Video Mode Menu 29 3 2 1 White Balance 30 3 2 2 Resolution 30 3 2 3 Effect 31 3 2 4 Night Mode 32 3 2 5 Quality 32 3 3 Playback Videos 33 3 3 1 Playback Vid...

Page 8: ...ght Mode 44 3 9 5 Quality 44 3 10 Playback Photos 45 3 10 1 Playback Photos 45 3 11 Deleting Photos 47 3 12 Protecting Photos 48 3 13 Autoplay Photos 49 3 14 Image Output 50 Appendix 51 Specification...

Page 9: ...irectX 9 video card DirectX 10 is recommended Standard USB 1 1 port or higher At least 2GB or greater available hard disk 1 1 2 System requirements for 3D video playback The camcorder requires a PC wi...

Page 10: ...he following items should be present in the package If any item is missing or appears damaged contact your dealer immediately Camcorder Quick Start Guide CD Rom Li ion Battery Charger Power Cable Pouc...

Page 11: ...1 4About the camcorder Refer to the following illustrations to familiarize yourself with the buttons and controls of this camcorder 1 4 1 Front view Lens Lens LED Light Lens Head 6...

Page 12: ...1 4 2 Top view Speaker Zoom Button Shutter Button 1 4 3 Bottom view Tripod Mount Strap 7...

Page 13: ...1 4 4 Back view Navigation Button USB AV Port Record Button Status LED Mode Dial 1 4 5 Left view Battery Compartment Battery Cover Latch 8...

Page 14: ...1 4 6 Right view Microphone LCD Panel Power Button Menu Button 3D Button Playback Button SD Card Compartment 9...

Page 15: ...go back the previous screen or close the menu Playback Button Press to playback recorded videos or photos 3D Button Press to toggle between 3D and 2D modes Zoom Button In Video or Camera mode press T...

Page 16: ...ideo playback Navigation Button In menu mode use the four way control to select items in the menu and press the middle button to confirm In Video or Camera mode Press the up down button to increase de...

Page 17: ...ying video press the left right button to rewind fast forward video playback While playing video press and hold the left right button increase decrease to toggle the rewind fast forward speed 2X 4X or...

Page 18: ...1 4 7 Operating the camcorder To turn on the power open the LCD panel or press the Power Button for one second Rotate the LCD panel so you can view pictures and movies 13...

Page 19: ...Rotate the lens head to open the lens 90 14...

Page 20: ...nd configuring preliminary settings See later chapters for advanced functions 2 1Inserting an SD card An SD card can be installed in the camcorder to provide additional storage space for still images...

Page 21: ...e a rechargeable Li ion battery Only use the batteries supplied by the manufacturer or your dealer 1 Slide the battery cover latch to open the battery cover Note Install the battery exactly as describ...

Page 22: ...battery Make sure that the and symbols on the battery line up with the and symbols on your camcorder 3 Close the battery cover Note Make sure that the battery cover is tightly closed to ensure proper...

Page 23: ...her end to the wall outlet as shown 2 The orange LED will light up for proper charging 3 After full charge the LED turns to green 4 Actual charging time depends on current battery capacity and chargin...

Page 24: ...ures or videos on a TV connect the camcorder to a TV using the supplied AV cable as shown 2 6Connecting to TV HDMI Cable You can also connect the camcorder to a TV using the HDMI cable Note For 3D vid...

Page 25: ...ial to switch between modes You can also press the 3D Button to toggle between 2D and 3D modes In Video or Camera modes press the Menu Button to enter the Video or Camera menu and adjust White Balance...

Page 26: ...ton to scroll through the options pages until the desired menu is highlighted Please see below for the available options 3 Press the middle Navigation Button to open the menu The following options are...

Page 27: ...the desired language 2 Press the middle Navigation Button to confirm 2 9 3 Date Time The Date Time menu allows you to adjust the date and time To adjust the Date Time do the following 1 Use the left...

Page 28: ...ing 1 Use the left right Navigation Button to select 2 Press the middle Navigation Button to confirm Warning Formatting will delete everything on the media 2 9 5 Default The Default menu allows you to...

Page 29: ...to Power Off function 1 min Auto Power Off after 1 minute 5 min Auto Power Off after 5 minutes 2 Press the middle Navigation Button to confirm 2 9 7 Frequency The Frequency menu allows you to set the...

Page 30: ...ation Button to select NTSC or PAL 2 Press the middle Navigation Button to confirm 2 9 9 Beep The Beep menu allows you to turn the operation sound and button sound off or on To adjust the Beep do the...

Page 31: ...decrease the EV settings Press the up Navigation Button to increase the EV settings Use the Zoom Button to zoom in and out in 2D mode Press the left Navigation Button to quickly change the White Bala...

Page 32: ...deo mode 2 Indicates the amount of zoom being used 3 Indicates the current White Balance mode 4 Indicates that night mode is enabled 2 The maximum file size of each video recording is approximately 3...

Page 33: ...cates the current resolution 7 Indicates the current exposure value Indicates the memory card is inserted 8 Indicates that the internal memory is used to store files 9 Indicates the remaining space fo...

Page 34: ...enu is highlighted Please see below for the available options 3 Press the middle Navigation Button to open the menu 4 Press the Record Button to go back to Video mode The following options are availab...

Page 35: ...camcorder set the white balance automatically Sunny Select this option for daylight filming Cloudy Select this option for filming in cloudy days Fluorescent Select this option for fluorescent lightin...

Page 36: ...ution at 60 fps WVGA Select this option for 848 x 480 resolution 2 Press the middle Navigation Button to confirm 3 2 3 Effect The Effect menu allows you to change the recording effect To set the Effec...

Page 37: ...2 Press the middle Navigation Button to confirm 3 2 5 Quality The Quality menu allows you to set the recording quality Higher quality videos contain more details and therefore use more memory space To...

Page 38: ...se the recorded videos 4 Press the middle Navigation Button or Record Button to playback the video To pause playback press the Record Button Press the middle Navigation Button to stop playback To adju...

Page 39: ...n 1 3 4 5 2 Icon Description 1 Indicates that the camcorder is in Playback mode 2 Indicates the video file number 3 Indicates the total recorded time 4 Indicates that the file is protected 5 Indicates...

Page 40: ...Button to select then press the middle Navigation Button to confirm 5 Press the middle Navigation Button to delete the selected video To delete all videos do the following 1 Press the Playback Button...

Page 41: ...n 4 Use the left right Navigation Button to select then press the middle Navigation Button to confirm 5 To protect unprotect more files use the left right Navigation Button to select other files then...

Page 42: ...press the Playback Button to enter the Video Playback mode 2 Press the Menu Button to open the Video Playback menu screen 3 Use the left right Navigation Button to select then press the middle Navigat...

Page 43: ...ck menu screen 3 Use the left right Navigation Button to select then press the middle Navigation Button to confirm 4 Use the left right Navigation Button to select desired option 2D You will see 2D vi...

Page 44: ...r 2D mode 3D mode allows you to take photos with 3D effects 2D mode allows you to take regular 2D photos Press the down Navigation Button to decrease the EV settings Press the up Navigation Button to...

Page 45: ...3 Indicates the total number of pictures 4 Indicates the current White Balance mode 5 Indicates that night mode is enabled 6 Indicates the amount of battery power left 7 Indicates the current resolut...

Page 46: ...esired menu is highlighted Please see below for the available options 3 Press the middle Navigation Button to open the menu 4 Press the Record Button to go back to Video mode The following options are...

Page 47: ...amcorder set the white balance automatically Sunny Select this option for daylight filming Cloudy Select this option for filming in cloudy days Fluorescent Select this option for fluorescent lighting...

Page 48: ...1832 x 1030 resolution 5M Select this option for 2280 x 1242 resolution 16M Select this option for 4608 x 2592 resolution 2 Press the middle Navigation Button to confirm 3 9 3 Effect The Effect menu a...

Page 49: ...de on 2 Press the middle Navigation Button to confirm 3 9 5 Quality The Quality menu allows you to set the image quality Higher quality images contain more details and therefore use more memory space...

Page 50: ...Make sure you are in the Camera mode Adjust the Mode Dial to switch to Camera mode if not 2 Press the Playback Button to enter the Photo playback screen 3 Press the left right Navigation Button to br...

Page 51: ...ption 1 Indicates that the camcorder is in Camera Playback mode 2 Indicates the file number of the current photo 3 Indicates the sequence number of the current photo over the total number of photos 4...

Page 52: ...Button to select then press the middle Navigation Button to confirm 5 Press the middle Navigation Button to delete the selected photo To delete all photos do the following 1 Press the Playback Button...

Page 53: ...en 4 Use the left right Navigation Button to select then press the middle Navigation Button to confirm 5 To protect unprotect more files use the left right Navigation Button to select other files then...

Page 54: ...era mode press the Playback Button to enter the Camera Playback mode 2 Press the Menu Button to open the Camera Playback menu screen 3 Use the left right Navigation Button to select then press the mid...

Page 55: ...Playback menu screen 3 Use the left right Navigation Button to select then press the middle Navigation Button to confirm 4 Use the left right Navigation Button to select desired option 2D You will se...

Page 56: ...vailable memory for image storage is approximately 56MB SD Card Up to SDHC 32GB Class6 Sensitivity Auto Exposure mode Programmed AE Color effects Natural B W Sepia Lens F3 2 f 5 1mm Focus range Approx...

Page 57: ...D light Effective range 1M Mode On Off White balance Auto Sunny Cloudy Tungsten Fluorescent EV compensation 2 0 EV 2 0 EV Interface AV out NTSC PAL HDMI MSDC USB 2 0 high speed Shutter speed Video 1 1...

Page 58: ...der is running out of battery power Turn the power on again Replace the battery The captured image is not stored in memory Before the image is saved the power has been cut off When the battery indicat...

Page 59: ...ry card is protected The memory card contains non DCF images taken by other camcorders Unlock the memory card Format the memory card Before formatting the card ensure you back up the files All buttons...

Page 60: ...olumbia www viewsonic com la T 01800 9 157235 soporte viewsonic com Latin America Mexico www viewsonic com la T 001 8882328722 soporte viewsonic com Renta y Datos 29 SUR 721 COL LA PAZ 72160 PUEBLA PU...

Page 61: ...pplied with the product b Any damage of the product due to shipment c Removal or installation of the product d Causes external to the product such as electrical power fluctuations or failure e Use of...

Page 62: ...to other property caused by any defects in the product damages based upon inconvenience loss of use of the product loss of time loss of profits loss of business opportunity loss of goodwill interfere...

Page 63: ...ty contact ViewSonic Customer Support Please refer to the attached Customer Support page You will need to provide your product s serial number so please record the product information in the space pro...

Page 64: ...ales com Cuernavaca Compusupport de Cuernavaca SA de CV Francisco Leyva 178 Col Miguel Hidalgo C P 62040 Cuernavaca Morelos Tel 01 777 3180579 01 777 3124014 E Mail aquevedo compusupportcva com Distri...

Page 65: ...x...

Reviews: