background image

ViewSonic NMP-500

7 of  38

3. L

OGIN

Open an Internet Browser, i.e., 

Internet Explorer

. In the 

URL address field

, type in  the

default IP address of the 

NMP-500

 (192.168.12.100) > press 

Enter

. The 

Login

 screen

appears. Type in the default 

Login

 and 

Password

.

Login:

admin

Password:

admin

For security purposes, we recommend that you change the default IP address, Login and
Password. 

For more information, see the Security section in this user guide.

After logging in successfully, the 

Network Configuration

 screen appears. 

Note:

 The

NMP-500

 automatically logs you out after fives minutes of inactivity.

For information on how to change network settings on an OS other than Windows, please
consult the OS user guide or your Network Administrator.

4. C

ONNECT


THE

 NMP-500 

TO


A

 D

ISPLAY

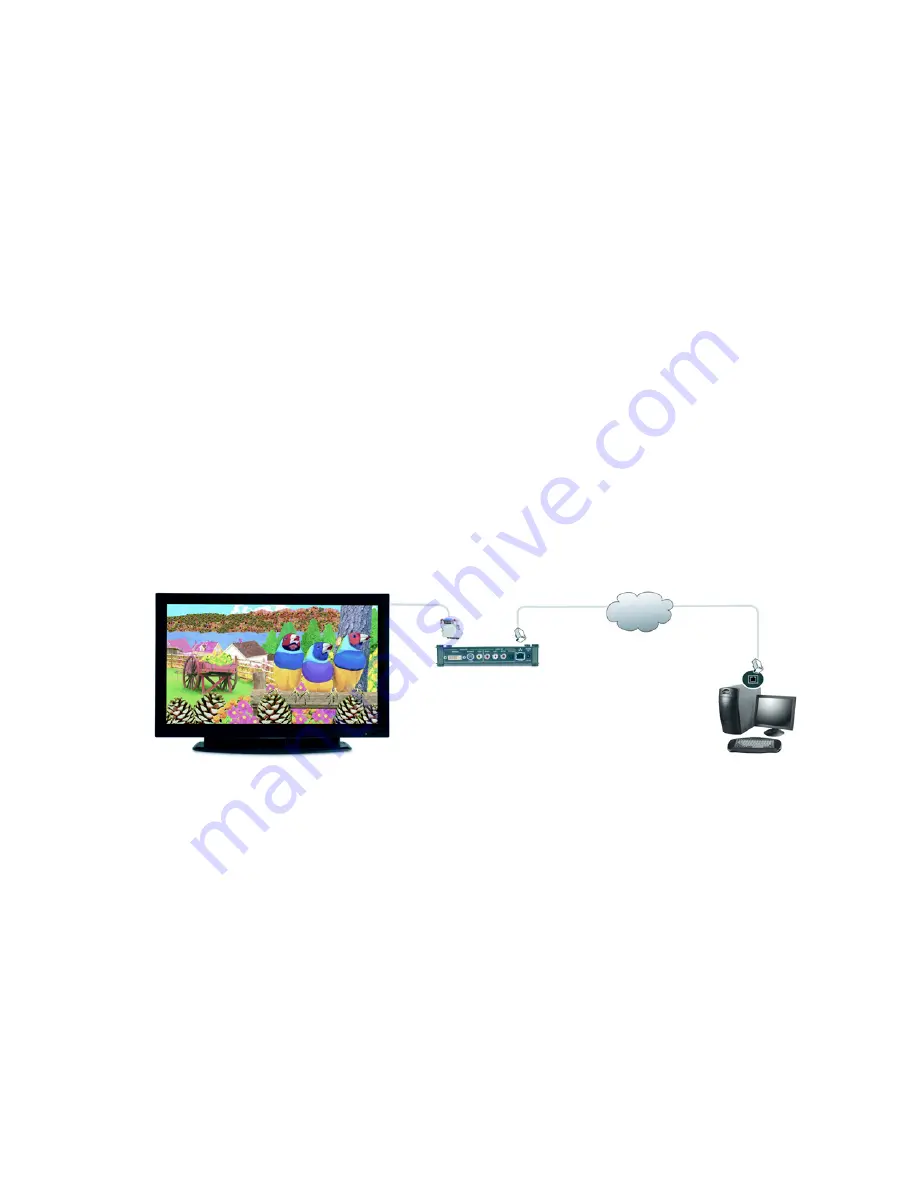
Connect the

 NMP-500

 to a display such as a Plasma Display Panel (PDP) or a Liquid Crystal

Display (LCD). 

Display

Network

NMP-500

Summary of Contents for NMP-500

Page 1: ......

Page 2: ...r the performance or use of this product In the interest of continuing product improvement ViewSonic Corporation reserves the right to change product specifications without notice Information in this document may change without notice No part of this document may be copied reproduced or transmitted by any means for any purpose without prior written permission from ViewSonic Corporation Product Reg...

Page 3: ...ront View 5 Back View 5 Remote Control 5 SETUP Connect NMP 500 to PC 6 Manually Configure your PC 6 Login 7 Connect the NMP 500 to a Display 7 Put Batteries in Remote Control 9 MANAGEMENT Startup URLs Network Configuration 10 Browser Configuration 11 VNC client 13 Video Audio Configuration 14 TAS Configuration 15 System Services Configuration 16 ...

Page 4: ...ency 21 Go to URL 22 ADMINISTRATION Advanced Video Configuration 23 Security 24 Save Configuration 25 Default Settings 25 Reboot 26 Firmware Upgrade 26 HELP Status 27 License 28 About 28 APPENDIX Compliance and Safety Notices 29 Screens 32 Customer Support 35 Specifications 36 Limited Warranty 37 ...

Page 5: ...Player This section introduces you to the NMP 500 PACKAGED CONTENTS Please check that all the following items are in the package NMP 500 Quick Start Guide Quick Start Guide AC Power Adapter DVI VGA Adapter S Video YPbPr Adapter User Guide Quick Start Guide Remote Control and Two Batteries ...

Page 6: ...ENTS Operating System Any Windows or Linux OS capable of running a web server Processor Intel Pentium 4 1 GHz or higher or compatible microprocessor Memory 512 MB RAM or more Display 1024 x 768 pixels or greater Network Interface 100Base TX SOFTWARE REQUIREMENTS Software applications need to be purchased separately in order to create material for playback such as graphics video and Flash files etc...

Page 7: ...er vendors PDPs LCDs and projectors and it integrates with a multi vendor networking environment Efficient and cost effective solution for digital signage Devices can be remotely controlled with a user friendly web interface from virtually anywhere on a network or the Internet Can be managed with Tivella Administration Server TAS software and Cisco ACNS software Display content in landscape or por...

Page 8: ...ure and manage multiple NMP 500s remotely TAS provides centralized scheduling of video content presentation on multiple NMP 500s as well as management and seamless operation of a Cisco ACNS Content Distribution Networking infrastructure if one is installed This configuration greatly reduces maintenance overhead when TAS and the NMP 500 are connected to the network LAN WAN with the TAS acting as a ...

Page 9: ... NMP 500 5 of 38 FRONT VIEW BACK VIEW REMOTE CONTROL Green LED Activity Blue LED Power Ethernet 10 100 Power 5V DC OPTICAL S PDIF LEFT RIGHT CVBS S VIDEO YPbPr DVI VGA AUDIO OUT VIDEO OUT POWER button On Standby ...

Page 10: ...tart button in the task bar right click on My Network Places select Properties right click on the Network Connection associated with your Network Adapter and select Properties click Internet Protocol TCP IP and click Properties Enter a Static IP Address for example 192 168 12 x in the same range as the NMP 500 IMPORTANT BE SURE TO CONFIGURE THE NMP 500 AS SHOWN IN THE FOLLOWING STEPS BEFORE CONNEC...

Page 11: ...ddress Login and Password For more information see the Security section in this user guide After logging in successfully the Network Configuration screen appears Note The NMP 500 automatically logs you out after fives minutes of inactivity For information on how to change network settings on an OS other than Windows please consult the OS user guide or your Network Administrator 4 CONNECT THE NMP 5...

Page 12: ... to the VGA interface on the back of the display PDP or LCD Note do not use both a VGA connection and a YPbPr connection at the same time Component Using the S Video YPbPr adapter Composite Using an RCA cable Click the Show IP button shown below The IP address appears on screen momentarily then disappears after about four seconds If the IP address does not appear check that the NMP 500 and the dis...

Page 13: ...me left slider values range between 0 and 100 6 Move the Audio Channel Volume right slider values range between 0 and 100 7 If any changes were made to this screen do the following To enable the changes click Apply To save the changes click the Administration menu click Save Configuration click Save 5 Put Batteries in Remote Control Remove the back cover from the remote control as shown below Put ...

Page 14: ...o play a particular video at startup in the Video field enter a valid HTML page Here are some examples http ip address mpeg 1 2 file located on WEB Server udp ip multicast address port rtp multicast address port iptv ip multicast address videoport audioport playlist http ip address playlist file located on WEB server 2 In the Browser field enter a startup web screen for example http www viewsonic ...

Page 15: ...hanges click the Administration menu click Save Configuration click Save BROWSER CONFIGURATION The Browser Configuration screen allows you to make specific screen settings for a specific URL that you chose Click Management Browser The screen shown below appears Note 1 millisecond 1 1000th second 1 In the Macromedia Flash Transparency Source field select one of the options from the pull down menu 2...

Page 16: ... of this guide 0 video only no graphics 255 graphics only no video 7 In the Start screen display time field type the number of milliseconds you want the initial screen to be displayed at startup 1 millisecond 1 1000 second 8 In the Screen Height field type the height of the screen that is displaying your graphics image 9 In the Screen Width field type the width of the screen that is displaying you...

Page 17: ...ent under System services is set to YES or Enabled VNC server password must be at least 6 characters can be alpha numeric X and Y coordinates let you set the size of the window of the remote desktop displayed if full screen is not desired VNC full screen mode lets you set the client to start up as full screen all the time VNC auto restart mode reconnects the client in the event of network interrup...

Page 18: ...ness slider values range between 128 and 127 3 Move the Contrast slider values range between 0 and 255 4 Move the Saturation slider values range between 0 and 255 5 Move the Audio Channel Volume left slider values range between 0 and 100 6 Move the Audio Channel Volume right slider values range between 0 and 100 7 If any changes were made to this screen do the following To enable the changes click...

Page 19: ...e Timeout sec field type the number of seconds for the NMP 500s to access TAS 2 In the IP Address field is a valid DNS name automatically generated by TAS when connected to a network but empty when used as a standalone 3 If any changes were made to this screen do the following To enable the changes click Apply To save the changes click the Administration menu click Save Configuration click Save NO...

Page 20: ...n below appears 1 In the Network Media Player port 6666 field select Yes to access the NMP 500 using a Telnet client on port 6666 If you do not want this select No 2 In the MIB Event Notification field select Yes to be notified of changes that you made to the NMP 500 settings 3 If any changes were made to this screen do the following To enable the changes click Apply To save the changes click the ...

Page 21: ...he OSD or go to a specific URL on the fly VIDEO MULTICAST This screen allows you to play streams using the assorted protocols Select Actions Video multicast The screen shown below appears 1 In the IP address field type the IP Address transmitting UDP based multicast stream for example 239 1 1 7 2 In the Port field type the Port number used to receive the multicast 3 To tell the system to listen to...

Page 22: ... HTTP The screen shown below appears 1 In the URL field type the URL that corresponds to the HTTP stream that you want to appear on the display for example http 192 168 12 x movie mpg or http server ip file mpg 2 To tell the system to listen to the HTTP stream from the entered URL click Start ...

Page 23: ...ll the system to listen to the Playlist from the entered URL click Start To create a playlist A Playlist is a text file that can be created in any text editor with an extension of txt A Playlist is necessary when you want the NMP 500 to play specific content in a specific order usually looped A Playlist can be created for the http streams Example of a looped Playlist For a Playlist that is not loo...

Page 24: ...splay a remote desktop running a VNC server 1 In the VNC server field type the IP Address of the VNC server 2 In the Password field type the password of the VNC server whose IP is entered above IMPORTANT The password must be at least six 6 characters can be alpha numeric 3 To display the remote desktop click Start ...

Page 25: ... video layer field type a number between 0 to 255 for a more or less transparent translucent browser image user interface so you can still see through the browser OSD On Screen Display shown below on the right with your video or other images 0 no OSD 255 no video 128 equal transparency between video and OSD layers 2 To apply the entered transparency value to the image on the NMP 500 click Apply OS...

Page 26: ... URL To go to a web page on the browser click Actions Go to URL The screen shown below appears 1 In the URL field type the desired URL 2 To redirect the browser to the URL that you entered click Go The web page appears on your display ...

Page 27: ...nt of the screen on the X axis 2 In the Y of destination window type the center point of the screen on the Y axis 3 In the Width of destination window type the width of the destination window 4 In the Height of destination window type the height of the destination window 5 If any changes were made to this screen do the following To enable the changes click Apply To save the changes click the Admin...

Page 28: ...ear in each field as shown below default User name Password is admin admin 1 In the Password field type a new password 2 In the Repeat Password field re type the new password 3 If any changes were made to this screen do the following To enable the changes click Apply To save the changes click the Administration menu click Save Configuration click Save ...

Page 29: ...e NMP 500 click Administration Save Configuration The screen shown below appears Click Save DEFAULT SETTINGS To restore the NMP 500 back to factory settings click Administration Default Settings The screen shown below appears Click Restore User defined settings will be lost ...

Page 30: ... Administration Reboot The screen shown below appears Click Reboot The NMP 500 reboots FIRMWARE UPGRADE To upgrade the firmware on the NMP 500 click Administration Firmware The screen shown below appears Click Browse to open the firmware file click Start upgrade ...

Page 31: ...onic NMP 500 27 of 38 HELP STATUS Status refers to the log where you can track activity on a specific NMP 500 To show the Status log click Help Status The screen shown below is for information only no inputs ...

Page 32: ...ivate the license on the NMP 500 click Help License The License Key may appear automatically in the screen shown below read only ABOUT To show the current version of the product click Help About The screen shown below appears information only ...

Page 33: ...ate the receiving antenna Increase the separation distance between the equipment and the receiver Connect the equipment to an outlet on a different circuit than what the receiver is connected to Consult the dealer or an experienced radio or television technician for help CAUTION The Part 15 radio device operates on a non interference basis with other devices operating at its frequency Any changes ...

Page 34: ... EEC issued by the Commission of the European Community Compliance with these directives implies conformity to the following European Norms EN55022 CISPR 22 Radio Frequency Interference EN55024 IEC61000 4 2 4 4 4 5 4 6 4 11 EN60950 IEC950 Product Safety Declaration of RoHS Compliance This product has been designed and manufactured in compliance with Directive 2002 95 EC of the European Parliament ...

Page 35: ...ining 85 by weight or more lead 4 Lead as an allotting element in steel containing up to 0 35 lead by weight aluminium containing up to 0 4 lead by weight and as a cooper alloy containing up to 4 lead by weight For EU member states only as follows The mark shown to the right is in compliance with the Waste Electrical and Electronic Equipment Directive 2002 96 EC WEEE The mark indicates the require...

Page 36: ...ViewSonic NMP 500 32 of 38 SCREENS MANAGEMENT ...

Page 37: ...ViewSonic NMP 500 33 of 38 ACTIONS ADMINISTRATION ...

Page 38: ...ViewSonic NMP 500 34 of 38 HELP ...

Page 39: ...68 1202 T 866 463 4775 F 909 468 5814 United Kingdom viewsoniceurope com T 0800 833 648 F 01794 500801 Europe Middle East Baltic countries and North Africa viewsoniceurope com Contact your reseller Australia and New Zealand viewsonic com au T 61 2 9929 3955 F 61 2 9929 8393 Singapore India and Southeast Asia viewsonic com sg T 65 273 4018 F 65 273 1566 Taiwan viewsonic com tw T 866 2 2246 3456 F 8...

Page 40: ...o through S Video Adapter S Video CVBS Composite Video DVI VGA VGA through an adapter with DVI port RCA Audio left RCA Audio Right S PDIF Optical Power Voltage DC 5V max 100 240VAC Pre loaded software Web browser with Flash Plug in Standalone Flash Player HD Player Streaming protocols included but not limited to Multicast HTTP IP TV Playlists Decoding Video MPEG 1 MPEG 2 MPEG 4 Macromedia Flash Au...

Page 41: ...mance How long the warranty is effective ViewSonic warrants that its hardware will be free from defects in workmanship and materials under proper normal use and as set forth below Hardware and Power Supplies One 1 Year Accessories spare parts and spare kits Ninety 90 days The Warranty Period will begin on the date of purchase and remain effective as specified above Proof of purchase and or receipt...

Page 42: ... ALL LIABILITY FOR DELAYS IN SHIPPING AND OR ANY RESULTING DAMAGE S DUE TO LOSS OF USE FOR ANY AND ALL REASONS IN NO EVENT WILL VIEWSONIC CORPORATION AND ANY AND ALL OF ITS PRESENT FORMER AND FUTURE REPRESENTATIVES BE LIABLE FOR SPECIAL INDIRECT INCIDENTAL OR CONSEQUENTIAL DAMAGES RELATING DIRECTLY OR INDIRECTLY TO THIS AGREEMENT FURTHER VIEWSONIC WILL NOT BE LIABLE FOR LOSS OF THE USE OF PRODUCT ...

Page 43: ......

Reviews: