EN - English - I
nstruc
tion manual
6
MNVCMBX_1929_EN
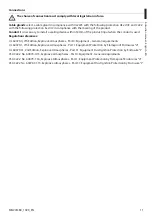
DANGER!
High level hazard.
Risk of electric shock. Disconnect the
power supply before proceeding with any
operation, unless indicated otherwise.
• Before starting any operation, make sure the
power supply is disconnected.
• A power disconnect device must be included
in the electrical installation, and it must be very
quickly recognizable and operated if needed.
• Be careful not to use cables that seem worn or old.
• This equipment is not suitable for use in locations
where children are likely to be present.
CAUTION!
Medium level hazard.
This operation is very important for the
system to function properly. Please read
the procedure described very carefully and
carry it out as instructed.
• Make sure the appliance is securely anchored
before supplying power.
• Any change that is not expressly approved by the
manufacturer will invalidate the guarantee.
• For technical services, consult only and exclusively
authorized technicians.
• Comply with all the national standards during the
device installation.
• The product can be installed in any position.
• All disconnected wires must be electrically
isolated.
• The manufacturer declines all liability for damage
to any of the apparatus mentioned in this
handbook, when resulting from tampering, use of
non-original spare parts, installation, maintenance
and repairs performed by non-authorised, non-
skilled personnel.
• This product must only be repaired by suitably
trained personnel or under the supervision of
VIDEOTEC personnel in accordance with the
foreseen terms and conditions: IEC/EN60079-19.
• Whenever replacing the parts as indicated,
always use VIDEOTEC original spare parts and
meticulously follow the maintenance instructions
supplied with every spare parts kit.
INFO
Description of system specifications.
We recommend reading this part carefully
in order to understand the subsequent
stages.
• For handling there are no particular instructions.
It is recommended, to assigned staff, to carry out
operation observing the common rules of accident
prevention.
• Make sure that all precautions for personal safety
have been taken.
• Before proceeding with installation, check the
supplied material to make sure it corresponds
to the order specification by examining the
identification labels.
• Equipment intended for installation in Restricted
Access Location performed by specialist technical
staff.
• Since the user is responsible for choosing the
surface to which the unit is to be anchored, we
do not supply the fixing devices for attaching the
unit firmly to the particular surface. The installer is
responsible for choosing fixing devices suitable for
the specific purpose on hand. Use methods and
materials capable of supporting at least 4 times the
weight of the device. Remember to use screws no
less than M8 (ISO261) or equivalent.
• The manufacturer declines all responsibility
for any damage caused by an improper use
of the appliances mentioned in this manual.
Furthermore, the manufacturer reserves the right
to modify its contents without any prior notice.
The documentation contained in this manual has
been collected and verified with great care. The
manufacturer, however, cannot take any liability
for its use. The same thing can be said for any
person or company involved in the creation and
production of this manual.
• Contact the manufacturer for information on the
dimensions of the flameproof joint.
• For all maintenance interventions, we recommend
you return the product to the laboratory that will
perform all required operations.
Summary of Contents for MAXIMUS MBX
Page 2: ......
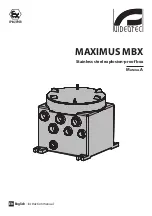
Page 3: ...EN English Instruction manual ENGLISH MAXIMUS MBX Stainless steel explosion proof box Manual A...
Page 4: ......
Page 6: ...EN English Instruction manual 4 MNVCMBX_1929_EN...
Page 22: ......
Page 24: ...IT Italiano Manuale di istruzioni 4 MNVCMBX_1929_IT...
Page 40: ......
Page 42: ...FR Fran ais Manuel d instructions 4 MNVCMBX_1929_FR...
Page 58: ......
Page 60: ...DE Deutsch Bedienungsanleitung 4 MNVCMBX_1929_DE...
Page 75: ...RU MAXIMUS MBX A...
Page 76: ......
Page 78: ...RU 4 MNVCMBX_1929_RU...
Page 79: ...RU 5 MNVCMBX_1929_RU 1 1 1 INFO 2 3 EN IEC 60079 14 EN IEC 60079 17 4mm 11AWG...
Page 80: ...RU 6 MNVCMBX_1929_RU VIDEOTEC IEC EN60079 19 VIDEOTEC INFO 4 M8 ISO261...
Page 86: ...RU 12 MNVCMBX_1929_RU 5 5 1 5 2 5 3 5 4...
Page 88: ...RU 14 MNVCMBX_1929_RU 5 7 IEC EN60079 14 6 6 VIDEOTEC 6 1 VIDEOTEC 7...
Page 89: ...RU 15 MNVCMBX_1929_RU 7 7 1 5mm 8 2012 19 RAEE 25cm...
Page 94: ......
Page 96: ...PT Portugu s Manual de instru es 4 MNVCMBX_1929_PT...
Page 111: ...KO MAXIMUS MBX A...
Page 112: ......
Page 114: ...KO 4 MNVCMBX_1929_KO...
Page 115: ...KO 5 MNVCMBX_1929_KO 1 1 1 INFO 2 3 EN IEC 60079 14 EN IEC 60079 17 4mm 11AWG...
Page 116: ...KO 6 MNVCMBX_1929_KO VIDEOTEC IEC EN60079 19 VIDEOTEC INFO 4 M8 ISO261...
Page 122: ...KO 12 MNVCMBX_1929_KO 5 5 1 5 2 5 3 O 5 4...
Page 124: ...KO 14 MNVCMBX_1929_KO 5 7 O IEC EN60079 14 6 6 VIDEOTEC 6 1 O VIDEOTEC 7...
Page 125: ...KO 15 MNVCMBX_1929_KO 7 7 1 5mm 8 WEEE 2012 19 EU 25cm...
Page 129: ......


