


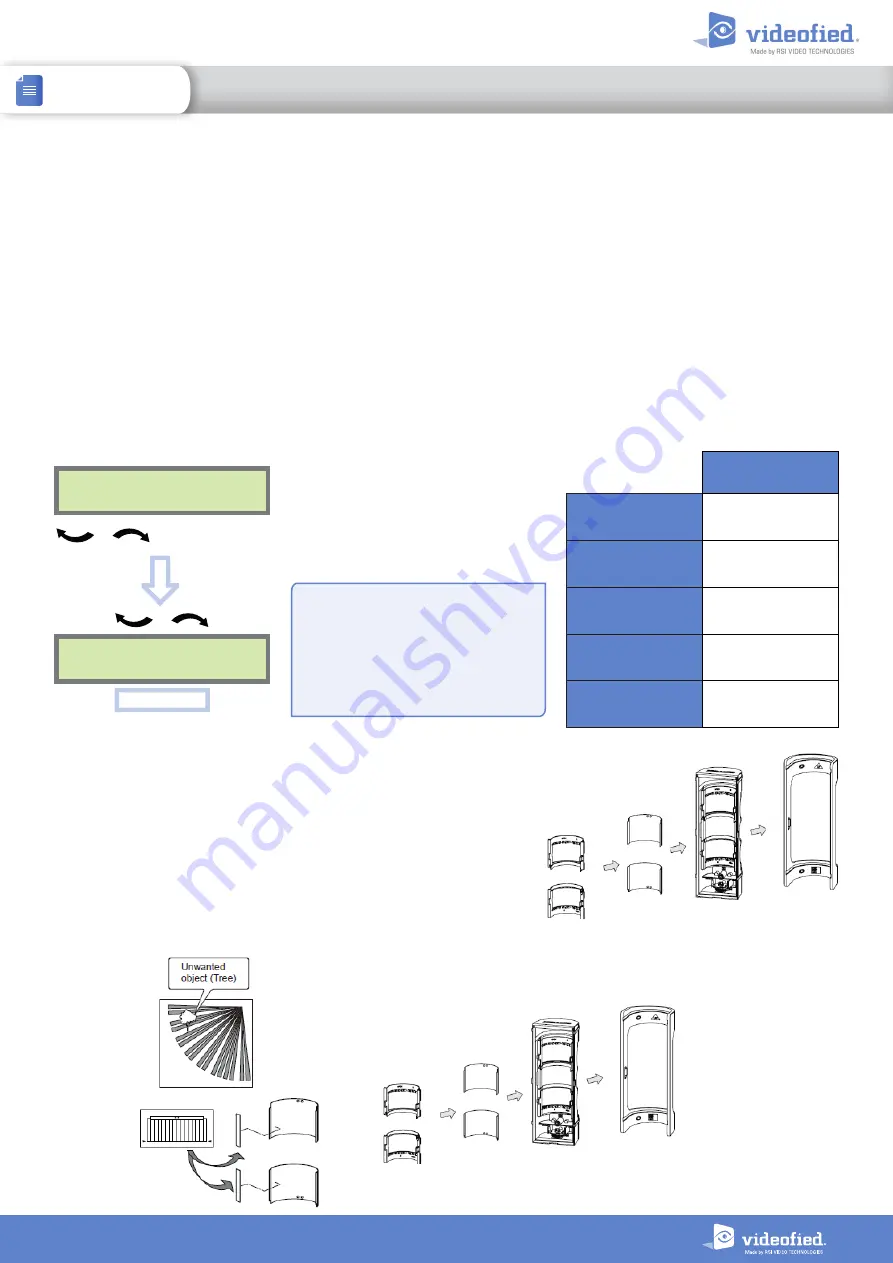
Disassembly
Reassembly
8
INSTALL SHEET
OMV-VX
OUTDOOR VISUAL VERIFICATION DETECTOR
Sensitivity adjustment
The OMV-VX detector comes with the capability of adjusting the sensitivity level of the PIR. It can improve the
detection or, on the contrary, reduce false alarms. Raising sensitivity will raise detection range, the detection field
will be larger and smaller thermal signatures will be detected. You should only use this feature when the site has
been diagnosed as needing this adjustment. It cannot be used to optimize detection as the adjustment may be too
high and generate either false alarms or missed intrusions.
Examples : Plant growth, pets.
Please note that the detector must be installed to prevent intrusions (aim the detector towards an access point),
sensitivity adjustment will have no effect if the installation doesn’t comply with the installation recommendations
described in this document.
Adjust sensitivity for the OMV-VX MotionViewer
To change the OMV-VX sensitivity, you need to change the
detector name
:
DEVICE
CONFIGURATION
CHANGE NAME
DEVICE
OK
or
YES
To select the OMV-VX
OK
or
YES
SENSITIVITY
ADJUSTMENT
MINIMAL
SENSITIVITY
detector_name
$2
LOW SENSITIVITY
detector_name
$1
DEFAULT
SENSITIVITY
detector_name
HIGH SENSITIVITY
detector_name
$8
MAXIMAL
SENSITIVITY
detector_name
$9
Enter the detector name then enter
the
$
symbol at the end and the
chosen digit (without space). The
number following $ will depend on
the necessary adjustment:
$ Symbol
CMA keypad
: Press @ repeatedly
until $ is displayed
XMA/XMB keypad
: Press
1
repeatedly until $ is displayed
Masking lens
The OMV-VX detector is provided with a masking kit. With this kit you
can inhibit specific zones in the detection field because elements in
those zones can generate false alarms, like a tree or a road.
After disassembling the detector, detach the precut elements from
the kit and place them directly behind the lens at the detection beam
location you wish to mask.
Once it is done, put the OMV-VX elements back together as shown
below.


