7
/
14
Supported functions:
(1)
Controlling GRBL-based CNC-machine via console commands, buttons on form, numpad.
(2)
Monitoring CNC-machine state.
(3)
Load, edit, save and send G-code files to CNC-machine.
(4)
Visualizing G-code files.
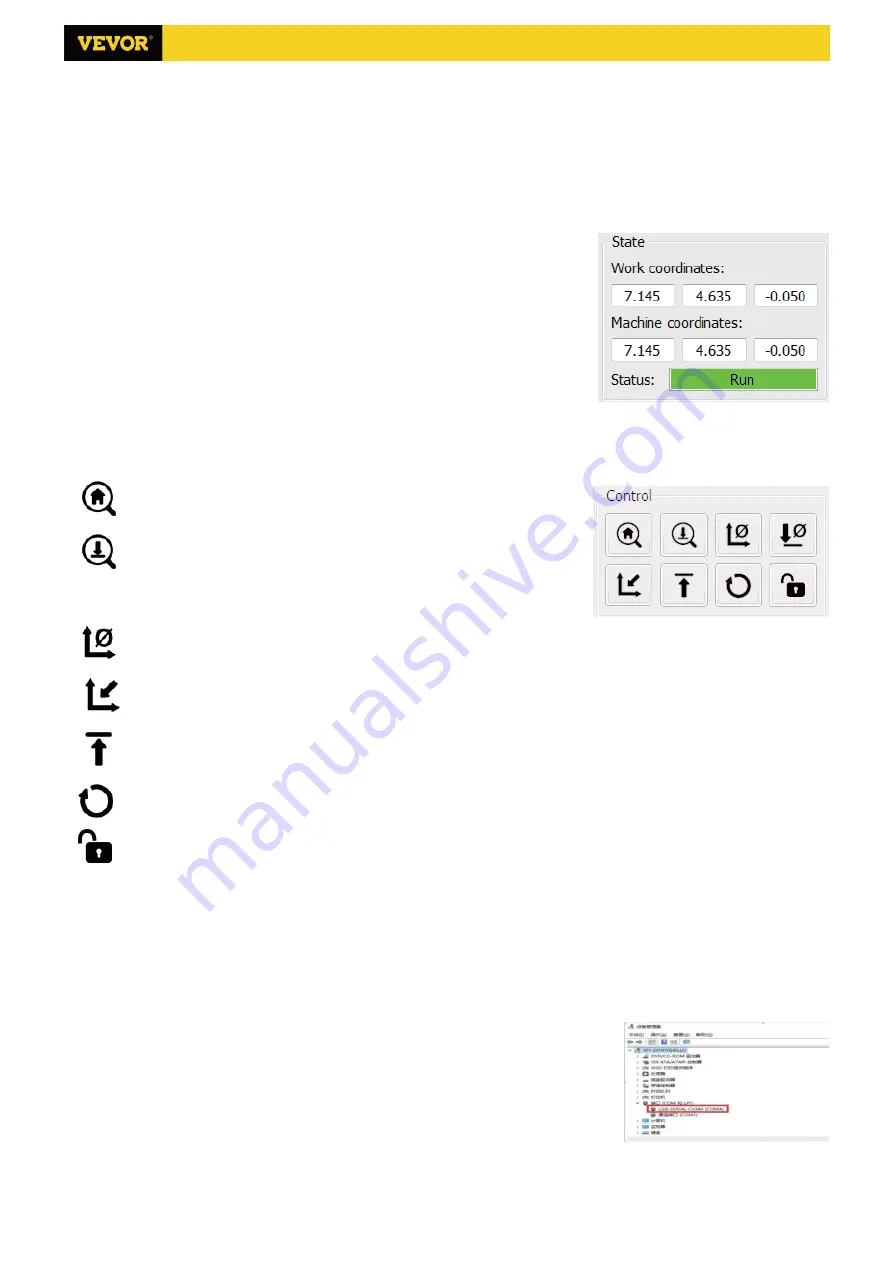
4.1 States
Work coordinates:
Represents current X, Y & Z local coordinates of the CNC.
Machine coordinates:
Represents current X, Y & Z absolute machine coordinates.
One of following CNC status:
Idle - waiting for a G-code command Running - running a G-code command
Home - homing cycle is executing
Check - G-code command check mode is turned on
Hold - paused by a "!" command, need to be restarted by a "~" command
Alarm - CNC doesn't know where it is and blocks all G-code commands
4.2 Control
Home button
Starts the homing cycle procedure with "$H" command
Z-probe
Starts the zero Z-axis search procedure using the command specified in the
settings
("Z-probe commands"
box).
Example
command:G91G21;
G38.2Z-30F100; G0Z1; G38.2Z-1F10
Zero X/Y
Zeroes the "X" and "Y" coordinates in the local coordinate system. Also retains an local system offset ("G92") for later use.
Restore X/Y/Z
Restores local system coordinates with "G92" command.
Safe Z
Moves tool by "Z"-axis to safe position. Position coordinate can be specified in the "Safe Z" setting. Position must be
specified in machine coordinates.
Reset
Resets CNC with "CTRL+X" command
Unlock
Unlocks CNC with "$X" command.
4.3 Software using steps
(1).
Install the driver
For the first time use, please connect the device to the computer via USB cable, and click the CH340-Driver.exe file in
the driver folder to install the driver. Under normal circumstances, the Win10 system will automatically identify and
install the driver. For Win7 and Win8 systems, please install it manually.
(2)
Set the port and connection
After installing the driver, open the device manager of the computer and click on
the port option to see the content inside the red box on the screen shown in the
figure below (the port information is in brackets).
Remember the port information queried above, switch to the
Candle
software
interface and click the "Settings" option in the upper left corner. Selecting the setting
will pop up the setting window. Under "Connection", select the port name you queried, select the baud rate 115200,
and then click the "ok" to finish the setting.
S3018 Pro Ver 2.3


