- Screw M3x20mm 2pcs
- Dowle 2pcs
- Power adapter
5.Installation
Note: For trouble-free videophone operation,please observe
the followinginstallationinstructions.
Do not install the monitor:
• in adusty
environment to prevent dust from
intrusion,
including other solid
the ingredients and substances tobeused,
• nearheat
sources or in a place
exposed
to
Thesunisover,
• inthe open airwith high humidity and condensation of steam
• in the vicinityof strong sources
of electromagnetic
• on unstable and uneven surfaces.
To install:
Preparea suitablecable according to the manufacturer's
instructionsfor
connecting
individual
depending on
their distance between them
and the end
ofthe
corresponding connectors. Selectthe
height
of the
monitor
after theinstalled installation
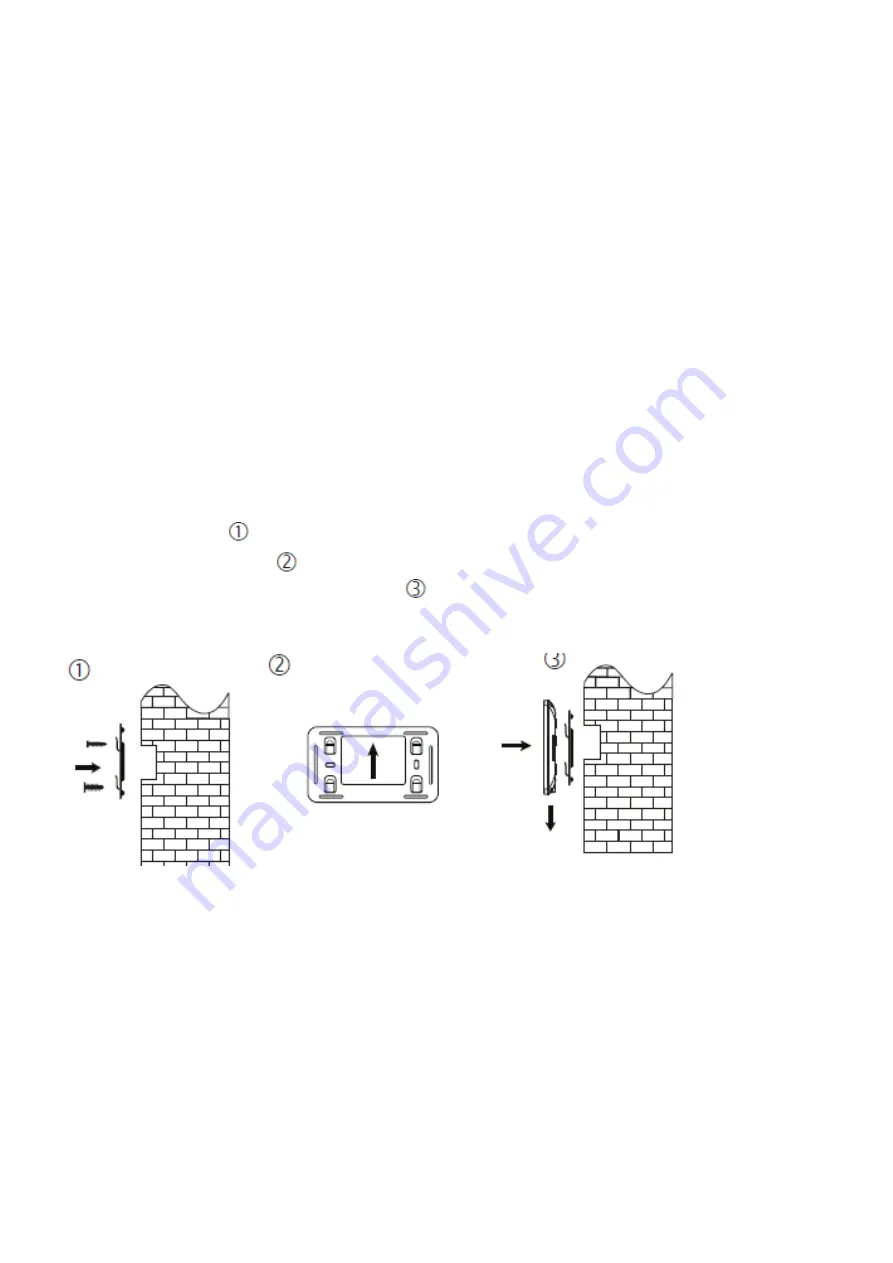
and fix the metal bracketwith
the
Horizontally. Make sure
theconsole is properly positioned
shown in the following figure.
Connect theconnectors to the monitor
andput it
on the console by moving it
downwards .
For installationuse thecorresponding cables with two copper cablesNoi, at
least
0.5mm²
.
The cable does
not need to betingled, usea
protective pipe
during installation.
For example,cables:
CYH 2x0.5 mm², H03VVH2-F 2x0.5mm², JYTY-O 2x1mm².
Installation canonly be carried
out by a person
who
is and usedforthe installation of VERIA videophone systems.


