


PCUSBVGA
19/02/2009
© 2008
Velleman Components nv
4
5.
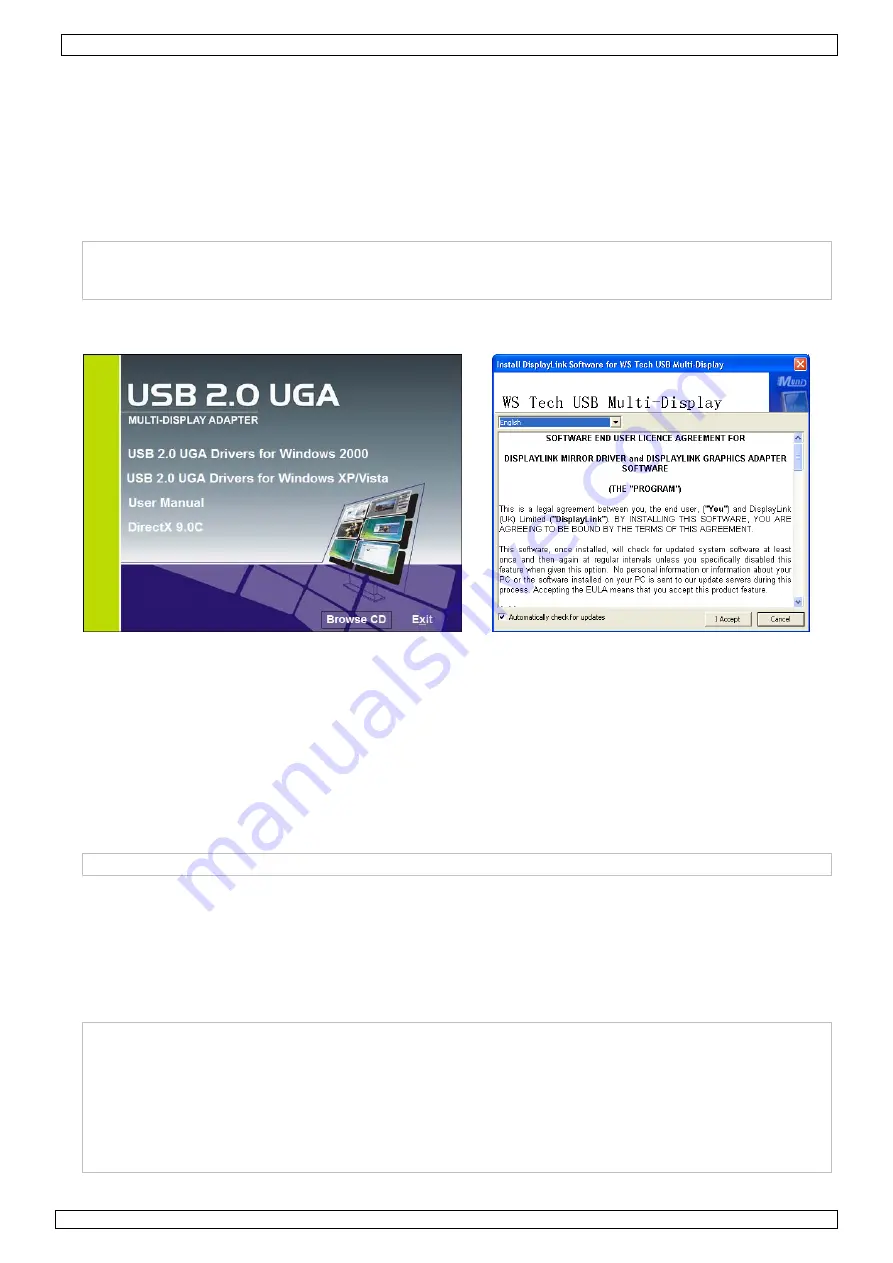
Windows driver installation
•
Before connecting the device to the PC, drivers must be installed. Close all applications before
continuing.
•
Place the included CD-ROM in the CD-reader. Note: only insert the disc in a loader that supports
mini-CD ROMs (8cm/3.15”).
•
When auto-play is enabled, the installation program starts automatically. If not, locate and double
click Setup.exe on the CD-ROM.
NOTICE:
→
Windows Vista: the User Account Control dialog box pops up when attempting to install a
program. Enter an administrator password or click ‘Allow’ to start the installation.
→
Windows 2000: Make sure all necessary Service Packs are present on the system.
•
In the opening screen (see below), click on the applicable operating system.
•
A window with the user licence agreement pops up (see above). Read it through and click on ‘I
accept’ to continue installation.
•
The system needs to be rebooted to finalize the installation. Click ‘Yes’ when the reboot prompt
appears.
6.
Adaptor installation
•
Refer to the illustrations on page 2 of this manual.
•
Plug the type B-connector (smaller) of the included USB cable into the ‘mini-B’ USB port [A] of the
PCUSBVGA. Plug the USB type A-connector (larger) into a free USB 2.0 port of the computer.
NOTICE:
→
The USB port must be type USB 2.0 or higher
•
Connect the DVI port [B] of the PCUSBVGA to a monitor. If the monitor has a DVI connector, use
a normal DVI cable (not incl.). To connect to an analogue VGA or HDMI monitor, use the
appropriate adaptor (included).
•
Switch on the monitor; the status LED [C] lights up. Windows will automatically finalize the
installation and the monitor will become active.
NOTICE:
→
Windows Vista: it is possible that the screen remains blank. In this case, reboot the system
again.
→
During installation, the added screen might flicker a couple of times. This is normal
behaviour.
→
There might be some delay before a first image is seen on the added screen.
→
Windows Vista Aero interface: the USB adaptor is not compatible with the Vista aero
interface. The interface is disabled and a warning that the colour scheme has been changed
is given. Unplug or uninstall the USB adaptor to automatically re-enable the Aero interface.


