background image

SELECTING MOUNTING LOCATION

The detector can be surface mounted or corner mounted. Always mount the unit on a sturdy
surface.
*  The detector should be mounted indoors, in areas that do not have openings constantly

exposed to the outside environment.

*  Select the mounting location so that the expected movement of an intruder will cross the

detection beams.

*  Do not locate detectors where hot or cold moving air will blow directly onto the unit.
*  Avoid aiming the detector at heating or air

conditioning vents or ducts, exterior metal
walls, exterior windows or curtains covering
windows, refrigerator or freezer grills or any
other surface that may change temperature
rapidly.

*  Avoid putting large objects in front of the

detector which will cause significant changes
in the area or volume protected.

* Select a location that the detector can

provide the largest coverage.

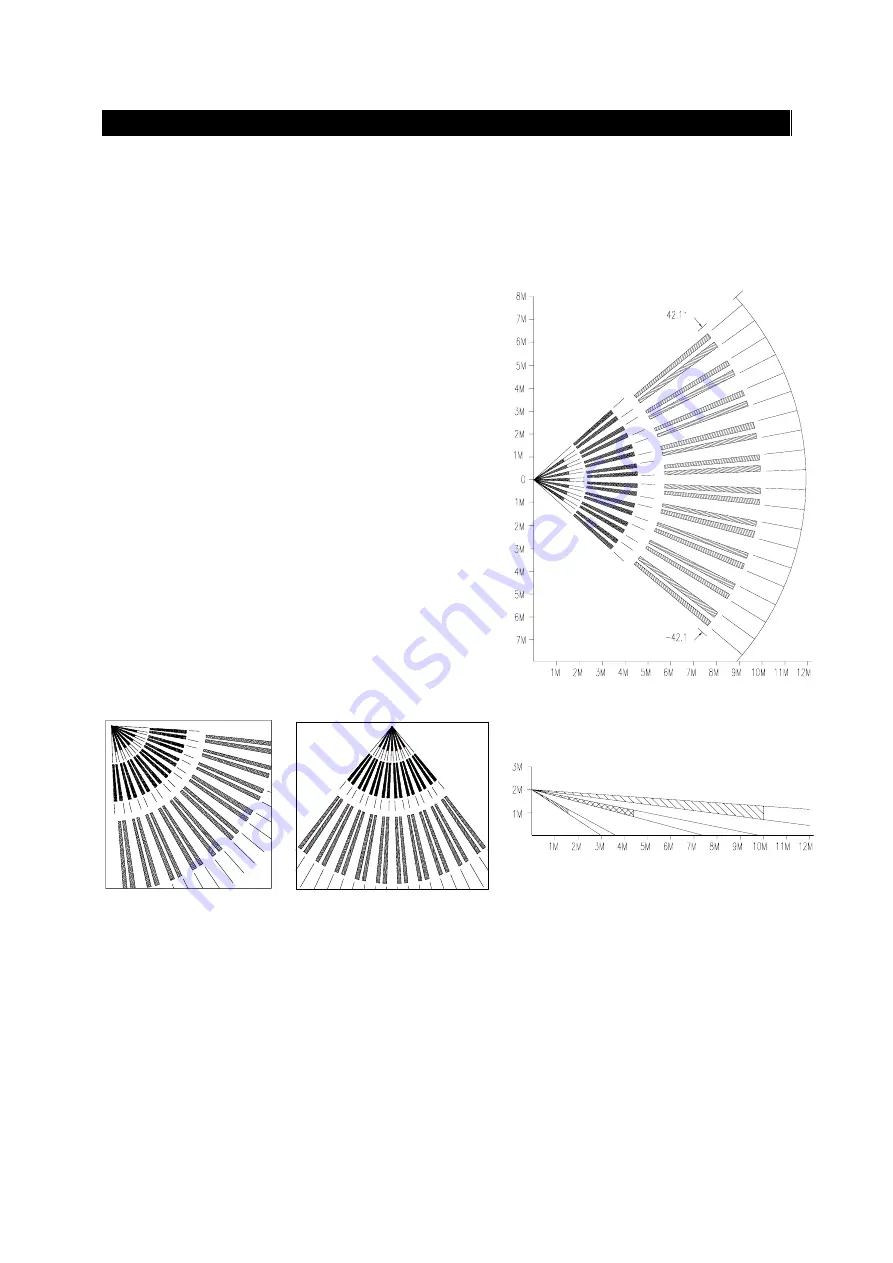
The installation location in figure A gives a larger protection area.

Figure A

Figure B

VERTICAL

HORIZONTAL

Summary of Contents for HAA51

Page 1: ...MODEL HAA51 PASSIVE INFRARED INTRUSION DETECTOR PASSIVE INFRAROOD DETECTOR DETECTEUR D INTRUSION PASSIF INFRAROUGE...

Page 2: ...substantial immunity to false alarms The HAA51 also employs a pulse count triggering circuit which provides further improvement in this respect HAA51 can also be selected for single shot triggering H...

Page 3: ...makes the detector go immediately into the alarm condition whenever an intruder moves in or out of the detection zone The detection circuit requires 1 pulse to activate it It is recommended to use sin...

Page 4: ...ed faulty detector Connect a DC voltmeter with minimum input impedance of 20KOhm V with its positive lead to the T P terminal and the negative lead to the 12V DC terminal as shown in the following dia...

Page 5: ...ot or cold moving air will blow directly onto the unit Avoid aiming the detector at heating or air conditioning vents or ducts exterior metal walls exterior windows or curtains covering windows refrig...

Page 6: ...TEST LED INDICATOR INTO THE INDICATOR HOLE AND KEEP THE HINGED LEVER OF THE TAMPER MICRO SWITCH PRESSED WHEN CLIPPING THE FRONT COVER TESTING a Set the LED selector to ALARM for testing purposes and...

Page 7: ...g levels of infrared energy Clear area of all people and pets If LED remains lit cover detector with heavy paper and wait 1 to 2 minutes If LED extinguishes check each detection zone to locate source...

Page 8: ...installation Mounting location Indoors only flat surface or corner mounting Operating voltage 10 5 16V DC Quiescent current 12mA typical Sensor Dual element pyroelectric sensor with day light filter...

Reviews: