CCTVPROM18
V. 02.1 – 30/01/2014
7
©Velleman nv
On the DVR:
1.
Set "ACTION" to ON.
2.
Select the system event or events you want to get notified about on your mobile device.
You will receive a text message whenever an event occurs.
8.2
Installing the EagleEyes App
Prerequisites
Before installing EagleEyes to your mobile phone for remote surveillance, make sure you have checked the following:
You have subscribed to and you can access mobile internet services for your mobile phone.
Note
: You may be charged for internet access via wireless or 3G networks. For the internet access rate details, please
check with your local network operator or service provider.
You have noted down the IP address, port number, user name and password used to access your network camera from
the internet.
Where to Download
1.
Connect to www.eagleeyescctv.com from your mobile device, and sign in.
Please do not try to download EagleEyes from your computer.
o
For Android, select the download link from the website to start downloading.
o
For iPhone and iPad, two versions of EagleEyes are available: EagleEyesHD Plus (at a fee), and EagleEyesHD Lite
(free).
2.
Select the version you want, and you will be directed to the App Store to download the application.
3.
When the download is completed, EagleEyes will install automatically to the default location or any location you choose.
Note
: For more details about configuring and operating EagleEyes, visit the website www.avtech.com.tw.
8.3
Configuration
Before configuring push status, make sure that:
The DVR system is set up as described in point
3. Connection and Setup
in the full manual on the included CD-ROM.
The DVR is connected to the internet.
The EagleEyes app is installed on your mobile device (see
Installing the EagleEyes App
above).
Steps
1.
Open EagleEyes, and add this DVR to the EagleEyes address book.
For more details about EagleEyes operation, visit www.eagleeyescctv.com.
2.
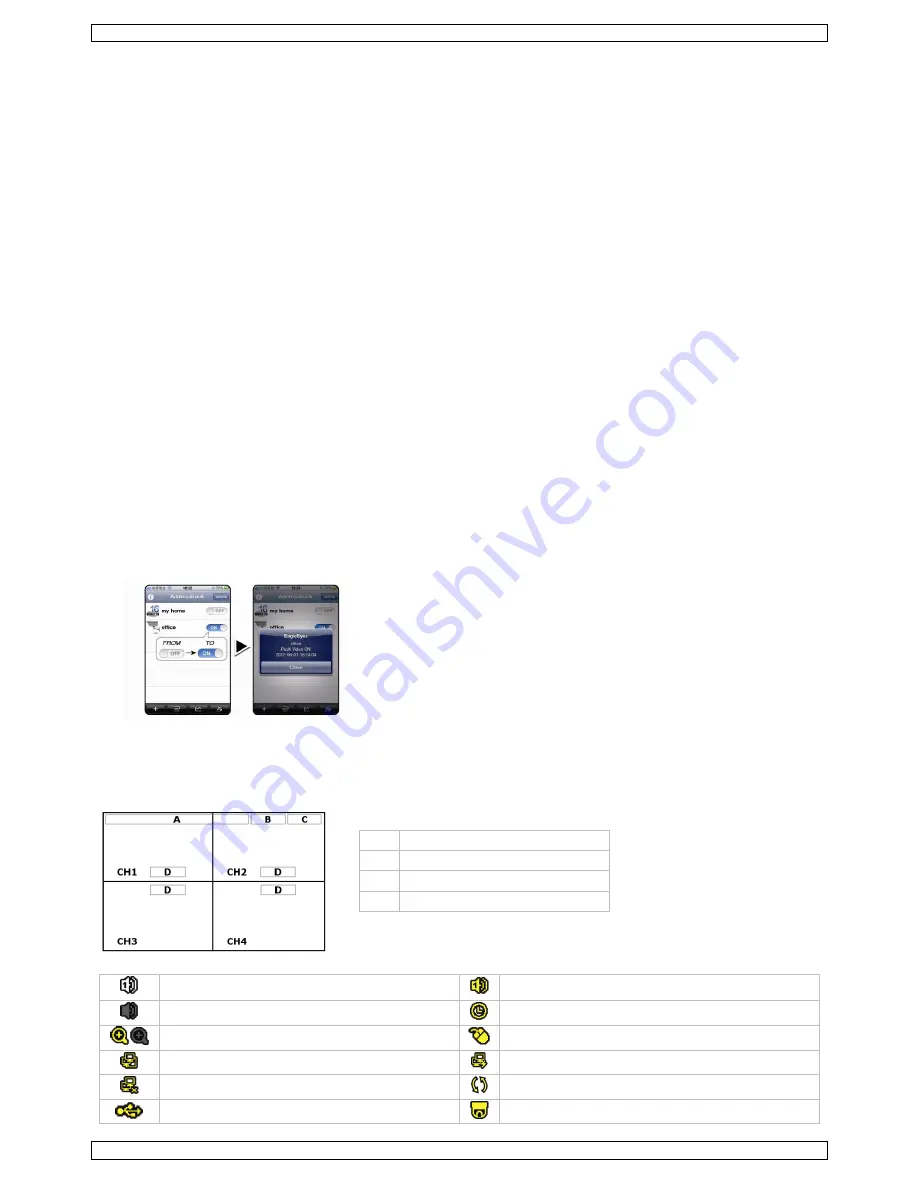
In the EagleEyes app, enable push status as described below.
3.
Try triggering an alarm event to see if you get a push status message.
9.
Operation
Display
The following image shows the screen layout.
A
system date and time
B
general system status
C
available HDD capacity
D
channel status
live audio channel 1–4 enabled
playback audio channel 1–4 enabled (yellow)
audio channel disabled
timer recording
digital zoom on (yellow) / off
USB mouse connected
LAN connected
internet connected
no network connection
hard disk overwrite (default)
USB flash drive connected
PTZ mode


