background image

Construction 


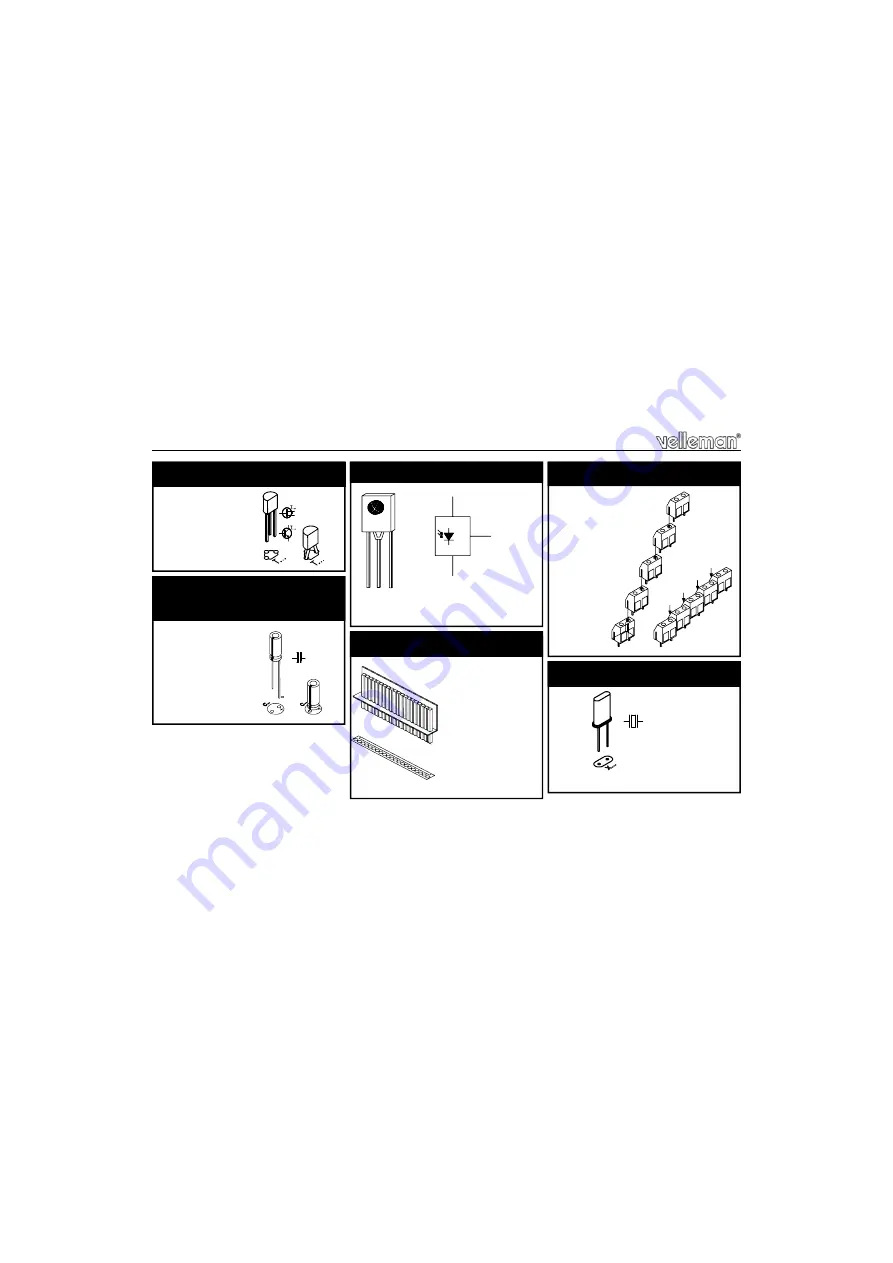
T1 : BC547B 

6. Transistor


C7 : 

10µF


7. Electrolytic capacitor. 
Watch the polarity !


C...


IRX1 

8. IR– Receiver


GND

+V

OUT

1  2  3 


SK11 : 5p 


SK12 : 20p 

9. Headers


SK1 


SK2 


SK3 


SK4 


SK5 


SK6 


SK7 


SK8 


SK9 


SK10 

10. Terminal blocks


X1 : 

4MHz 


11. Quartz crystal


X...

Summary of Contents for K8050

Page 1: ...infrared receiver K8050 ILLUSTRATED ASSEMBLY MANUAL H8050IP 1 Total solder points 248 Difficulty level beginner 1 2 3 4 5 advanced IR Remote control transmitters allow you to control 15 open collecto...

Page 2: ...5 independent outputs 15 rotary outputs 7 independent outputs 8 rotary outputs 7 rotary outputs 8 rotary outputs independent from each other 3 addressed allow the use of multiple receivers in one room...

Page 3: ...he eyes Needle nose pliers for bending leads or to hold components in place Small blade and Phillips screwdrivers A basic range is fine For some projects a basic multi meter is required or might be ha...

Page 4: ...the PCB surface and carefully solder the leads 2 Make sure the solder joints are cone shaped and shiny 3 Trim excess leads as close as possible to the solder joint REMOVE THEM FROM THE TAPE ONE AT A...

Page 5: ...polarity D CATHODE R8 390 3 9 1 B R9 390 3 9 1 B R10 390 3 9 1 B R11 390 3 9 1 B R12 390 3 9 1 B R13 390 3 9 1 B R14 390 3 9 1 B R15 390 3 9 1 B R16 390 3 9 1 B R17 10K 1 0 2 B R18 10K 1 0 2 B R19 10K...

Page 6: ...6 Transistor C7 10 F 7 Electrolytic capacitor Watch the polarity C IRX1 8 IR Receiver GND V OUT 1 3 2 1 2 3 SK11 5p SK12 20p 9 Headers SK1 SK2 SK3 SK4 SK5 SK6 SK7 SK8 SK9 SK10 10 Terminal blocks X1 4...

Page 7: ...A7805 12 Voltage regulator VR C8 1000 F 25V 13 Electrolytic capacitor Watch the polarity C IC1 VK8050 Programmed PIC16C55A 04 or equal IC2 ULN2003 or eq IC3 ULN2803 or eq 14 IC s Watch the posi tion o...

Page 8: ...puts independent from each other Momentary push button function Hold the key to activate the output and release the key to deactivate it Toggle function Operates according to the principle of a classi...

Page 9: ...D15 If a toggle output is needed MOUNT a diode for the corresponding output D1 to D15 ADDRESS SELECTION Different possibilities in conjunction with diode setup The address selection allows you to oper...

Page 10: ...0 the identification of the transmitter must be adjusted to that of the receiver Address 1 mount diode D4 Address 2 mount diode D6 Address 3 mount diode D5 SEVERAL IR RECEIVERS If you wish to connect...

Page 11: ...he circuit board but connect it to the board by means of a cable of the desired length USING SEVERAL RECEIVER INDICATIONS In case you want for each receiver a diagnostic LED connect them parallel and...

Page 12: ...e a 2x6 to 2x12VAC power supply to feed the receiver or connect an 8 to 14VDC power supply between the points GND and VA or VB Fig 2 0 Connect 2x6 to 2x12VAC or 8 to 14VDC 150mA see pag13 FIG 2 0 K805...

Page 13: ...st the outputs You can check each output for correct operation using a LED and resistor 390 in series Connect pin V of SK2 see point A with the left side of the resistor See fig 3 0 and connect the ca...

Page 14: ...to connect eventual relays Its advisable to use a separate power supply for the relays rather than to branch off from the power supply of the receiver Usage and connection 17 Usage and connection K80...

Page 15: ...15 Usage and connection FIG 5 0 7 13 VCOM 14 15 10 11 12 9 8 2 5 6 3 4 VB V 1 VA GND 7 8 9 2 6 5 4 3 VB GND 1 K6714 K8050 15 16 10 14 13 12 11...

Page 16: ...t one transformer instead of two Take care not to exceed the maximum current of the individual relays 50mA Usage and connection RY1 RY15 RY1 RY15 COIL 12VDC max 50mA K8050 8 VCOM 13 15 14 12 11 9 10 5...

Page 17: ...T0CKI 1 OSC2 CLKOUT 26 NC 3 NC 5 VDD 2 IC1 PIC16C55A V GND D17 D16 D18 D19 GND GND X1 C1 C2 C5 GND GND GND V R17 V OUT GND IRx1 GND V C6 R20 GND SK1 SK2 T1 BC547 R16 LD16 GND D20 D21 C8 GND I O GND VR...

Page 18: ...18 PCB 19 PCB...

Page 19: ...19...

Page 20: ...and typographical errors reserved Velleman Components nv H8050IP 2004 ED1 rev 1 0 VELLEMAN Components NV Legen Heirweg 33 9890 Gavere Belgium Europe www velleman be www velleman kit com 5 4 1 0 3 2 9...

Reviews: