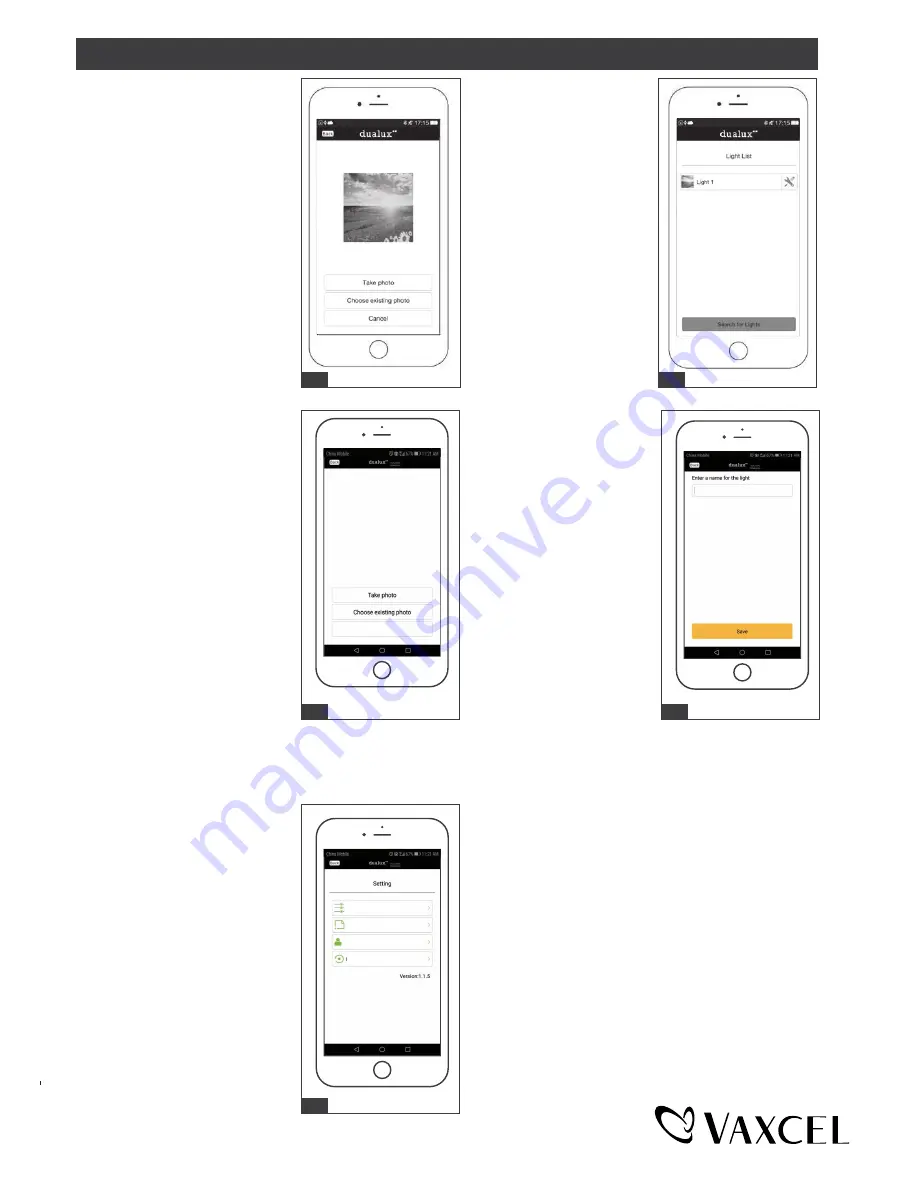
17. It will turn to “change image”.
The photo will show on it.
(Android will be slightly different
from the iOS system)
17
18. Go back to “Light list”, the
photo will show on the
left of “Light 1”.
18
19. Click “choose existing photo”
to choose a desired image on
your device. Then click
“Cancel” back to “Setting”
menu list.
20. Click Fig.13 “Rename light”
to enter a name for the
light, then click “Save”.
20
21. Click "Remove light" to remove
the device from the light list.
If you want to reconnect the
light, press "reset button" twice
within 5 seconds.
Note: 1. Manual control and App control
independently.
2. The function will execute the last
settings.
3. For achieving the best performance,
make sure the wall switch is in “ON”
state (daytime and nighttime).
USER GUIDE (continued)
21
Remove light
Rename light
Change image
Functions
19
Cancel
Page 10 / 17
211231


