background image

EN

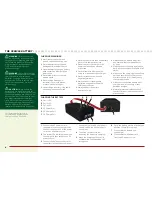
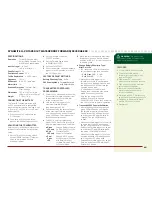
BindinG Procedure

1

  Ensure the transmitter and vehicle are both turned off.

2

  Insert the Bind plug (included) into the receiver slot  

labeled BIND. 

important:

 You do not need  

to remove any other plugs to rebind.

3

  Connect a fully charged battery to the EC3

 connector  

on the ESC.

4

  With the Bind plug installed, turn on the vehicle.  

The receiver LED will start to blink.

5

  Turn on the transmitter. The transmitter LED will  

start to blink.

6

  After a few seconds, the receiver and transmitter  

LEDs will turn solid, indicating they have been bound.

7

  Turn off the vehicle, then the transmitter.

8

  Remove the bind plug from the receiver.

9

  Turn on the transmitter and then the vehicle to ensure 

operation. If the transmitter does not control the vehicle, 

repeat steps 1 –8 above. If after several attempts you are  

unsuccessful, please contact Horizon product support.

transmitter and reCeiVer bindinG 

 / / / / / / / / / / / / / / /


/ / / / / / / / / / / / / / / / / / / / / / / / / / / / / / / / / / / / / / / / / / / / / / / / / / / / /

Control test 

 / / / / / / / / / / / / / / /


/ / / / / / / / / / / / / / / / / / / / / / / / / / / / / / / / / / / / / / / / / / / / / / / / / / / / / / / / / / / / / / / / / / / / / / / / /

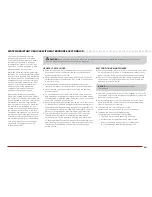
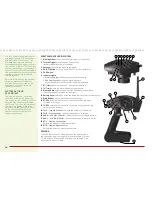
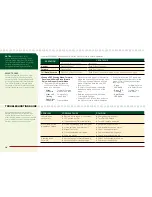
Perform a control test with the vehicle 

wheels off the ground. If the wheels 

rotate after the vehicle is powered  

ON, adjust the “TH. Trim” knob until 

they stop. To make the wheels move 

forward, pull the trigger. To reverse 

them, wait for the wheels to stop, 

then push the trigger. When moving 

forward, the wheels should maintain 

a straight line without any steering 

wheel input. If not, adjust the “ST. 

Trim” knob so the wheels maintain  

a straight line without having to  

turn the steering wheel.

Binding is the process of program-

ming the receiver to recognize the 

GUID (Globally Unique Identifier) code 

of a single specific transmitter. You 

need to ‘bind’ your chosen Spektrum


DSM

®

 technology equipped vehicle 

transmitter to the receiver for proper 

operation. The DX3E transmitter and 

SR300WP receiver are pre-bound  

at the factory. If you need to rebind, 

follow these instructions.

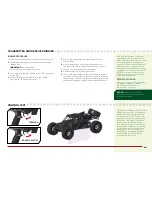
receiVer antenna

Using your fingers, gently straighten 

the antenna wire to be close to  

vertical from the chassis for  

the best radio reception.

notiCe:

 Do not cut or bend the 

receiver antenna or damage to the 

receiver may result.

Brake/reVerSe

forWard

Summary of Contents for TWIN HAMMERS KIT

Page 1: ...owner s manual bedienungsanleitung manuel de l utilisateur manuale dell utente twin hammers...

Page 2: ......

Page 3: ...EN...

Page 4: ...ual to become familiar with the features of the product before operating Failure to operate the product correctly can result in damage to the product personal property and cause serious injury This is...

Page 5: ...ed air to dry the vehicle and help remove any water that may have gotten into small crevices or corners Spray the bearings drive train fasteners and other metal parts with WD 40 solvent or any other w...

Page 6: ...er Only use alkaline or rechargeable batteries 4 Install the fully charged battery in the vehicle 5 Power ON the transmitter and then the vehicle Always power the transmitter ON before the vehicle and...

Page 7: ...tape VTR70000 Use only Dynamite tools or other high quality tools Use of inexpensive tools can cause damage to the small screws and parts used on this type of model EN 1 10 Scale Twin Hammers 4WD Rock...

Page 8: ...se caution while using this product and comply with the following warnings could result in product malfunction electrical issues excessive heat FIRE and ultimately injury and property damage WARNING N...

Page 9: ...mitter Batteries 1 Push in the battery cover a small amount to release the retaining tab then remove the cover 2 Install 4 AA batteries taking care to align the battery polarity to the diagram in the...

Page 10: ...t Adjusts the amount of high AUX travel 17 AUX L AUX Low Endpoint Adjusts the amount of low AUX travel 18 ST L Steering Left Endpoint Adjusts the amount of left steering travel 19 ST R Steering Right...

Page 11: ...a control test with the vehicle wheels off the ground If the wheels rotate after the vehicle is powered ON adjust the TH Trim knob until they stop To make the wheels move forward pull the trigger To...

Page 12: ...he vehicle sitting at its normal ride height Keep your vehicle clean by using a soft brush to remove dirt and dust Look for cracks in the suspension arms and other molded parts Check the beadlock whee...

Page 13: ...r and set the transmitter s throttle endpoint travel to maximum and the throttle trim to the center position 2 Hold the throttle trigger at the maximum forward position then power on the ESC 3 Continu...

Page 14: ...Green flashing 3x c Change ESC Running Mode Forward Reverse with Smart Brake Forward Only with Brake or Crawler Mode The green LED will indicate the currently selected ESC running mode for 4 seconds G...

Page 15: ...sole and exclusive remedy shall be that Horizon will at its option either i service or ii replace any Product determined by Horizon to be defective Horizon reserves the right to inspect any and all Pr...

Page 16: ...y support or service Once assembly setup or use of the Product has been started you must contact your local distributor or Horizon directly This will enable Horizon to better answer your questions and...

Page 17: ...s and feet and the antenna to meet RF exposure safety requirements as determined by FCC regulations The following illustrations show the approximate 5 cm RF exposure area and typical hand placement wh...

Reviews: