background image


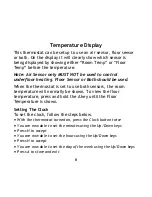
Temperature Display


This thermostat can be setup to use an air sensor, floor sensor 
or both. On the display it will clearly show which sensor is 

being displayed by showing either “Room Temp” or “Floor 
Temp” before the temperature. 


Note: Air Sensor only MUST NOT be used to control 
underfloor heating. Floor Sensor or Both should be used. 


When the thermostat is set to use both sensors, the room 

temperature will normally be shown. To view the floor 
temperature, press and hold the A key until the Floor 
Temperature is shown. 


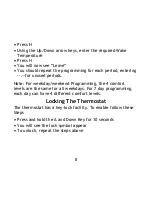
Setting The Clock


To set the clock, follow the steps below.


• 

With the thermostat turned on, press the Clock button twice 

• 

You are now able to set the minutes using the Up/Down keys 

• 

Press H to accept 

• 

You are now able to set the hours using the Up/Down keys 

• 

Press H to accept 

• 

You are now able to set the day of the week using the Up/Down keys 

• 

Press A to store and exit 

Summary of Contents for FH-01

Page 1: ...1 Operating Instructions Model FH 01 230V A C 16Amp Digital Thermostat Programmer For Electric Underfloor Heating Version 2 April 2010...

Page 2: ...6 Setting the Clock 6 Setting the Comfort Levels 7 Keypad Lock Facility 8 Temperature Hold 9 Setting the Temperature 9 Holiday Feature 10 Frost Protection Power On Off 11 Factory Reset 11 Operating Mo...

Page 3: ...he thermostat should be mounted in a 35mm min deep back box Step 1 Carefully separate the front half of the thermostat from the back plate by placing a small flat head terminal driver into the slots o...

Page 4: ...4 LCD Display Controls 01 02 03 04 05 06 07 08 09 10 11 12 13 14 15 16 17 18...

Page 5: ...am Cycle Indicator Displayed during programming only to show which period is being altered 8 Holiday Indicator Displayed when the programmer is in holiday mode 9 Clock Button 10 Power Button 11 H Butt...

Page 6: ...e thermostat is set to use both sensors the room temperature will normally be shown To view the floor temperature press and hold the A key until the Floor Temperature is shown Setting The Clock To set...

Page 7: ...these can be changed easily The default times are 08 00 21 C Wake 09 30 16 C Leave 16 30 22 C Return 23 00 17 C Sleep If you only want to use 2 levels you should program the unused levels to To begin...

Page 8: ...d periods Note For weekday weekend Programming the 4 comfort levels are the same for all weekdays For 7 day programming each day can have 4 different comfort levels Locking The Thermostat The thermost...

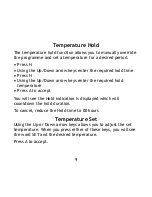
Page 9: ...H Using the Up Down arrow keys enter the required hold temperature Press A to accept You will see the Hold indication is displayed which will countdown the hold duration To cancel reduce the Hold time...

Page 10: ...r holiday the thermostat will revert back to the programmed setting ensuring that your home is warm on your arrival Press H three times Until you see the suitcase Using the Up Down arrow keys enter th...

Page 11: ...ost protect mode press the Power button Thermostat Off To turn the thermostat off completely press and hold the Power button The display and heating output will be turned off To turn the thermostat ba...

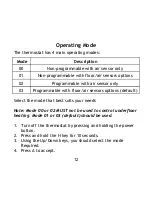
Page 12: ...fault Operating Mode The thermostat has 4 main operating modes Select the mode that best suits your needs Note Mode 00 or 02 MUST not be used to control underfloor heating Mode 01 or 03 default should...

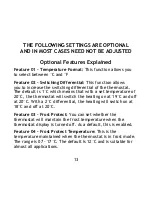
Page 13: ...at with a set temperature of 20 C the thermostat will switch the heating on at 19 C and off at 20 C With a 2 C differential the heating will switch on at 18 C and off at 20 C Feature 03 Frost Protect...

Page 14: ...arrow keys This limit is also applicable when the thermostat is locked and so allows you to give others limited control over the heating system Feature 08 Sensor Selection On this thermostat you can...

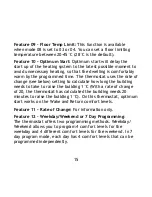
Page 15: ...setting to calculate how long the building needs to take to raise the building 1 C With a rate of change of 20 the thermostat has calculated the building needs 20 minutes to raise the building 1 C On...

Page 16: ...small number is the feature number the large number is the setting value 3 Use the clock button to cycle through the features 4 Use the Up Down keys to change the setting 5 Press A to accept and store...

Page 17: ...00 MUST not 01 Remote Air Sensor be used for 02 Floor Sensor Only Underfloor heating 03 Floor Sensor and Built in Air Sensor 04 Floor Sensor and Remote Air Sensor 09 Floor Temp Limit 20 45 C 28 C Defa...

Page 18: ...g Element Neutral 5 230V Supply Neutral 6 Heating Element Live 7 230V Supply Live nb generally underfloor heating elements floor sensors are not polarity conscious as such can be connected to the live...

Page 19: ...19 Notes E1 Floor Sensor is not connected or is faulty E2 Remote Air Sensor is not connected or is faulty E3 Built In Air Sensor is not connected or is faulty Error Codes...

Page 20: ...20...

Reviews: