background image

Adjustments & Maintenance 

Note:

 Before performing maintenance, ensure all mo‐

on has stopped and that the Power Unit is powered 

down with igni on key removed.  Before working on 
or underneath the mower, place blocks on both sides 
of the Power Unit’s  res and underneath both ends of 
the mower to prevent accidental lowering of the ma‐
chine. 


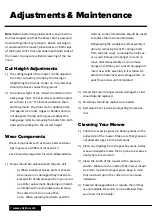
Cut Height Adjustments


1)  The cu ng height of the mower can be adjusted 

from 0‐4”. Adjus ng is done by shortening or 
lengthening the top‐link. Under no circumstances 
should the knives contact the ground! 

2)  The en re weight of the mower should be on the 

back gauge roller. The skid shoes should be adjust‐
ed so there is 1/2”‐3” clearance between them 
and the ground. The shoes are for added protec‐

on against tree roots, ridges or borders and are 

not designed to slide on the ground. Adjust the 
back gauge roller by removing the bolts from both 
sides and rese ng It to the correct height. 


Wear Components


 Wear components such as knives, belts and bear‐

ings may wear at different rates and so      

      each should be inspected for wear independently. 
 

1)  Knives should be replaced when they are dull.  


A) 

When individual knives, bolts or spacers 

become worn or damaged they must be re‐
placed with hardware saved from your previ‐
ous knife replacement. Replacing an individ‐
ual sta on with new hardware could cause  
the cu er drum to run out of bal‐
ance.  When replacing hardware at all the 

sta ons, some old hardware should be saved 
to replace future broken hardware. 


B) Replacing the complete knife assembly is 
done by removing the 3/8” carriage bolts 
from the hole cover, removing the hole cov‐
er as well. Remove the hanger rod and re‐
move old knife assembly as you remove 
hanger rod. When you re‐insert hanging rod 
insert new knife assembly in its sta on. Re‐
a ach the hole cover and carriage bolts, re‐
peat this process un l completed. 


2)  Decals that are no longer visible, damaged, or lost 

should also be replaced. 

3)  Skid shoes should be replaced as needed. 

4)  Belt adjustment is done by adjus ng the tension 

rod.  


Cleaning Your Mower


1)  Check for excessive grease in bearing areas on the 

pulley side of the mower. Make sure that grease is 
not allowed to get into the belt areas. 

2)  Clean any clippings from the gearbox areas, pulley 

areas and anywhere else that is prone to excessive 
heat where fire can start. 

3)  Clean the inside of the mower with a pressure 

washer. Make sure the inside of the mower is kept 
free from mud and compact grass. Keep in mind 
that mud built up on the cu er drum can cause 
imbalance. 

4)  Preserve damaged decals or replace them if they 

are unreadable. Decal kits can be obtained from 
your local Vrisimo dealer. 


7  

www.vrisimo.com      


Summary of Contents for Vrisimo Sanitizer

Page 1: ...PO Box 220 2507 Tully Rd Hughson CA 95326 USA 800 426 5615 Sanitizer OWNER S MANUAL Sanitizer by Version 2 2 Release Date Dec 2017 Serial Number VT17326 XXXXXX and A er...

Page 2: ......

Page 3: ...l shields in place Belts checked for proper adjustment PTO shaft checked for proper length Procedures for attaching mower shredder to tractor demonstrated to end user Starting procedures explained to...

Page 4: ......

Page 5: ...dure 5 Running Your Mower 6 Adjustments and Maintenance Cu ng Height and Belt Adjustment 7 Replacing Knives 7 Cleaning Mower 7 Lubrica on 9 Transport Removal and Storage 9 Frequently Asked Ques ons 11...

Page 6: ...provements in its products without any obliga on upon itself to install them on its products previ ously manufactured If at any me you require addi onal informa on consult your authorized dealer or th...

Page 7: ...PTO sha s and gearboxes or other parts not manufactured by Vrisimo Equipment Such being subject to the warran ty of their respec ve manufacturers No expressed implied or statutory warranty other than...

Page 8: ...ocky areas as this could create dangerous dis charge Never allow children or other persons to ride on this mower Keep bystanders and children clear of the work area during opera on as debris can be di...

Page 9: ...language Be sure to inspect all safety devices before each use If safety devices are worn in such a way that they can no longer properly perform their guarding func on contact your nearest Vrisimo de...

Page 10: ...front of the machine so that the li links are in line with the mower s hitch pins 2 Shut o the engine and disengage the PTO Block the tractor s wheels before placing yourself be tween the tractor and...

Page 11: ...s along the ground 4 Adjust the sway bars so that there is a minimum side slack and be sure the stabilizers are ght 5 A ach the tractor s top link to the A frame of the a achment and adjust the top li...

Page 12: ...rom your previ ous knife replacement Replacing an individ ual sta on with new hardware could cause the cu er drum to run out of bal ance When replacing hardware at all the sta ons some old hardware sh...

Page 13: ...Sanitizer by 8 Skid Shoe Back Roll Adjustment Keep Undercarriage Clean...

Page 14: ...tractor and mower 3 Remove the safety pins from the lower two link points Remove the tractor arms from pin loca ons and re insert the pins for storage d Storage 1 Put the drive sha away in a clean dr...

Page 15: ...Roll Bearings NOTE 1 Remove grease from belts 2 Check for excessive grease on bearings 3 Clean Pulley Assembly of any debris a er every use Chain down loca ons Lubricate Back Roll Bearings Remove link...

Page 16: ...l before I use the mower R No the gearbox comes full with oil Use 90 weight oil when replacing Q What do I do if my belts are wearing out too fast or burning up R First check belt tension Belts should...

Page 17: ...ar as the grade of cut you will get but rather safety advantages as stated above Q How do I reverse cu er drum rota on R To reverse cu er drum rota on simply un mount the gearbox from its current posi...

Page 18: ...13 www vrisimo com...

Page 19: ...Parts Catalog Sanitizer by Parts Catalog 120 Inch 144 Inch 14...

Page 20: ...619 7 Skid Shoe Le 1 All 1062 VR 3 8 Skid Shoe Right Not Shown 1 All 1061 VR 3 1 2 3 4 5 11 10 9 12 14 15 16 17 Descrip on Qty Model P N 9 Top sha extension guard 1 All M 4016 10 Pillow Block Bearing...

Page 21: ...Shown 8 SM2120 2670 VR 2 6 Hanger Rod 8 SM2144 2709 VR 2 7 Hole Cover 8 All 2676 VR 3 8 Flight A Not Shown 1 SM2120 04233 9 Flight B Not Shown 1 SM2120 04234 10 Flight A 1 SM2144 04237 11 Flight B 1 S...

Page 22: ...Assembly 1 C Joint Tube half Assembly With Guard 1 D Joint Tube half Assembly 1 1 SSL Auto lock Repair Kit Drive line 1 2 Safety Slide Lock Yoke Assembly 2 3 35E Cross Bearing Kit 2 4 Yoke Shaft 1 5...

Page 23: ...A R 13 Shim Output Shaft 0 4 mm All BP 2813 A R 14 Shim Output Shaft 0 2 mm All BP 2814 A R 15 Shim Input Shaft 0 6 mm All BP 2815 A R 16 Shim Input Shaft 0 8 mm All BP 2816 A R 17 Shim Input Shaft 1...

Page 24: ...Decals 19 www vrisimo com...

Page 25: ...20...

Page 26: ...Decals 21 www vrisimo com...

Page 27: ...22 General...

Page 28: ...23 www vrisimo com Torque Specifications...

Page 29: ...24 Notes...

Page 30: ...25 www vrisimo com Notes...

Page 31: ......

Page 32: ...Sanitizer OWNER S MANUAL PO Box 220 2507 Tully Rd Hughson CA 95326 USA 800 426 5615 www Valleytoolmfg com Sanitizer by...

Reviews: