background image

PhotoDoc-It Imaging System 


10


Warranty 
 

UVP's products are guaranteed to be free of defects in materials, workmanship and manufacture for one (1) year from 
date of purchase. Consumable and disposable parts including, but not limited to tubes and filters, are guaranteed to be 
free from defects in manufacture and materials for ninety (90) days from date of purchase. Transilluminators carry a two 
(2) year warranty from date of purchase. If equipment failure or malfunction occurs during the warranty period, UVP shall 
examine the inoperative equipment and have the option of repairing or replacing any part(s) which, in the judgment of 
UVP, were originally defective or became so under conditions of normal usage and service. 

No warranty shall apply to this instrument, or part thereof, that has been subject to accident, negligence, alteration, abuse 
or misuse by the end-user. Moreover, UVP makes no warranties whatsoever with respect to parts not supplied by UVP or 
that have been installed, used and/or serviced other than in strict compliance with instructions appearing in this manual.  

In no event shall UVP be responsible to the end-user for any incidental or consequential damages, whether 
foreseeable or not, including but not limited to property damage, inability to use equipment, lost business, lost profits, or 
inconvenience arising out of or connected with the use of instruments produced by UVP. Nor is UVP liable or 
responsible for any personal injuries occurring as a result of the use, installation and/or servicing of equipment. 

This warranty does not supersede any statutory rights that may be available in certain countries. 


Doc-It is a registered trademark of UVP, LLC. PhotoDoc-It and Visi-Blue are trademarks of UVP, LLC.


Summary of Contents for PhotoDoc-It

Page 1: ... UVP LLC Ultra Violet Products Ltd 2066 W 11th Street Upland CA 91786 Unit 1 Trinity Hall Farm Estate Tel 800 452 6788 909 946 3197 Nuffield Road Cambridge CB4 1TG UK Fax 909 946 3597 Tel 44 0 1223 420022 Fax 44 0 1223 420561 Web site www uvp com 81 0270 01 Rev L ...

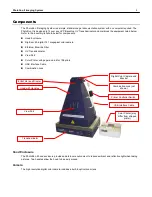
Page 2: ...UV Transilluminator View Port Color Printer with paper and ink for 108 prints USB Interface Cable Combination Lock Hood Enclosure The PhotoDoc It hood enclosure provides a darkroom environment to reduce ambient and reflective light when taking pictures Two handles allow the hood to be easily moved Camera The high resolution digital color camera includes a built in optical zoom lens Digital Color C...

Page 3: ... includes an ultraviolet blocking cover however the cover should be removed when the transilluminator is used with the system Gel Viewer Window The Gel Viewer Window is comprised of a UV blocking material to provide safe sample viewing without removing the hood Opening the Gel Viewer Window allows users to view the actual gel without exposure to UV and without having to turn off the UV transillumi...

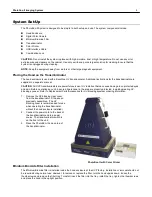
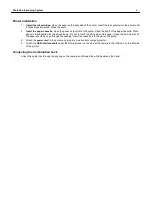
Page 4: ...ed eyes and skin Before operating any unit be sure all personnel in the area are properly protected including wearing UV blocking eyewear Refer to Replacement Parts Accessories for UV blocking eyewear ordering information 1 Remove the UV blocking clear cover from the transilluminator if it has been previously assembled The UV blocking cover is recommended for use when operating the transilluminato...

Page 5: ...r connection on or off Should the camera need to be removed use the provided Allen wrench to unscrew the black Allen bolt on the front of the bracket Use a Phillips head screwdriver to remove the three screws from the top of the bracket and remove the bracket component for access to the camera Camera Buttons 1 Power On Off Button 1 2 Camera Shutter Button 2 3 Face Selector Button 3 4 Playback Butt...

Page 6: ...e cassette with the shiny side up Try not to touch the shiny side of the paper Close the lid A portion of the paper should be seen through the opening Insert the cassette into the slot on the printer 3 Attach the power cord to the printer and plug into a wall outlet or surge protector 4 Attach the USB interface cable under the terminal cover on the side of the camera to the USB port on the left si...

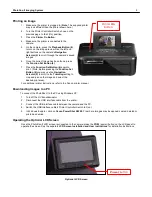
Page 7: ...op of the transilluminator 5 Turn the transilluminator ON Capturing an Image 1 Press the Power On Off Button 1 to turn the camera on NOTE Prior to taking a picture ensure that the Printer Controller Switch is set to O off 2 Ensure that the flash is deactivated prior to taking pictures Press the flash indicator on the right of the Navigation Selector 5 until the screen shows a symbol with the flash...

Page 8: ...he Function Set Button 6 you may use the Navigation Selector 5 to scroll to the Trimming setting to crop and pan on the image and select the desired print area For additional printer instructions refer to the Canon printer manual Downloading Images to a PC To connect the PhotoDoc It to the PC using Windows XP 1 Turn off the UV transilluminator 2 Disconnect the USB interface cable from the printer ...

Page 9: ...ncluded for use with the Visi Blue Converter Plate Ordering Information Description Part Numbers Paper and Ink KP 108IP for 108 shots 96 0164 01 Combination Lock with Cable 89 0387 01 Doc It LS Analysis Software 97 0185 02 LCD Screen 98 0093 01 UV to White Light Converter Plate 25x26cm 38 0191 04 Visi Blue Converter Plate 25x26cm 38 0200 04 UV to 365nm Converter Plate 25x26cm 38 0325 01 Filter 50m...

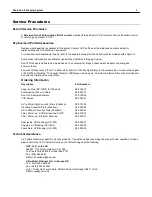
Page 10: ...or part thereof that has been subject to accident negligence alteration abuse or misuse by the end user Moreover UVP makes no warranties whatsoever with respect to parts not supplied by UVP or that have been installed used and or serviced other than in strict compliance with instructions appearing in this manual In no event shall UVP be responsible to the end user for any incidental or consequenti...

Reviews: