2LV/2L1/2L2/2MS/2MT
1-5-15
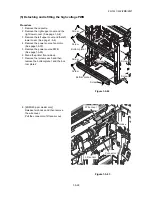
1-5-5 Drum section
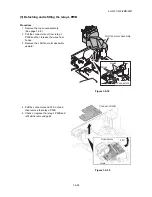
(1) Detaching and refitting the drum unit
Procedure
1. Remove the developer unit.
(See page 1-5-13)
2. Remove the lock lever L.
3. Remove the lock lever R by sliding
backward.
4. Remove the drum unit by sliding
forward.
5. Check or replace the drum unit and refit
all the removed parts.
Figure 1-5-23
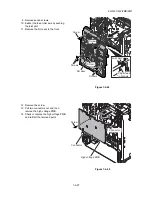
(2) Detaching and refitting the chager roller unit
Procedure
1. Release the lock lever and then remove
the chager roller unit.
2. Check or replace the charger roller unit
and refit all the removed parts.
Figure 1-5-24
Drum unit
Lock
lever L
Lock
lever R
Durm unit
Lock lever
Main chager roller unit
Summary of Contents for P-4030D
Page 11: ...This page is intentionally left blank ...
Page 15: ...2LV 2L1 2L2 2MS 2MT This page is intentionally left blank ...
Page 25: ...2LV 2L1 2L2 2MS 2MT 1 1 10 This page is intentionally left blank ...
Page 63: ...2LV 2L1 2L2 2MS 2MT 1 3 24 This page is intentionally left blank ...
Page 99: ...2LV 2L1 2L2 2MS 2MT 1 4 36 This page is intentionally left blank ...
Page 130: ...2LV 2L1 2L2 2MS 2MT 1 5 32 This page is intentionally left blank ...
Page 147: ...2LV 2L1 2L2 2MS 2MT 2 1 14 This page is intentionally left blank ...
Page 175: ...2LV 2L1 2L2 2MS 2MT 2 3 20 This page is intentionally left blank ...
Page 200: ...Installation Guide 500 sheets paper feeder Installation Guide ...
Page 202: ...㟝㫴G㤵㣠 㟝㫴G㤵㣠 㦹㢨G㣰G㥐ᶤ 㦹㢨G㣰G㥐ᶤ ...
Page 203: ...2000 sheets bulk paper feeder Installation Guide ...
Page 205: ...1 2 3 4 1 2 3 1mm 용지 적재 용지 적재 PF 315 종이 잼 제거 종이 잼 제거 양면 장치 양면 장치 ...
Page 206: ...SSD HD 6 Installation Guide ...
Page 207: ......
Page 208: ......
Page 209: ...IEEE1284 Interface Installation Guide ...
Page 212: ...Network interface Installation Guide ...
Page 215: ......
Page 216: ...OS ...


