Uni-I/O™
Unitronics
3
10
Input LEDs (0-3)
Red LEDs
11
Status LED
Tricolor LED, Green/Red/Orange
N
OTE
Refer to the module's specification sheet for LED indications.
12
Module door
Shipped covered with protective tape to prevent the door
from being scratched. Remove tape during installation.
13
Screw holes
Enable panel-mounting; hole diameter: 4mm (0.15”).
About the I/O Bus Connectors
The I/O Bus connectors provide the physical and electrical connection points between
modules. The connector is shipped covered by a protective cover, protecting the connector
from debris, damage, and ESD.
The I/O Bus - Left (#4 in diagram) can be connected to either a CPU-for-Panel, a
Uni-COM™ module, to another Uni-I/O™ module or to the End Unit of a Local Expansion
Kit.
The I/O Bus - Right (#6 in diagram) can be connected to another I/O module, or to the
Base Unit of the Local Expansion Kit.
Caution
If the I/O module is located last in the configuration, and nothing is to be
connected to it, do not remove its Bus Connector Cover.
Installation
Turn off system power before connecting or disconnecting any modules or devices.
Use proper precautions to prevent Electro-Static Discharge (ESD).
Installing a Uni-I/O™ Module onto a UniStream™ HMI Panel
N
OTE
The DIN-rail type structure on the back of the panel provides the physical support for
the Uni-I/O™ module.
1. Check the unit to which you will connect the Uni-I/O™ module to verify that its Bus
Connector is not covered.
If the Uni-I/O™ module is to be the last one in the configuration, do not remove the
cover of its I/O Bus Connector - Right.
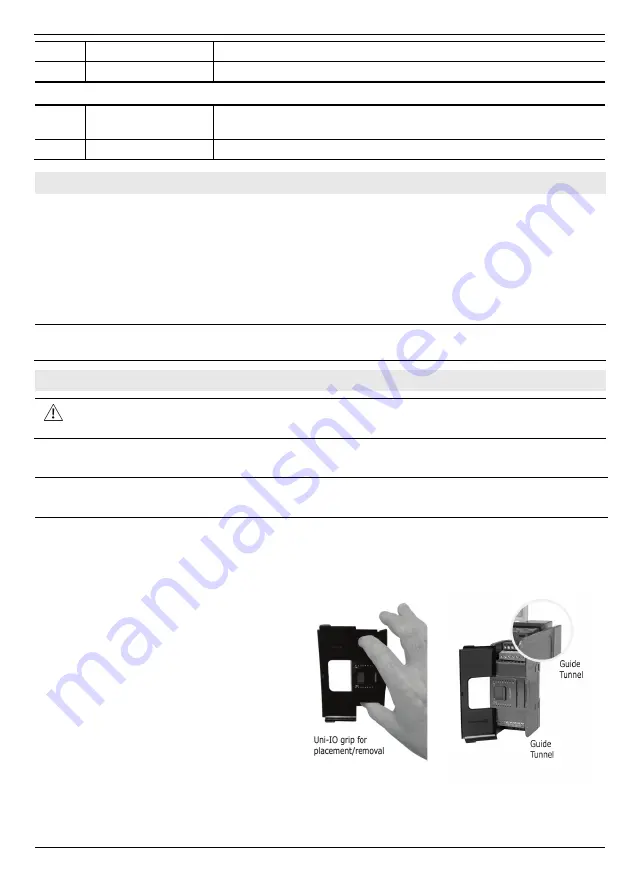
2. Open the door of the Uni-I/O™
module and hold it as shown in the
accompanying figure.
3. Use the upper and lower guide-
tunnels (tongue & groove) to slide
the Uni-I/O™ module into place.
4. Verify that the DIN-rail clips
located at the top and bottom of
the Uni-I/O™ module have
snapped onto the DIN-rail.


