-3-
Assembly Instructions
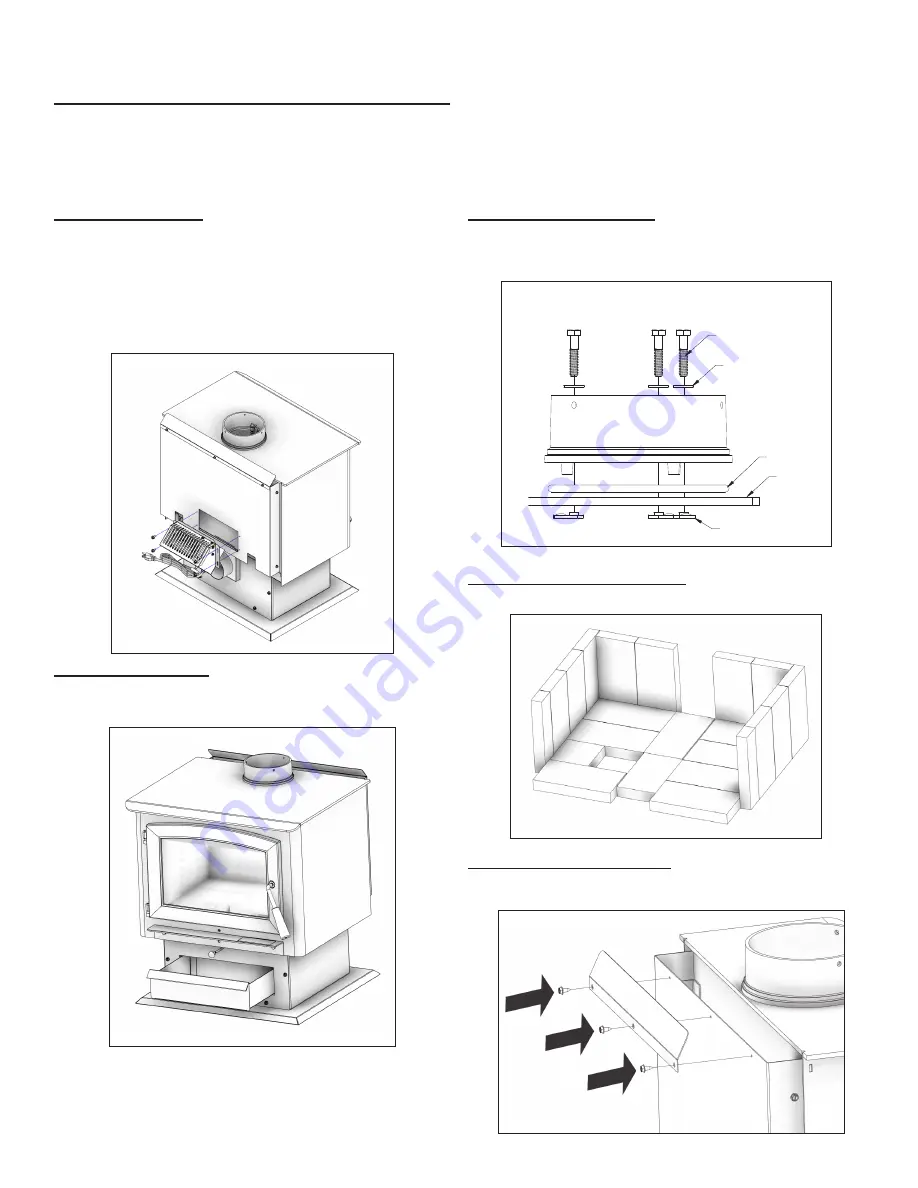
BLOWER ASSEMBLY
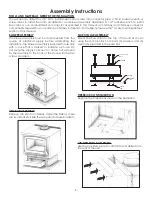
The blower assembly must be disconnected from the
source of electrical supply before attempting the
installation. The blower assembly is intended for use only
with a stove that is marked to indicate such use. Do
not route the supply cord near or across hot surfaces!
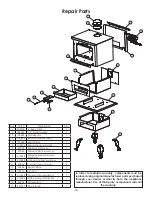
Fix the assembly to the back of the stove with the four
screws provided.
ASH PAN ASSEMBLY
Remove ash pan from firebox. Under the firebox, there
are two brackets; Slide the ash pan into these brackets.
FLUE COLLAR ASSEMBLY
Mount the flue collar to the top of the unit as shown
using the (3) 5/16-18 x 1-1/2 bolts, (3) washers, and (3)
weld tabs provided in the parts box.
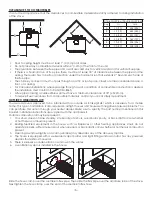
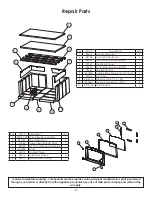
FIREBRICK CONFIGURATION
Replace the Firebrick as shown in the illustration.
5/16-18 x 1-1/2
BOLT
WASHER
HEATER
TOP
GASKET
WELD
TAB
TOOLS AND MATERIALS NEEDED FOR INSTALLATION
You will need a drill with a 1/8” bit to install sheet metal screws into connector pipe. A 5/16” socket/wrench or
screw driver to install the room air deflector, and blower assembly described. A 1/2” socket/wrench to install
flue collar. A non-combustible floor protector as specified in this manual. All chimney and chimney connector
components required for your particular chimney installation. For mobile homes see the “For Use In Mobile Homes”
section of this manual.
AIR DEFLECTOR ASSEMBLY
Use the provided screws to attach the air deflector to
the rear of the unit.

