


8
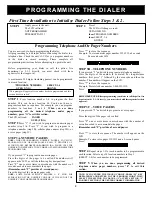
First Time Installation to Initialize Dialer Follow Steps 1 & 2.
Programming Telephone And/Or Pager Numbers
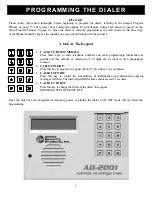
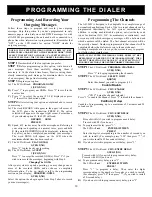
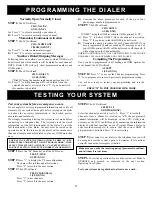
P R O G R A M M I N G T H E D I A L ER
STEP 1
Apply power to the unit.
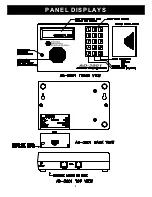
The LCD will read:
NOT PROGRAMMED
PRESS KEYPAD #1
STEP 2
Press 1.
The LCD will change to read:
USP AD2001 X.X
then:
PROGRAM: NUMBERS
then:
SELECT: 1-4
0(DONE)
You are now ready to begin programming the dialer.
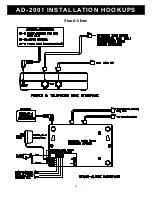
All programming can be input before connecting the dialer to a
telephone line. Check the unit’s LCD as you program numbers
in the dialer to ensure accuracy. Please complete all
programming instructions before attempting to operate the unit.
Before programming your dialer to call the police, fire
department or 9-1-1 directly, you must check with these
agencies for their approval.
A maximum of 50 digits (including pauses) can be programmed
in at each location.
*PROGRAM: NUMBERS SELECT: 1-4
1(YES) 2(NO ) 0(DONE)
STEP 1
Press location number 1-4 to program the first
number. This can be any location 1-4. You do not have to
program locations in sequence. For example, you can program
numbers in locations 2 and 4.
When you are done
programming all the desired telephone and/or pager
numbers, press “O” to exit this section.
The LCD will read:
PAGER
1(YES) 2(NO)
STEP 2
Press “1” if you wish to program in a numeric pager
number (step 3A). Press “2” if you wish to program in a
telephone number (step 3B), cellular phone numer (step 3B), or
a voice pager (step 3C).
STEP 3A-
NUMERIC PAGERS
NOTE:
WHEN PROGRAMMING NUMERIC PAGERS, YOU MUST
PROGRAM IN ONE OR MORE PAUSES. EACH “P” PROVIDES A 2-
SECOND PAUSE. BEFORE PROGRAMMING IN A PAGER, CALL THE
NUMBER TO DETERMINE THE NUMBER OF 2-SECOND PAUSES TO BE
PROGRAMMED IN.
If you pressed “1” to program in a numeric pager…
Press the digits of the pager to be called. The numbers will
appear on the LCD, as will the following key designations.
Press “P” one or more times in accordance with the number of
seconds needed to accommodate the pager.
(Remember, each “P” provides a 2-second pause).
Press the digits of the numeric pager code.
NOTE:
SOME PAGER SERVICES REQUIRE A “#” SIGN FOR
SEPARATION OF THE NUMERIC CODE OR AT THE END OF THE
NUMERIC CODE FOR PROPER TRANSMISSION.
Press “*” to store the sequence.
Example:
To store numeric pager number 555-1212, a 4-second
Pause and code 3456:
Press:
STEP 3B –
TELEPHONE NUMBERS
If you pressed “2” and wish to program in a telephone number…
Press the digits of the number to be dialed. For long-distance
numbers, first press “1” followed by the area code and then the
number. The number will appear on the LCD.
Press “*” to store the sequence.
Example:
Store telephone number 1-800-555-1212:
Press:
REMEMBER/NOTE: Before programming your dialer to call the police, fire
department 0r 9-1-1 directly, you must check with these agencies for their
approval.
STEP 3C –
VOICE PAGERS
If you pressed “2” and wish to program in a voice pager…
Press the digits of the pager to be called.
Press “P” one or more times in accordance with the number of
seconds needed to accommodate the pager.
(Remember each “P” provides a 2-second pause).
Press “*” to store the sequence. The number will appear on the
LCD.
Example: To store voice pager 555-1212 and a 4-second pause:
Press:
STEP 4
Repeat steps 1-3 for each number to be programmed in
each location. Select any of 4 location numbers in Step 1
(SELECT: 1-4) for each number to be programmed.
STEP 5
When you are done programming all desired
telephone and/or pager numbers, press “0” to exit this
section.
NOTE: IF YOU ENTER THE WRONG CHOICE, PRESS “M” KEY
REPEATEDLY AND RETURN TO THE “PROGRAM MODE”, THEN
SELECT THE SECTION TO CHANGE (“1” ACCEPT SECTION, “2”
FOR NEXT SECTION), THEN ENTER CORRECT INFORMATION.
*This prompt will appear after a number has been programmed and this
section has been exited.


