Chapter 2
Using the Hardware
9
Using the Stylus
CAUTION!
Never use anything other than the MR650 stylus on the screen. Using
an object other than the stylus could cause permanent damage.
1.
Hold the stylus as you would hold a pencil.
2.
To make a choice from a menu, lightly tap the tip of the stylus on that choice.
3.
Double-tap to open programs.
4.
To write data into a field on a form, use the stylus to print the letters or numbers.
Using Proximity, MSR, or the Barcode Reader
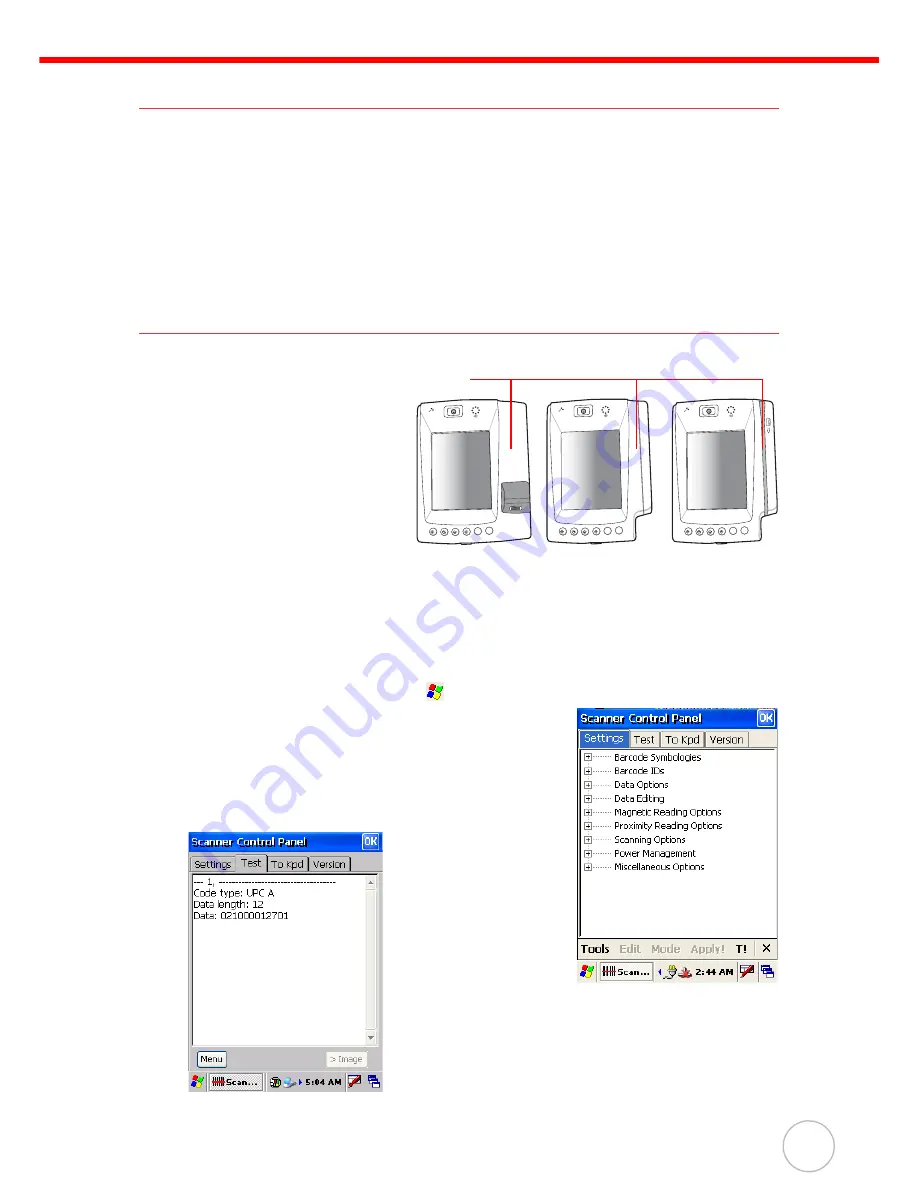
The MR650 features an integrated
proximity reader (EM125KHz, HID
125KHz and 13.56MHz Mifare), MSR,
and barcode reader which can read
proximity cards, magnetic stripe cards,
and barcode labels respectively.
NOTE:
Reading software
must be enabled in
order to operate the
scanner.
This can be a user-
loaded application or
a pre-loaded utility such as Scanner Setting.
Testing Reader Data
The MR650 has a built-in Scanner Control Panel that enables you to test the device’s barcode scan
function.
1.
To launch Scanner Control Panel, tap
→
Settings
→
System
→
Scanner
.
2.
The Scanner Control Panel opens.
From here you can configure barcode scanner parameters
such as enabling or disabling barcode symbologies, setting
data transmission options, configuring magnetic and proxim-
ity reading options, and setting power management options.
3.
To test the barcode scanner, tap the
Test
tab and then per-
form a scan. The screen will display the results of the scan.
E
ESC
F4
F3
F2
F1
unitech
unitech
unitech
unitech
E
ESC
F4
F3
F2
F1
unitech
unitech
E
ESC
F4
F3
F2
F1
Place or
swipe card


