background image

19 

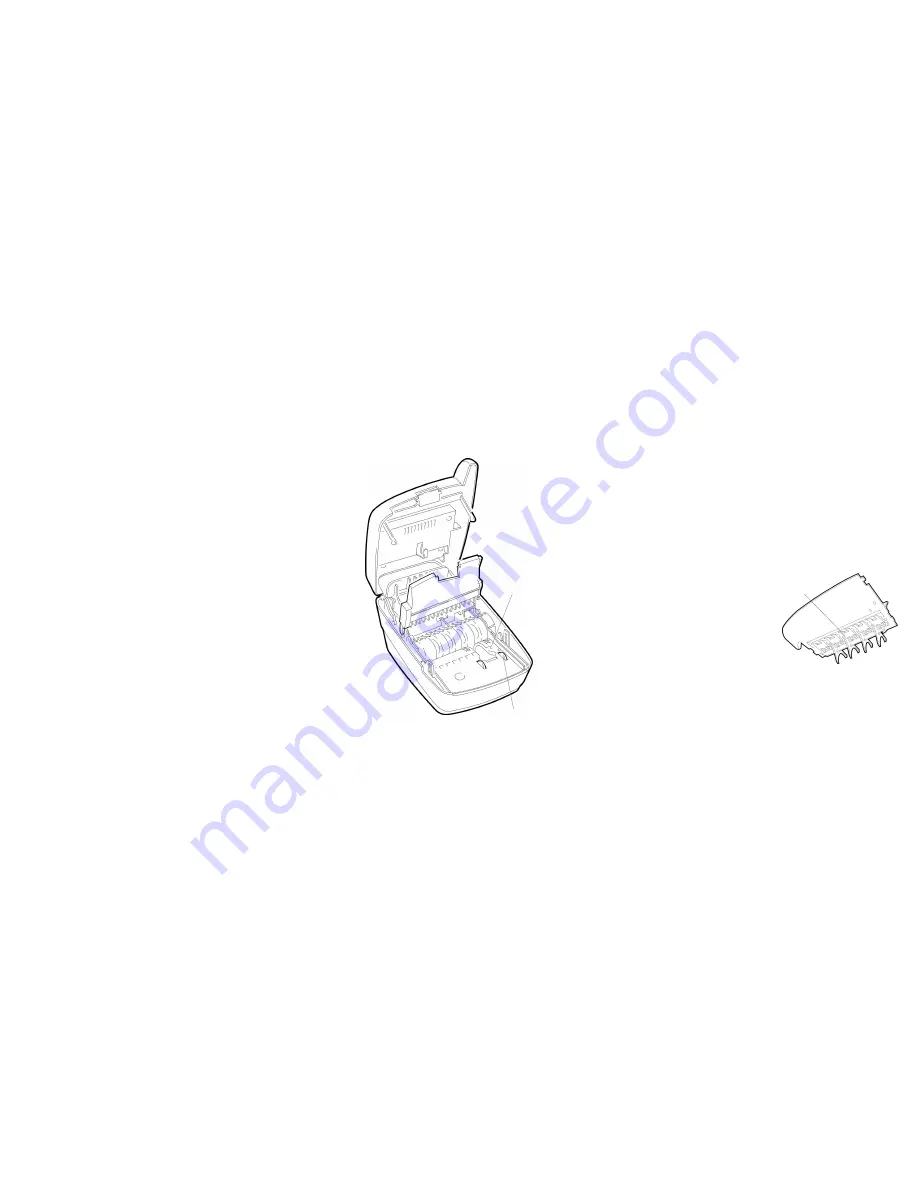
 Check Feeder Does Not Function Properly  

Ensure that you are inserting the check properly: flush to the right side of 
the UEC 6000 or the UEC 7000, information side facing up, with the MICR 
line to the inside right. If the problem persists, refer to local procedures or 
contact your application provider. Remove any debris by following the 
directions below: 


1. 

Press the latch and lift the cover to access the imaging frame.  

2. 

Lift the imaging frame to access the 
document feed plate.  

3. 

Clear any paper or debris from the 
imaging frame and document feed plate.  

4. 

Ensure that the black fingers on the 
baffle move freely (UEC 7000 only). 

5. 

Use a lens cleaning tissue or a damp lint-
free cloth to remove any ink or dust from the document sensors. 

6. 

Ensure that the rollers under the baffle are clean  
(UEC 7000 only). 

7. 

Re-close the imaging frame and cover.  


Rollers 

Black 
Fingers 

Document 
Sensors 

Summary of Contents for UEC 6000 Series

Page 1: ...UEC 6000 and UEC 7000 Series Installation Guide Unisys UEC 7011 Unisys...

Page 2: ...d other countries The Unisys logo is a trademark of Unisys Corporation All other brand names and trademarks appearing in this guide are the property of their respective holders Copyright Unisys Corpor...

Page 3: ...Contents Compliance Statements 2 Introduction 3 Requirements 4 Setting Up the UEC 6000 or UEC 7000 5 Maintaining the UEC 6000 or UEC 7000 16 Troubleshooting 18 Specifications 21 Warranty Information 2...

Page 4: ...against harmful interference when the equipment is operated in a commercial environment This equipment generates uses and can radiate radio frequency energy and if not installed and used in accordance...

Page 5: ...Utilizing industry leading progressive MICR method and imaging technology the UEC 6000 and the UEC 7000 are ideal for Check Electronification Check Cashing and Walk in Bill Payment applications The in...

Page 6: ...ther than the areas specified in this guide will void the warranty Recommendations This unit may be installed and programmed by a distributor reseller other than the original manufacturer Record all d...

Page 7: ...ork connection depending on your unit and power connections B Unpack the Shipping Box 1 Open the top of the box 2 Remove and unwrap the items 3 Save the box and wrapping for future use NOTE Before unp...

Page 8: ...B below does not include an MSR Scanner Model A will be graphically represented throughout this manual for consistency All other features of the UEC 6000 and UEC 7000 are available as standard or opti...

Page 9: ...s Cover Latch Outside Cover in raised position Image Frame in raised position Image Sensor Document Feed Plate comes out to reveal the optional Franking Acknowledgement Printer Assembly UEC 7000 shown...

Page 10: ...to a PC AUX Yellow Use this port to connect optional peripheral devices such as a pass through printer COM Green Use this port to connect to a PC or terminal TEL Purple This port offers an optional m...

Page 11: ...ge into the unit I Access the Printer Assembly 1 Press the latch and lift the cover to access the imaging frame 2 Lift the imaging frame to access the feed plate 3 Locate the blue tab on the side of t...

Page 12: ...nt feed plate by pressing down firmly until it clicks into place 4 Close the imaging frame 5 Close the outside cover CAUTION Avoid contact with the main drive roller to prevent ink transfer to documen...

Page 13: ...one line into the telephone company wall jack Test the Telephone Line and Third Party Line 1 Call the third party line to ensure that it is working properly 2 If the third party line is not working co...

Page 14: ...to power the LED will light up Your unit is now turned on CAUTION Disconnecting the power source while the terminal is processing a transaction may cause data files stored in the unit s memory to be...

Page 15: ...it is ready to accept checks when the LED is green As shown on the right insert the check Flush to the right side of the UEC 6000 or the UEC 7000 Information side facing up MICR line to the inside rig...

Page 16: ...ext job with a command from the terminal Amber Flashing The unit is sending or receiving information from the terminal wait Red Green Amber Flashing The unit is starting up or performing diagnostics w...

Page 17: ...ful in reading the MICR line One long beep LED is flashing red An error occurred during processing or storing of the captured image A Typical Check Processing LED Cycle 1 The unit is on and idle the L...

Page 18: ...s the latch and lift the cover to access the imaging frame 2 Lift the imaging frame to access the document feed plate 3 Locate the blue tab on the side of the unit With your thumb positioned on the ou...

Page 19: ...locate and access the document sensors follow the instructions below 1 Press the latch and lift the cover to access the imaging frame 2 Lift imaging frame to access the document sensors 3 Use a lens c...

Page 20: ...that they are still connected properly 2 Ensure the telephone line is working by removing the connection from the UEC 6000 or the UEC 7000 and connecting it to a telephone base unit 3 If the telephon...

Page 21: ...rections below 1 Press the latch and lift the cover to access the imaging frame 2 Lift the imaging frame to access the document feed plate 3 Clear any paper or debris from the imaging frame and docume...

Page 22: ...roperly Test the Card Swipe Mechanism 1 Ensure that you are swiping the card properly The black magnetic stripe on the back of the card must face downward and to the left 2 Try using another card to e...

Page 23: ...x 6 2 wide x 5 3 high 22 5 cm long x 15 5 cm wide x 13 5 cm high Unit Weight UEC 6000 3 1lbs 1 4 Kg UEC 7000 3 4 lbs 1 5 Kg Unit Orientation For proper operation place unit on a level horizontal surfa...

Page 24: ...W x 4 4 L 5 5 cm x 11 2 cm Maximum 4 W x 9 L 10 16 cm x 22 86 cm Weight Range 8 lb to 100 lb thermal paper to business card stock Font E13B MICR Character Set Alphanumeric OCR A and B font recognition...

Page 25: ...V 34bis V 34 V F C V 32bis V 32 V 22bis V 22A B V 23 V 21 Bell 212A and 103 Error Correction V 42 LAPM and MNP 2 4 Data Compression V 42bis and MNP 5 Optional Magnetic Stripe Reader MSR Specifications...

Page 26: ...below Equipment a may be newly manufactured b may be assembled from new or serviceable used parts that are equivalent to new parts in performance or c may have been previously installed During this tw...

Page 27: ...ed to purchaser all of which is sold or licensed to purchaser AS IS Purchaser agrees to look solely to the warranties and remedies if any provided by the manufacturer or its Unisys reseller These limi...

Page 28: ...tion 2006 Copyrighted material licensed by Unisys Corporation from a third party All rights reserved No part of this document may be reproduced in any form without the written consent of Unisys Corpor...

Reviews: