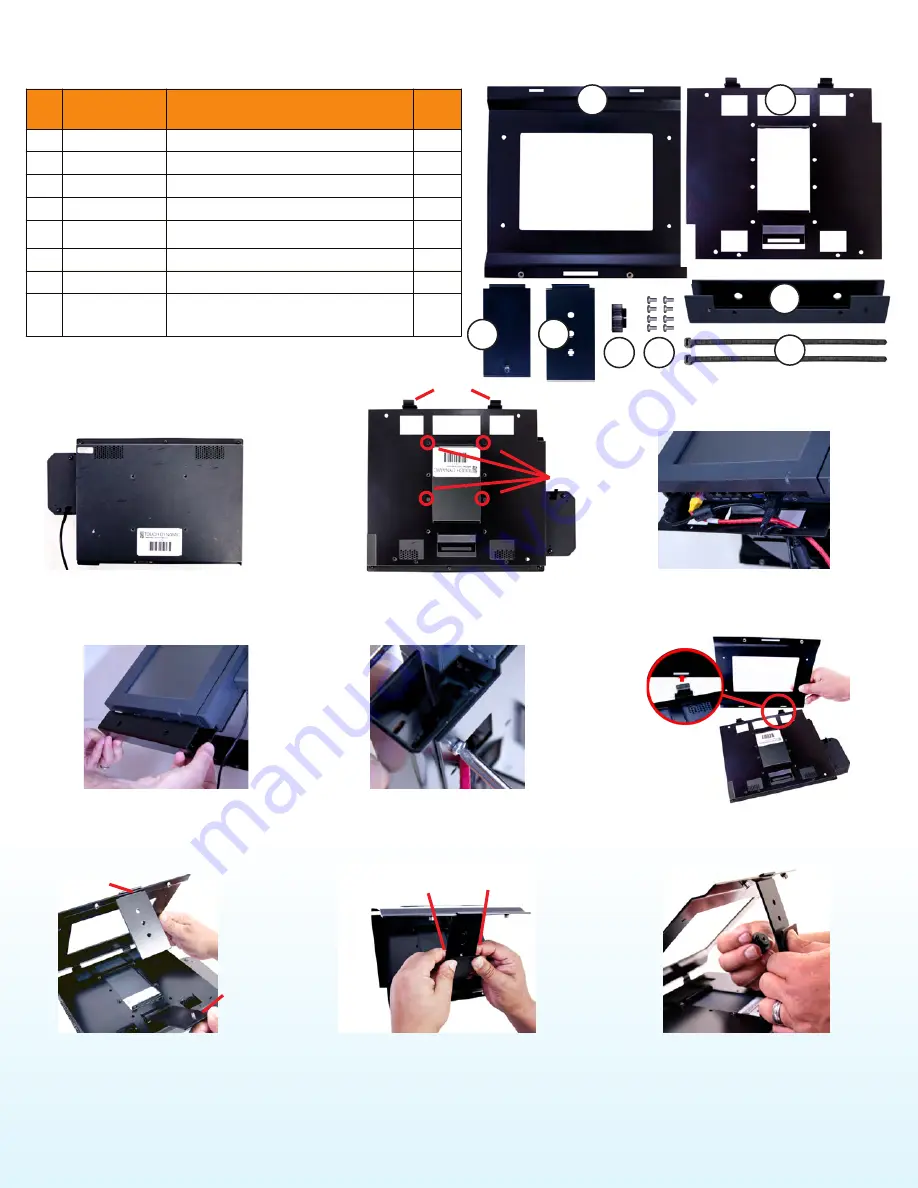
Insert the Base Mount: Align the two
tabs with the two slots in the Base
Mount.
Insert the tabs from both Studded (part
#4) and Perforated (part #5) Adjustment
Plates into the large slots in position
A&B above. Be sure to keep the stud
facing inward.
Depending on the preferred angle, insert
the stud into one of the three holes on the
Perforated Adjustment Plate. These Plates
are designed to be a tight fit, you may
need assistance.
Holding the plates firmly, attach the
Tension Knob and tighten. The Procare
Touch 8 Mount should now be tight and
firm.
A
B
PRESS FIRMLY
3
1
ITEM
NO.
PART
NUMBER
DESCRIPTION
QTY
1
PT81000A
BASE MOUNT
1
2
PT81000B
MOUNT PLATE
1
3
PT81000C
CORD GUARD
1
4
PT81000D
STUDDED ADJUSTMENT PLATE
1
5
PT81000E
PERFORATED ADJUSTMENT PLATE
1
6
PT81000F
TENSION KNOB
1
7
14” ZIP TIE
2
8
M4 X 0.7 X 8 PAN HEAD MACHINE
SCREW, PHILLIPS, ZINC, STEEL
8
8
2
4
5
6
7
Please be sure your mount kit has the following parts:
Desktop Mount Assembly Instructions
Place the PC face down on a
protected/padded surface.
Tabs
Place the Mount Plate as you see above. Be
sure the TABS are pointed up. Install screws
in the 4 positions noted.
Screws
Run cables through the cut-outs in
the Mount Plate before installing
Cord Guard.
Place the Cord Guard over the
cords and align with the holes on
the Mount Plate.
Secure the Cord Guard by installing two
screws on the back side of the Mount Plate.
See: Optional Power Brick installation (page 4)
3


