background image

38

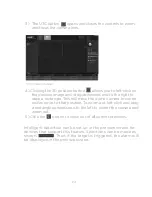
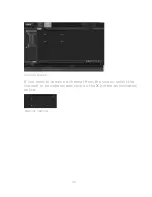
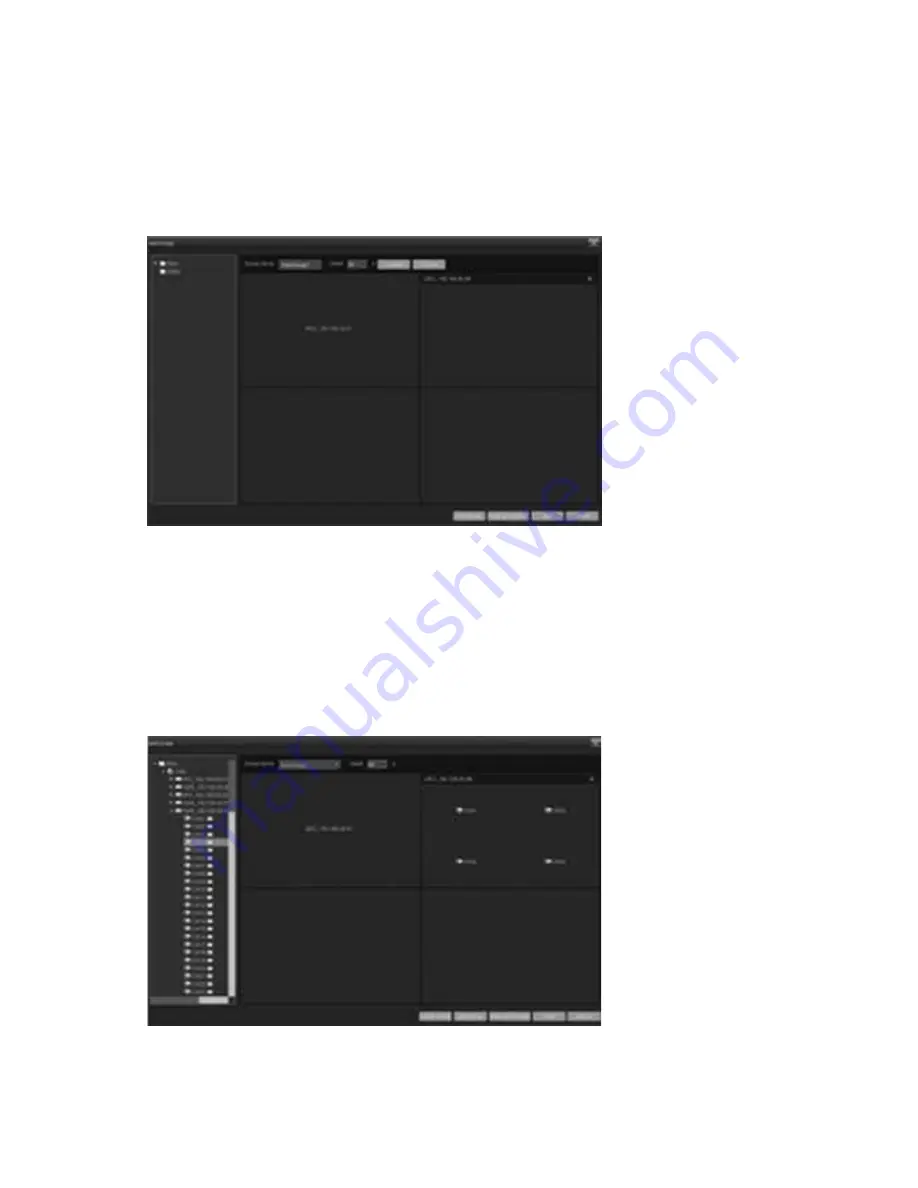
Add Group Screen

If a screen on the TV wall is set as a roll screen, it needs to 

have a group of channels assigned to it. Create a 

Group Name 

and set the 

Dwell

 time for channel preview rotation between 

20 to 6,000 seconds. Drag the channels you would like to 

group together to the screen to complete the layout of the 

first group. Click 

Confirm

 to group the roll screen channels.

Click 

Add Group. 

Note: You can only add groups to roll screens. If you don’t have any roll screens, 
skip to the next step.

Add Group Screen

Summary of Contents for UNVR165x8

Page 1: ...Video Security Systems Compatible Products NVR 1080p UNVR85x4 UNVR85x8 UNVR165x8 Pro View User Guide...

Page 2: ...out 16 1 5 Storage Server 18 2 Preview 21 2 1 Device Streams 22 2 2 Preview Window Toolbar 22 2 3 Preview Overview 23 2 4 Device Group Polling 25 2 5 Device Layout Polling 25 2 6 PTZ 26 2 6 1 PTZ Cont...

Page 3: ...Decoding Mode Selection 40 7 2 Decoding on the Wall 41 7 3 Decoding Rolling 43 7 4 Preview Function Overview 43 7 5 Decoder Playback 44 7 6 Playback Function Oveview 45 8 Alarm Configuration 46 8 1 Ad...

Page 4: ...protocols Active Registration I8H I8 ONVIF and GB28181 Active Registration I8H and I8 are proprietary protocols of Uniden so they can be used free of charge for any time period ONVIF and GB28181 prot...

Page 5: ...nguage is English if you require a different language you will need to select it from the drop down The program supports Simplified Chinese and English Click OK to confirm the setup language and begin...

Page 6: ...ect a location to install the VMS program The default path is C VMS but you can modify the path to install the program to a different destination Setup Destination Location Screen Setup Additional Tas...

Page 7: ...the installation of the program to continue Once installed the program will begin The user may enter login information and select a language for the program The default username is admin and the passw...

Page 8: ...ry consumption and real time network data flow Click the button to log out of the current account 2 Displays real time alarm and event notifications Double click an alarm message to open the channel p...

Page 9: ...ent to open up the device settings interface Device Management displays information on all of the devices currently added to the VMS system It lists the device type protocol type and online offline st...

Page 10: ...ol is a joint ownership protocol that allows third party devices to access the system if they are ONVIF compatible GB28181 is the national standard protocol for third party devices to access the syste...

Page 11: ...ady added to your device list will be displayed in dark grey You can sort the results based on IP address by clicking on IP at the top Check the box next to the device you would like to add and click...

Page 12: ...Leaving passwords blank or filling them in incorrectly will lead to a failure to add the device 1 2 Add Decoder You can enter the Decoder interface by clicking the tab at the top of the Device Managem...

Page 13: ...cate the available online decoders on your LAN Decoders that are already added will display in dark grey and you will be unable to select them in the search results window Add Decoder Window Decoder S...

Page 14: ...ame Default username is admin Password Default password is left blank Once completed click Save to add the decoder to the server Choose a decoder from the list and press Select You can also select mul...

Page 15: ...ight side of the screen Select Add Group Group Screen Add Group Window 15 Enter a group name and click Save to create the group Next select a device on the left side choose a group on the right then c...

Page 16: ...16 Complete Grouping Layout Screen To remove a channel from the group click the channel and press the button 1 4 Layout Click the Layout tab on the Device Management screen...

Page 17: ...screens include standard split and wide screen split Standard split screens display in 16 9 aspect ratio and wide screen pictures display in 1 1 aspect ratio Select the duration of stay for rotating c...

Page 18: ...e added layout should be displayed in the column to the right of the Layout screen Right click on an existing layout to edit it 1 5 Storage Server Click the Storage tab on the Device Management screen...

Page 19: ...elect Add Channel to modify the storage server Select the channel to modify its recording plan Storage Configuration Screen Recording Plan Screen 19 The Storage screen displays server names addresses...

Page 20: ...recording based on a set schedule and also when the alarm is triggered Timing Captures recording only when scheduled Alarm Captures only when alarm triggers a recording Stop No recording occurs Pre re...

Page 21: ...in the preview Split screen modes include standard split and wide screen split as discussed in the Layout section and are available in a variety of different arrangements In the device list double cli...

Page 22: ...Previews Exit out of all channel preview windows 4 Open Recording Open the local recording of all device channels at one time 5 Open Close Intercom Open the intercom function between the PC and devic...

Page 23: ...e the device is not recording 3 The capture button takes a screenshot of the channel 4 The audio button turns the channel s audio on and off The button indicates the audio is muted and indicates the a...

Page 24: ...This will move the dome camera to center and zoom in to that position To zoom out left click and drag a rectangle upwards and to the left to center the camera and zoom out 5 Click the button to close...

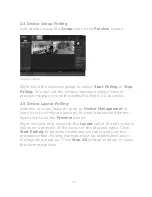
Page 25: ...ut Polling Add two or more layouts refer to Device Management to learn how to configure layouts to switch between different layout views on the Preview screen Right clicking on a layout in the Layout...

Page 26: ...picture Speed determines the speed at which the camera rotates Click on Auto to set the camera speed automatically to Cruise 2 6 2 Preset Cruise and Track 1 Preset The PTZ camera requires setting a di...

Page 27: ...l Zoom When Preview is opened you can control the digital zoom on the current picture by selecting the window and scrolling the wheel of the mouse up to zoom in or down to zoom out 2 9 Preview Multi s...

Page 28: ...extra screen won t close the primary display However if the primary window is closed it will close all extra windows as well The user can customize the preview screens to only show certain functions...

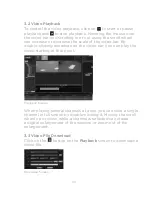
Page 29: ...Note Only videos within the same device or on the same storage server can be played simultaneously and only nine channels can be selected at a time Choose the Stream Type of the video to be played ba...

Page 30: ...le clicking anywhere on the video bar you can play the video starting at that point Playback Screen When playing several channels at once you can view a single channel in full screen by double clickin...

Page 31: ...video for each click of the mouse The button enables disables the audio of the playback video The controls the playback speed allowing play speed to be between 1 16 and 16x the normal speed The is the...

Page 32: ...the Control Panel Map Configuration Screen 4 1 Add Map Right click and select Add Map Add Map Box Enter a Name select a file and click OK to add a map Several maps can be added and can be organized in...

Page 33: ...Add Child Map Adds another map underneath the currently selected map Once the child map is added in the list you can drag it to the main map preview so it will be displayed in the main map as a green...

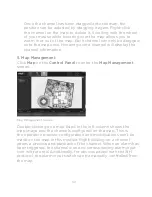
Page 34: ...lick Map on the Control Panel to enter the Map Management screen Map Management Screen Double clicking on a map listed in the left column shows the map image and the channels configured on the map Thi...

Page 35: ...n the Control Panel Decoder Configuration Screen Decoder Configuration shows the TV wall scheme that is currently set and its status You can Modify Delete and Enable Disable existing wall schemes or c...

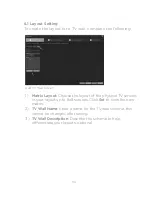
Page 36: ...1 Matrix Layout Choose the layout of the physical TV screens in your layout up to 8x8 screens Click Set to view the new matrix 2 TV Wall Name Enter a name for the TV wall scheme this cannot be changed...

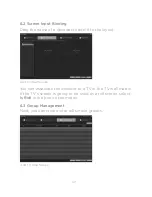
Page 37: ...wall matrix If the TV s screen is going to be used as a roll screen select Is Roll in the box on the matrix 6 3 Group Management Next you can create your roll screen groups Add TV Wall Screen 6 2 Scr...

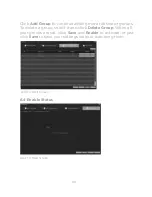
Page 38: ...well time for channel preview rotation between 20 to 6 000 seconds Drag the channels you would like to group together to the screen to complete the layout of the first group Click Confirm to group the...

Page 39: ...all Screen Click Add Group to continue adding more roll screen groups To delete a group select it and click Delete Group When all your groups are set click Save and Enable to activate or just click Sa...

Page 40: ...save and exit The setting will show in the Decoder Configuration list 7 Decoder Management Click on Decoder on the Control Panel to open the Decoder Management screen In the drop down at the top righ...

Page 41: ...of decoding is 1280x960 Normally decoding should be set to the resolution of the front end IPC camera but the preview will not exceed the resolution restriction you set in the decoding mode 7 2 Decod...

Page 42: ...42 Decoder Screen If you need to remove a channel from the screen select the channel to be deleted and click on the X button as indicated below Remove Channel...

Page 43: ...for roll decoders and can t control other channels 7 4 Preview Function Overview On the Preview tab of the Decoder screen you will find a row of function buttons The buttons are roll screen control b...

Page 44: ...he Date and Stream Type under Search Conditions and click Video Retrieve to search for a video file on the selected channel All the playback channels must be on the same device A maximum of nine chann...

Page 45: ...7 6 Playback Function Overview There is a toolbar in the lower part of playback screen The functions are Play Pause Stop Frame by frame Playback Playback Speed Split Screen Options Full Screen Decoder...

Page 46: ...the alarm rule setting screen and can be used to edit alarm linkage Alarm Configuration Screen The Alarm Configuration screen shows the current linkage rules and their status as either enabled or dis...

Page 47: ...Choose the source to be monitored for the alarm from all the channels available on devices currently added to the VMS 4 Linkage Action Check all the boxes that apply to actions you would like the alar...

Page 48: ...en triggered a real time preview of the channel will display on the TV Wall Note If the linkage action is set to map video pop up image and TV wall the end mode will be auto end or timed end Auto end...

Page 49: ...on the Control Panel to enter the Alarm Management screen Alarm Management Screen Alarm Management displays all the alarm information that has been uploaded to the VMS Select a time range and alarm ty...

Page 50: ...ement Record of the additions modifications and deletion of devices 3 Start Stop Rec The start and stop times for local video recordings 4 Linkage Management Record of the additions modifications and...

Page 51: ...nel User Management Screen The administrator can set the permissions for sub users and users Upon setup the software automatically creates a user called Admin which can t be deleted and has full permi...

Page 52: ...r Window Setting the user type as Guest means the user is not an administrative user Once set the user type can t be modified Enter a username password password confirmation and then click OK to add n...

Page 53: ...annel The administrator can distribute specific channels to specific sub users The PTZ number represents the amount of control a user has over the PTZ feature to be used when multiple users are attemp...

Page 54: ...idden when that user logs in and the functions they are not permitted to access will be deactivated Right Management Screen Sample login for sub user that can only see five channels Sub user View Note...

Page 55: ...Management Screen 1 Modify Sub user Click Modify to enter the edit screen Change the password if needed and click OK when done Edit User Screen 2 Delete Sub user Click Delete on the User Management s...

Page 56: ...event of auto stream 1 4 and 9 screens are available 4 Window Scale Choose the scale for preview or playback Full Screen 4 3 or 16 9 5 Preview Poll Interval The default interval of preview poll is 30s...

Page 57: ...he database to prevent data loss 13 Enable Web Enable web access and login from a web port 14 Channel Count Display the authorized channel count of protocols in addition to the current register I8 I8H...

Page 58: ...2017 Uniden America Corporation Irving TX uniden com...

Reviews: