background image

Page 102

How Do I Use It?

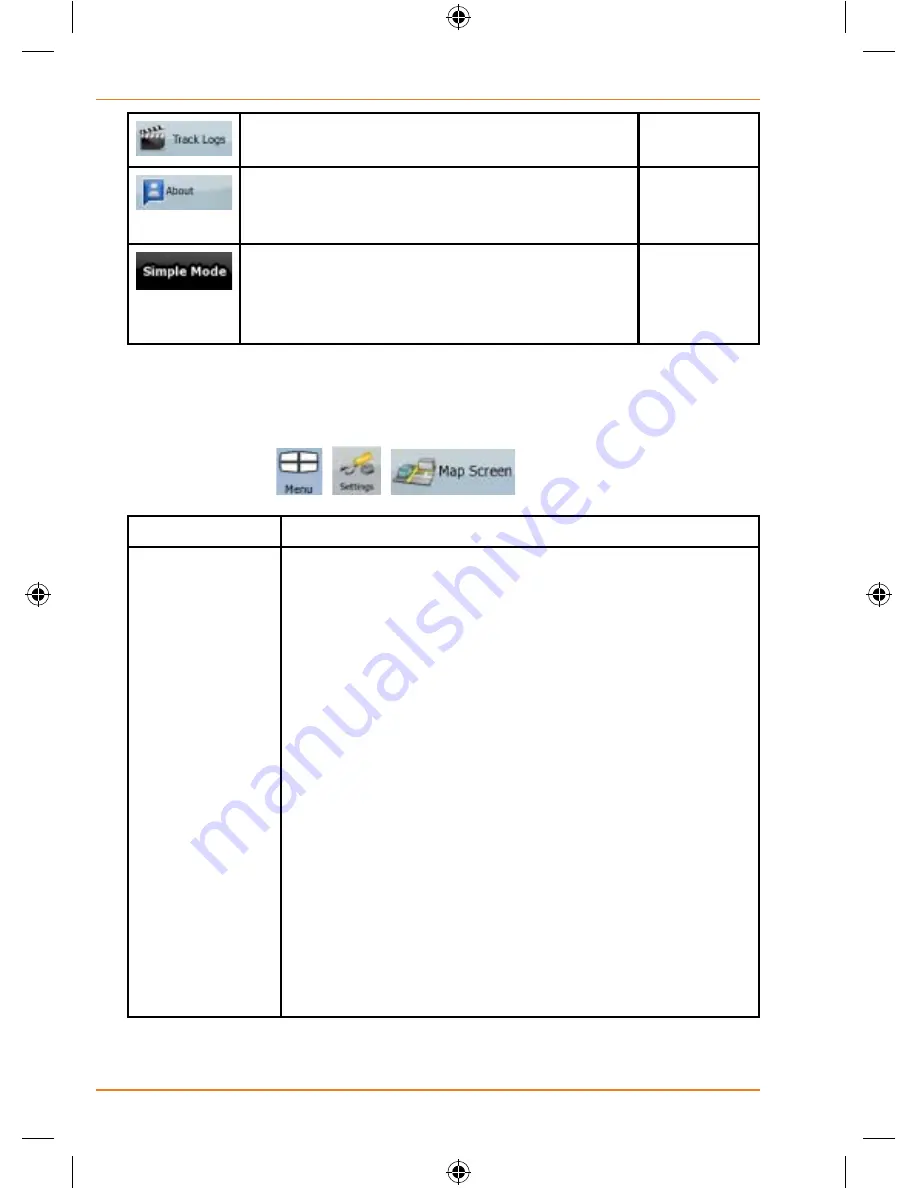
You can set up an automatic Track Log 

saving, and fine-tune its settings.

Page 112

This screen has no navigation feature. It merely 

provides information about the maps and 

licenses included with your navigation system.
You can switch to Simple mode. In Simple 

mode only a few of the above settings are 

available. The rest of the settings are set to 

values that are optimal for typical use.

Page 17

Map Screen settings

You can fine-tune the appearance and content of the Map screen. Tap the 

following buttons: 

.

Button

Description

3D Settings

Use 3D settings to determine which of the present 3D 

objects are shown on the map, and adjust the level of 

3D visual detail. The options are as follows:

• Elevated Roads: Complex intersections and 

vertically isolated roads (such as overpasses or 

underground tunnels) are displayed in 3D.

• Terrain Detail Level: 3D terrain map data shows 

changes in terrain, elevations or depressions in the 

land when you view the map, and use it to plot the 

route map in 3D when you navigate.

• Landmarks: Landmarks are 3D artistic or block 

representations of prominent or well-known objects. 

3D landmarks are only available in selected cities and 

countries. 

• Building Visibility: Full 3D city building data that 

represents actual building size and position on the 

map. Building data is limited to the city centre of major 

cities.

Summary of Contents for TRAX430

Page 1: ...TRAX430 In Car Navigation OWNER S MANUAL...

Page 2: ...14 2 Getting started with TRAX430 14 Start using TRAX430 16 Simple and Advanced modes 17 Hardware button Power on off 19 Buttons and other controls on the screen 19 Using keyboards 21 Using the map 2...

Page 3: ...the destination of a route 45 Selecting the Cursor as the destination 46 Entering an address or part of an address 46 Entering an address Australia 46 Entering an address if house numbering is restar...

Page 4: ...creating a Track Log 66 Simulating a Track Log on the map 67 Changing the colour of a Track Log 67 Saving a route 67 Loading a saved route 68 4 Reference book Advanced mode 68 Map screen 69 Icons on...

Page 5: ...aved Search Criteria 99 User Data management 100 Settings Menu 101 Map Screen settings 102 Sound settings 103 Route Planning options 104 Regional settings 106 Navigation settings 107 Warning settings...

Page 6: ...and can still give directions Press the power button in and hold it for three seconds to turn the device completely off Windshield mount If you do put the device on your windshield don t forget to lo...

Page 7: ...for example when you unplug the adapter or turn off your car the device automatically shuts down If you want it to stay on tap anywhere on the screen during the Shutting down message You can turn the...

Page 8: ...the road for a few minutes It s a good idea to take valuable items with you when you leave you car that includes GPS devices If you can t take the device with you lock it in the glove compartment or...

Page 9: ...Page 9 How Do I Put It in My Car Attaching the windshield mount Insert the bracket hook into the notch at the bottom of the device Rotate the bracket up so the head fits into the gap 1 2...

Page 10: ...up down right and left any just about angle in between Angle the suction cup and the bracket where you want them then push the adjustment lock back down to lock the windshield mount into position If t...

Page 11: ...o place Gently pull on the mount to 3 make sure it is secure If you have trouble getting the suction cup to stick Clean the spot with an ammonia free cleanser Dry the spot completely use a lint free c...

Page 12: ...e device s weight The surface should be as smooth as possible If the surface texture is too rough the glue may not stick as well The anchor disk will stick permanently on most surfaces If you try to r...

Page 13: ...t the surface Push down along the 5 edges too so that every part of the disk makes good contact with the surface Before you install the windshield mount gently tug on the disk to make 6 sure it s secu...

Page 14: ...he route TRAX430 has a Safety Mode if you turn on Safety Mode you cannot change anything in TRAX430 while the vehicle is moving at a speed of 10 km h 6 mph or higher Unless only passengers operate TRA...

Page 15: ...e buttons on the Map screen you can set or reset the zoom value of the button 2D map Tap and hold any of the buttons on the Map screen you can set or reset the tilt and zoom values of the button 3D ma...

Page 16: ...n any screen Start using TRAX430 When TRAX430 is started the first time you need to do the following 1 Select the written language of the application 2 Select the language and speaker used for voice g...

Page 17: ...60 Use a saved location a Favourite page 57 a POI page 57 the History of previously set destinations and waypoints page 59 Simple and Advanced modes The two operating modes of TRAX430 mainly differ in...

Page 18: ...s See page 57 Navigating to a POI Yes Yes See page 57 Navigating to coordinates No Yes See page 60 Creating a multi point route No Yes See page 61 Saving a map point as a Favourite destination Yes Yes...

Page 19: ...off TRAX430 does not calculate your GPS position and it does not update the route or the driving instructions When you turn the device on again TRAX430 continues navigating as soon as the GPS receiver...

Page 20: ...l different unnamed values TRAX430 shows an indicator on a gauge that displays and sets a value from a range Drag the handle to move the slider to its new position Tap the slider where you want the ha...

Page 21: ...ect from the list of available keyboard types TRAX430 remembers your last keyboard choice and offers it the next time you need to enter data Correcting your entry on the keyboard Remove the unneeded c...

Page 22: ...ition during navigation 1 Check the bottom line of the map It shows the current street and house number information 2 For further details tap to open the Position menu 3 Tap The address the coordinate...

Page 23: ...tion page 34 Selected location Cursor page 35 The following controls help you modify the map view to best suit your actual needs Most of these controls appear only if you tap the map once and disappea...

Page 24: ...on Smart Zoom button Zooming in and out Changes how much of the map is displayed on the screen TRAX430 uses high quality vector maps that let you see the map at various zoom levels always with optimis...

Page 25: ...can turn away from Track Up with these buttons If GPS position is available and you have rotated the map the button appears Tap this button to re enable the automatic map rotation Viewing modes Gives...

Page 26: ...ble Smart Zoom Tap hold the button to set the zoom limits of Smart Zoom Returning to normal navigation back to the GPS position with automatic map rotation Tap this button to move the map back to the...

Page 27: ...screen It is available on the following screens Plan on Map screen When you have an active route you can display it in its full length on the map Track Information screen A track log can be displayed...

Page 28: ...d an active route are available but automatic off route recalculation is switched off and you deviated from the route Tap this area to make TRAX430 recalculate the recommended route If the icon is ani...

Page 29: ...an active route are both available this field shows the route event that follows the next route event shown in the above described area Tap this area to open the Itinerary screen with the turn by tur...

Page 30: ...he sound output of TRAX430 is enabled TRAX430 records a Track log when GPS position is available Track log recording is disabled The following information can be seen in the three data fields shown on...

Page 31: ...rmation There are time values that can be shown Current GPS time Time remaining to reach the destination Time remaining to reach the next via point Estimated arrival time at the destination Estimated...

Page 32: ...with one of the following options Use the Find menu to select a location The map returns with the selected point the Cursor in the middle and the Cursor menu appears with the available options Tap th...

Page 33: ...ced mode only Opens a screen with the name address and coordinate information of the Cursor and the list of POIs near it TRAX430 Concepts Smart Zoom Smart Zoom is a lot more than just a usual automati...

Page 34: ...marker depends on the vehicle type used for route calculation The vehicle type can be selected in Route settings page 93 or in the Quick Menu page 89 If you choose pedestrian The icon is at your exac...

Page 35: ...according to your current GPS position Selected location Cursor If you select a location in the Find menu or you tap the map when the map control buttons are visible the Cursor appears at the selected...

Page 36: ...are similar to paper road maps The night colour schemes use dark colours for large objects to keep the average brightness of the screen low TRAX430 offers different daytime and night colour schemes I...

Page 37: ...Short Economical Easy Vehicle types Car Taxi Bus Emergency vehicles Bicycle Pedestrian Road types Unpaved Roads Permit Needed Motorways Toll Roads Charge Roads Ferries Cross border Planning TRAX430 a...

Page 38: ...yed for example In Advanced mode tap the following buttons You have the following options on the Itinerary screen Button Description Any of the list items Opens the map with the selected manoeuvre in...

Page 39: ...RAX430 calculated Track Logs can be recorded renamed replayed shown on the map exported to a the internal Flash ROM in GPX format and deleted See page 66 Independently of the normal track log you can...

Page 40: ...symbol The icons are also semi transparent they do not cover the streets and intersections behind them POIs are grouped into several levels of categories and subcategories The icon of a POI that comes...

Page 41: ...amera place the Cursor at the desired location then tap the following buttons Camera warning The warning for Road Safety Cameras can be turned on in Warning Settings Tap the following buttons When you...

Page 42: ...ou can specify the controlled traffic direction and the speed limit TRAX430 warns you when you approach these speed cameras in the measured direction If your speed exceeds the speed limit near the spe...

Page 43: ...camera types In the rare case TRAX430 cannot register the moment you pass the second speed camera for example it is placed at the exit of a tunnel where GPS position is not yet available the warning...

Page 44: ...contain information about the speed limits of the road segments This information may not be available for your region ask your local dealer or may not be fully correct for all roads on the map You ca...

Page 45: ...430 offers you several ways of choosing your destination and via points intermediate destinations Use the selected location on the map the Cursor page 46 Enter a full address or a part of an address f...

Page 46: ...ater when the Cursor menu appears save it as a POI or put it on the list of your Favourites first The Cursor menu returns automatically with the same point Now you can use it as a route point Entering...

Page 47: ...d to select the state or tap to search for a settlement regardless of the state it is in 3 If you have not changed the country you still have the possibility to change the state Tap the button with th...

Page 48: ...lly 4 Pick the street from the list 6 Enter the house number 1 Tap 2 Enter the house number on the keyboard 3 Tap to finish entering the address 7 The map appears with the selected point in the middle...

Page 49: ...nt To select the settlement from the list of recently used ones tap the button To enter a new settlement 1 Tap the button with the name of the settlement or if you have changed the country state tap 2...

Page 50: ...ode from the Cursor menu The route is then automatically calculated and you can start navigating Entering an address without knowing the dictrict suburb Long roads can run across several districts or...

Page 51: ...ering a couple of characters the names that match the string appear in a list Tap to open the list of results before it appears automatically 4 Pick the settlement from the list 4 Enter the street nam...

Page 52: ...mode or Advanced mode 2 By default TRAX430 proposes the country state and settlement where you are If needed tap the button with the name of the country state and select a different one from the list...

Page 53: ...eyboard screen appears Start entering the name of the intersecting street on the keyboard As you type if the matching streets can be shown on one screen their list appears automatically 6 Tap the desi...

Page 54: ...es tap the button To enter a new settlement 1 Tap the button with the name of the settlement or if you have changed the country state tap 2 Start entering the settlement name on the keyboard 3 Get to...

Page 55: ...e name of the country state and select a different one from the list 3 Tap the button with the name of the settlement and enter the postal code 1 Start entering the postal code on the keyboard 2 Get t...

Page 56: ...treet name tap the button after a couple of letters TRAX430 lists the items that contain the character set You can speed up finding an intersection Search first for the street with a less common or le...

Page 57: ...ced mode from the Cursor menu The route is then automatically calculated and you can start navigating Selecting the destination from the POIs You can select your destination from the POIs included wit...

Page 58: ...n and after that if needed select the POI subgroup e g Hotel or Motel To find the POI by its name tap and use the keyboard to enter a part of the name To list all POIs in a given POI group tap 4 optio...

Page 59: ...ou can use instantly when searching for a POI The procedure is explained starting from the Navigation menu 1 Tap the following buttons Simple mode or Advanced mode 2 Tap 3 Select one of the saved crit...

Page 60: ...ering its coordinate This feature is available in Advanced mode only The procedure is explained starting from the Navigation menu 1 Tap the following buttons 2 optional Tap to change the format of the...

Page 61: ...as you like If you insert a via point in a route that is already a multi point route you will automatically be taken to the Edit Route screen where you can determine the position of the intermediate r...

Page 62: ...destination The previous destination becomes the last via point of the route This feature is available in Advanced mode only 1 Select a new location as you did in the previous sections This will be t...

Page 63: ...nal destination of the route The route is reversed The start point becomes the destination the destination becomes the start point and all via points are to be reached in the opposite order than befor...

Page 64: ...creen 1 Tap the following buttons 2 The Route menu appears There are two ways of running the route simulation Tap to run the simulation at high speed to give you a quick overview of the route Tap to r...

Page 65: ...you start driving again TRAX430 restarts the voice instructions from your position Deleting the next via point from the route The easiest way to delete the upcoming route point the next via point in A...

Page 66: ...osition changed that you drive You do not need to select a destination and create a route for this you can also record your driving path while cruising This feature is available in Advanced mode only...

Page 67: ...eturns and the Track Log simulation a life like replay begins 4 You can stop the replay any time by tapping the button Changing the colour of a Track Log 1 Tap the following buttons 2 Tap the desired...

Page 68: ...the very likely case when the start position of the saved route is different from the current GPS position you need to confirm whether you want to stop navigating from the current GPS position to use...

Page 69: ...Is Favourites Pins and History items Saved Routes and Track Logs Settings Managing the behaviour of TRAX430 for example the map layout during navigation the used languages or the warnings Map screen T...

Page 70: ...the Trip Information screen Battery status Opens the Quick menu GPS position quality Opens the Quick menu Vehicle used in route calculation Opens the Quick menu Top row Next street n a Bottom row Cur...

Page 71: ...left right 3D map only Tilt up down 3D map only Zoom preset buttons 2D map only Tilt and zoom preset buttons 3D map only Return to GPS position button Smart Zoom button Rotate left rotate right Rotat...

Page 72: ...ailable in 2D mode Tap hold any of the buttons to set its value to the current zoom level or to reset it to its original value Tilt preset buttons available in Advanced mode only Tap one of the preset...

Page 73: ...ecording status Battery GPS position quality and Vehicle type indicator This is a complex indicator and a button that opens the Quick menu The battery part shows information about the rechargeable bat...

Page 74: ...too weak and the receiver cannot determine the GPS position GPS navigation is not possible Only a few satellites are received Position information is available but elevation altitude cannot be calcul...

Page 75: ...are two fields reserved on the Map screen to display the next two manoeuvres route events that are listed in the Itinerary Both the type of the event turn roundabout exiting motorway etc and distance...

Page 76: ...ar right Turn sharp left Keep left Continue straight in the intersection Enter roundabout The number of the exit is shown in the circle but only for the next turn Enter motorway Exit motorway Board fe...

Page 77: ...he following buttons TRAX430 supports the following 3D object types Icon Description Elevated roads Complex intersections and vertically isolated roads such as overpasses or underground tunnels are di...

Page 78: ...If there is no valid GPS position TRAX430 uses the last known GPS position as the start point When you are using a saved route TRAX430 asks you if you want to use your GPS position or the first point...

Page 79: ...active leg If you have added via points the active leg is the part of the route from your current location to the next route point the next via point or the destination if there are no more via points...

Page 80: ...ect a distance to bypass If you have used the above function before tap this button to clear the restrictions from the map Cursor menu As soon as you select one point in the Find menu the map appears...

Page 81: ...tination The previous route is deleted If the Cursor is at or near the destination this button replaces the previous one and deletes the current destination from the route The last via point is promot...

Page 82: ...s a user POI Select the POI group and give a name for the POI then select a suitable icon enter a phone number and additional information if you like Map locations can be marked with Pins Unlike POIs...

Page 83: ...navigate There are two ways to open this screen It can be opened directly from the Map screen by tapping the Turn Preview field In Advanced mode from the Navigation menu tap the following buttons In...

Page 84: ...n available for the remaining segments of the route The calculation cannot take into account traffic jams and other possible delays Tap this field to change the content of all data fields to via point...

Page 85: ...mbol are displayed in case warnings are attached to the planned route These are warnings so icons always show information for the whole route even if the data fields display values from your current p...

Page 86: ...following data and functions on this screen Name Description Function or Shows whether the route data fields show information about the final destination checkered flag or about the next via point yel...

Page 87: ...for the remaining segments of the route The calculation cannot take into account traffic jams and other possible delays Tap this field to show it on the map screen in one of the Trip Data fields GPS T...

Page 88: ...s Symbol Description This value is not shown on the map screen This value appears on the map screen in the Trip Data area This is the value at the top This value appears on the map screen in the Trip...

Page 89: ...u is a selection of controls that are frequently needed during navigation It can be opened directly from the Map screen by tapping If you tap any of the switches in the Quick menu except for the Vehic...

Page 90: ...tton and select the Vehicle type to be used for route calculation Otherwise it is selected in Route Planning options in Settings page 104 Changing the Vehicle type triggers an automatic route recalcul...

Page 91: ...our horizontal and vertical GPS position Yellow TRAX430 has a connection to the GPS receiver and GPS position information is available in 2D only the horizontal position is calculated TRAX430 cannot c...

Page 92: ...ition as the centre The satellites are shown at their current positions The GPS receives data from both the green and yellow satellites Signals from the yellow satellites are only received while green...

Page 93: ...tination by entering its coordinates Page 60 You can select as your destination a location that you have already saved as a Favourite Page 57 Opens a special 2D map screen optimised for route planning...

Page 94: ...e Route settings screen with controls to modify the vehicle the road types used for route calculation or the route calculation method Page 101 You can run a demonstration of the route at high speed Pa...

Page 95: ...ge the previously saved routes Tap the following buttons Button Description Button with the name of the saved route Opens the selected route for editing Deletes the selected route Clears the list of s...

Page 96: ...k log recording in the Quick menu Button with the name of the track log Shows the details of the selected Track Log Starts a simulated playback of the selected Track Log on the map Turns the page for...

Page 97: ...age the list of your Favourites Tap the following buttons Button Description Button with the name of the Favourite Opens the selected Favourite for editing Deletes the selected item in the list of Fav...

Page 98: ...Tap to see all POIs in the list Creates a new POI group at the given group level Turns the page for additional list items This POI group is not shown on the map This POI group and all its subgroups ar...

Page 99: ...this button to select a new icon for the POI Tap this button to enter a telephone number for the POI Tap this button to enter additional information for the POI Tap this button to delete the selected...

Page 100: ...on to remove all your Pins from the map Backup User Data All user data and the current settings will be saved on the inserted memory card There is always one backup file If you perform a backup later...

Page 101: ...alculated Page 104 These settings allow you to adjust the application to your local language measurement units time and date and their formats as well as choose the voice guidance profile you prefer P...

Page 102: ...o determine which of the present 3D objects are shown on the map and adjust the level of 3D visual detail The options are as follows Elevated Roads Complex intersections and vertically isolated roads...

Page 103: ...reappear immediately Lane Information Some maps contain lane information to help you position your car in the upcoming intersection This setting tells TRAX430 whether to display this information at th...

Page 104: ...ctions may not be taken into account e g emergency vehicles have only a few restrictions Road Types Used for Route Planning To let the route fit your needs you can also set which road types are to be...

Page 105: ...roads are pay roads where you can purchase a pass or vignette to use the road for a longer period of time They can be enabled or disabled separately from toll roads Permit needed You might need a perm...

Page 106: ...mple the motorway instead of series of smaller roads or streets Regional settings These settings allow you to adjust the application for your local language measurement units time and date and their f...

Page 107: ...30 can also help you set the time zone based on your current GPS position Time and Time Zone Settings Type Description Auto Time Correction to GPS Use this feature to synchronise the clock of your dev...

Page 108: ...to the originally recommended route Setting another point than the current GPS position as the start point of the active route will automatically disable this feature Restore Lock to Position If you...

Page 109: ...r your region ask your local dealer or may not be fully correct for all roads in the map This setting lets you decide whether you wish to receive the warnings You can set the relative speeding at whic...

Page 110: ...e fast You are asked if you want to change to car navigation mode This way you can be sure you will not be routed via one way roads in the wrong direction as a pedestrian could for example Safety Mode...

Page 111: ...ption Animation You can activate and deactivate the Menu animations When animation is turned on buttons on Menu and keyboard screens appear in an animated way Background You can choose the image to be...

Page 112: ...et the backlight level for daytime use Backlight Intensity at Night You can set the backlight level for night use Track Log settings You can set up an automatic Track Log saving and fine tune its sett...

Page 113: ...If three satellites are available the receiver can calculate the horizontal GPS position but the accuracy is lower and the GPS device does not give you elevation data only 2D reception is possible Ac...

Page 114: ...the map is shown in 2D but scaled down to a predefined zoom level When you approach the next route event the previous 2D or 3D map view returns automatically Route A series of destinations to be reach...

Page 115: ...A special POI type for speed cameras and red light cameras Different data sources are available and you can also mark the position of a Road Safety Camera on the map You can configure TRAX430 to warn...

Page 116: ...Page 116 What Else Do I Need to Know...

Page 117: ...Page 117 What Else Do I Need to Know...

Page 118: ...r exclusions set out below WARRANTY DURATION This warranty to the original retail owner only shall terminate and be of no further effect ONE 1 year after the date of original retail sale This warranty...

Page 119: ...al damages This EXPRESS WARRANTY is in addition to and does not in any way affect your rights under the TRADE PRACTICES ACT 1974 Cth Australia or the CONSUMER GUARANTEES ACT New Zealand PROCEDURE FOR...

Page 120: ...Thank you for buying a Uniden product 2008 Uniden Australia Pty Limited Uniden New Zealand Ltd Printed in China USZZ01215ZZ 0...

Reviews: