background image

3

SAVE THESE INSTRUCTIONS!
CAUTION! Risk of explosion if battery is replaced by an incorrect type! 

Dispose of used batteries according to the instructions. Do not open 

or mutilate the battery. Disconnect the battery before shipping this 

product. 

For more details, see the 

Important Information

 section.

GETTING STARTED

Installing Your Phone

Charge the Battery

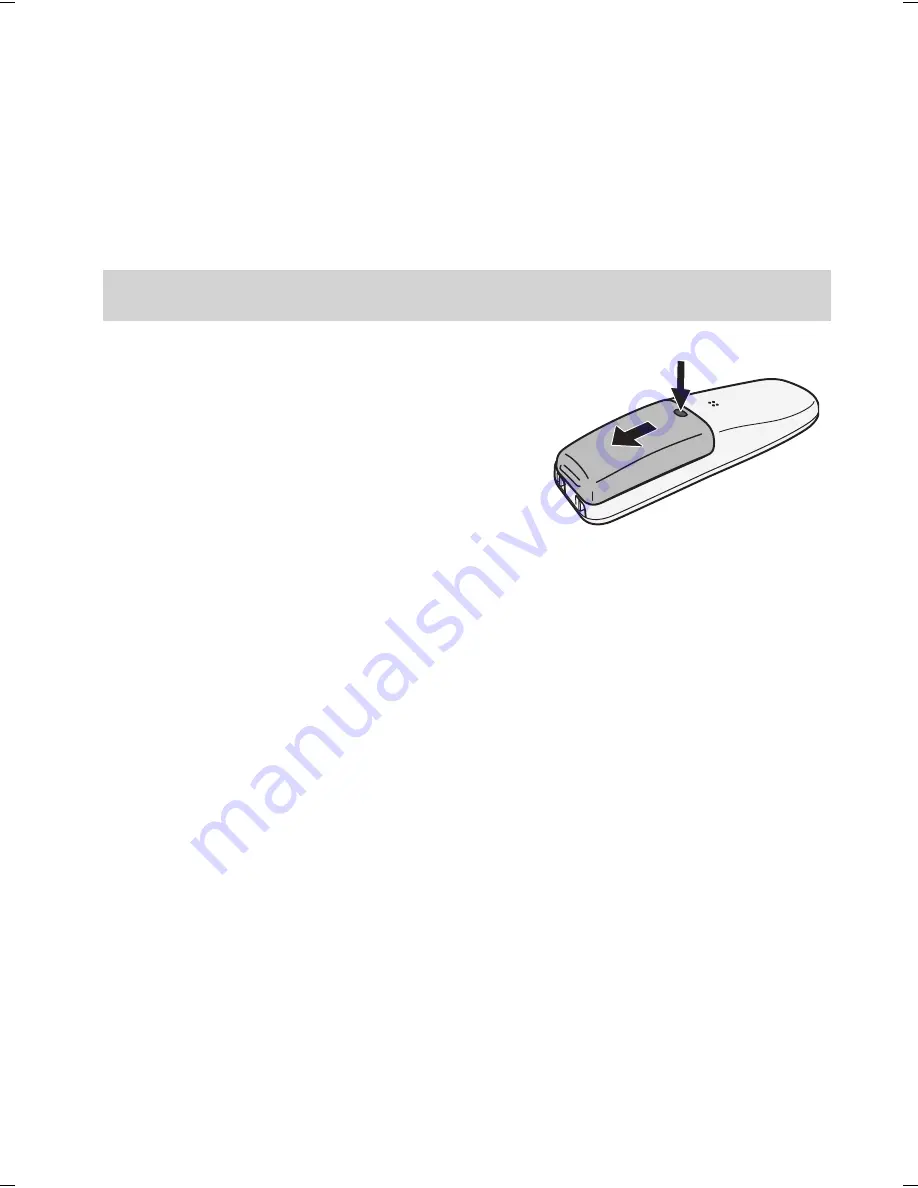
1.  Unpack all handsets, battery packs, 

and battery covers. If you need to 

remove a battery cover, press in on the 

notch and slide the cover down and off.

2.  Line up the battery connector with the jack inside the handset. 

(The battery connector will only fit one way.) 

3.  Push the connector in until it clicks into place; tug gently on the 

wires to make sure the battery pack is securely connected.

4.  Replace the battery cover and slide it into place.

5.  Connect the AC adapters to the 

DC IN 9V

 jack on the base (and 

on the charger(s) if you have multi handsets). Set the plug(s) into 

the notch(es).

6.  Plug the other end of the adapters into standard 240V AC outlets.

7.  Place one handset in the base (and the other(s) in the charger(s) 

if you have multi handsets) with the display(s) facing forward. 

The display on each handset should light up; if it doesn’t, reseat 

the handset or try plugging the AC adapter into a different outlet.


#

Charge all handsets completely (about 15 hours) before using 

them.

Connect the Telephone Cord

Use the telephone cord to connect the 

TEL LINE

 jack on the base to a 

standard telephone wall jack.

Summary of Contents for 1035 Series

Page 1: ...cts Need Help Get answers at our website www uniden com au for Australian model or www uniden co nz for New Zealand model DECT 1035 Series Owner s Manual Battery cover You will also find Not pictured...

Page 2: ...Do not dispose of batteries in a fire They may explode Check with local codes for possible special disposal instructions Do not place the handset in any charging cradle without the battery installed...

Page 3: ...onnector in until it clicks into place tug gently on the wires to make sure the battery pack is securely connected 4 Replace the battery cover and slide it into place 5 Connect the AC adapters to the...

Page 4: ...ne jack 2 Make a quick test call Press End to hang up If there is a lot of noise see page 21 for tips on avoiding interference 3 Test all your handsets the same way If you can t get a dial tone try mo...

Page 5: ...d to delete all the characters Talk flash In standby start a telephone call get a dial tone During a call switch to a waiting call End During a call hang up In the menu or any list exit and go to stan...

Page 6: ...attery is charging Blinking there are new messages Base keys LEDs and how they work Key icon What it does Up In standby increase the ringer volume While a message is playing increase the speaker volum...

Page 7: ...nd what they mean Since the icons appear based on what you re doing with the phone you won t ever see all of these icons at the same time Icon What it means The ringer is turned off and will not ring...

Page 8: ...END to exit the menu To go back a screen press PHONEBOOK LEFT The cursor shows the highlighted option To move the cursor use UP DOWN OR HANDSET SETUP T coil Ringer Tones Handset Setup Ans Setup Day T...

Page 9: ...n Your Phone Use the 12 key dial pad when you want to enter text into your phone a name in the phonebook the handset banner etc The phone defaults to a capital letter for the first letter and any lett...

Page 10: ...e listening to the earpiece press Up to increase the volume and Down to decrease it You can set the speaker volume on the base Anytime you are listening to the base speaker press Up to increase the vo...

Page 11: ...ll from newest to oldest Press UP to scroll from oldest to newest Dial a number from the lists Highlight the number you want and press Talk flash Close the lists Press Phonebook left To select a numbe...

Page 12: ...honebook Phonebook left Scroll through the entries Down to scroll through the phonebook from A to Z or Up to scroll from Z to A Jump to entries that start with a certain letter the number key correspo...

Page 13: ...number up to 20 digits into the phonebook just like a regular phonebook entry Be sure to enter the code number into the phonebook exactly as you would enter it during a call 2 When you hear the prompt...

Page 14: ...outside call comes in during an intercom page the phone cancels the page so you can answer the incoming call If an outside call comes in during an intercom call press Talk flash to hang up the interc...

Page 15: ...ou listen to your messages the voice message icon turns off If it doesn t you can reset it With the phone in standby open the menu and select Global Setup select VMWI Reset then select Yes Using the A...

Page 16: ...ode Press MENU SELECT to choose the displayed option Press END to exit remote operation mode 4 Delete 3 Skip 2 Play 1 Repeat 6 SelectGreeting 8 RecNewGreeting Use PHONEBOOK LEFT to go to the previous...

Page 17: ...eting press End To re record it go back to step 2 Switch Between the Two Greetings 1 Access the answering system from any handset Wait until the system finishes its announcements or press 5 Stop to sk...

Page 18: ...Play stop Select 5 Stop Screening Your Calls Another feature your answering system gives you is call screening While the system is taking a message you can hear the caller on the base speaker if you t...

Page 19: ...hear beeping enter a 2 digit command from this chart If you don t press any keys for 15 seconds the system hangs up and return to standby IMPORTANT INFORMATION Solving Problems If you have any troubl...

Page 20: ...n Privacy Mode The answering system does not work Making sure the answering system is on Making sure the base is plugged in The system won t record messages Making sure the Record Time is not set to A...

Page 21: ...pment especially wireless LAN equipment and DSL modems radio based wireless devices such as room monitors wireless controllers or wireless headphones or speakers fluorescent light fixtures especially...

Page 22: ...nstalling a Line Filter or DSL Filter Sometimes broadband Internet services that use the telephone line can interfere with phones One of these services DSL often causes static on telephones A DSL filt...

Page 23: ...fire or electrical hazard Do not place the unit in direct sunlight or subject it to high temperatures Fully charged the battery should provide about 7 hours of talk time and about 6 days of standby ti...

Page 24: ...r may damage the battery or cause it to explode Mounting the Base on a Wall You can mount your base to any standard telephone wall plate using the included wall mount bracket Bottom of the base To AC...

Page 25: ...pes or other items behind the mounting location that could cause a hazard when inserting screws into the wall Mount your phone within distance of a working phone jack Make sure the wall material is ca...

Page 26: ...will work correctly in all respects with another item of Telepermitted equipment of a different make or model nor does it imply that any product is compatible with all of Telecom s network services T...

Page 27: ...itationphonenumbers addressesandimages thatmaybestoredonyourProduct Statement of Remedy If the Product is found not to conform to this warranty as stated above the Warrantor at its discretion will eit...

Page 28: ...aUnidenproduct 2011 Uniden Australia Pty Limited Uniden New Zealand Ltd Printed in Vietnam U01UN301ZZA 0 For more exciting new products please visit our website Australia www uniden com au New Zealand...

Reviews: