DUA plus 30 µ tank
2.7 -
MODIFICATION FOR
OTHER GASES
The boilers are manufactured for the type
of gas specifically required upon order.
Any subsequent conversion must be
performed by qualified technicians who will
use the kits supplied by
Unical
and perform
the conversion and required adjustments
for correct preparation of the boiler for use.
To convert the boiler from one type of gas
to another proceed as follows:
for conversion from natural gas to
LPG
- remove the main burner;
- disassemble the 15 injectors "1
11
11"of the
main burner and replace them with those
with a diameter corresponding to the new
type of gas (see table “INJECTORS -
PRESSURES”);
- reassemble the main burner;
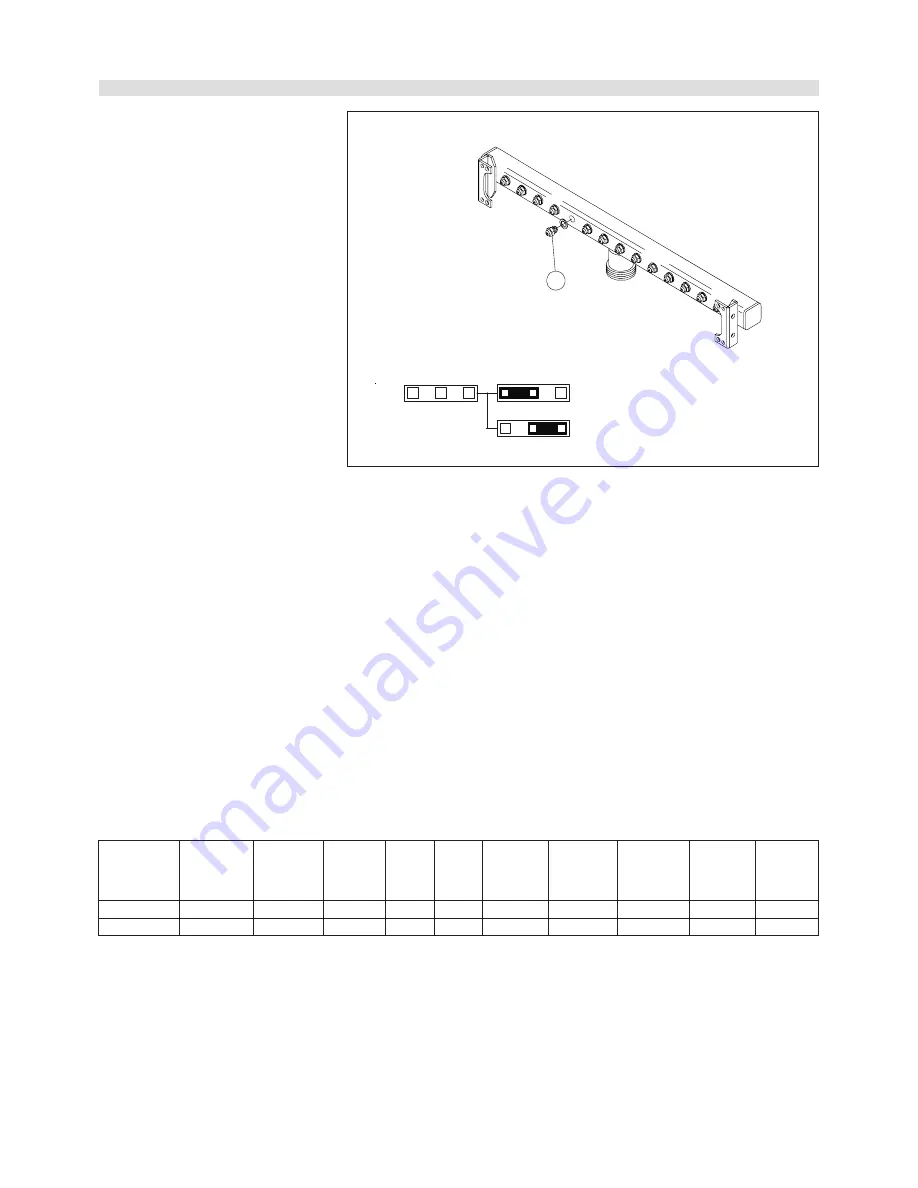
- position the jumper on the modulation PCB
in the panel board as shown in fig. 24
- remove plug
‘’A’’
(fig.21) on the gas valve
and fully tighten max pressure adjustment
screws
‘’C"
- check the pressure value upstream the
gas valve (see table “INJECTORS -
PRESSURES”) and adjust the min. pressure
of the burner as shown in section
" ADJUSTING THE BURNER”, by screwing
the nut "B" to increase or unloosing the nut
"B" to decrease the burner pressure.
- check that the burner is functioning
properly;
-
check that there are no gas leaks.
- tighten and seal the plug
“A”
(fig.28) of
the modulating coil (fig. 21)
- when the conversion is completed, fill in
the label, supplied with the kit, with the
information required and stick it onto the
boiler alongside the data plate.
for conversion from LPG to natural
gas
- remove the main burner;
- disassemble the 15 injectors of the main
burner and replace them with those with a
diameter corresponding to the new type of
gas (see “INJECTORS - PRESSURES”);
- reassemble the main burner;
- get access to the modulating PCB inside
the panel board and position the jumper
shown in thefig. 24;
- remove plug ‘
’A’’
(fig.21) from the gas
valve modulating coil and adjust the
maximum and minimum output s described
in paragraph 2.6 (A
A
A
A
A and B
B
B
B
B)
- check that the burner is functioning
properly;
-
check that there are no gas leaks.
- tighten the screw
“A”
of the plug of the
gas governor (fig.21);
- when the conversion is completed, fill in
label, supplied with the kit, with the
information required and stick it onto the
boiler alongside the data plate.
fig. 24
NOZZLES - DIAPHRAGMS - PRESSURES - GAS FLOW RATES
Gas type
Nominal
Output
(kW)
Nominal
Input
(kW)
Supply
Pressure
(mbar)
No. of
Nozzles
Ø of
Diaphr.
(mm)
Min
Burner
Pressure
(mbar)
Max
Burner
Pressure
(mbar)
Min
Gas Flow
rate
Max
Gas Flow
rate
Gaz H
(G20)
Gaz P
(G31)
13,9 - 29,95
13,9 - 29,95
15,5 - 32,2
15,5 - 32,2
20
37
15
15
Ø of
nozzle
(mm)
1,25
0,78
NO
NO
2,8
7,6
13,7
32,3
1,64 m³/h
1,20 kg/h
3,40 m³/h
2,50 kg/h
1
NAT
GPL
JP4
POSITIONING OF THE JUMPER
The pressures at the burner indicated in the following table must be checked after the boiler has been operating for 3
minutes.


