data is unlocked, the tester returns to testing mode, and the symbol “
HOLD
” disappears. The tester
can store maximum 3000 groups of data.
7. Data Viewing/Deletion
Press “
ڼ
” to view data and display the stored data of Group No. 0001. Press “
ۆ
” and “
ڼ
” to move
the cursor, press “
MEM
” to confirm. The tester is designed with fast viewing mode (+1, -1, +10, -
10), press “
MEM
” once to view data by increment/decrement. Move the cursor to “+10, -10” and
hold down “
MEM
” to view data by increment/decrement at 100.
To exit data viewing mode and return to testing mode, please move the cursor to “Return” and then
press “MEM”.
8. Data Uploading
Connect the tester with computer via USB cable, turn on the clamp sensor, then operate the monitor
software. If the software displays open serial port and successful connection, the stored data can
be read, uploaded, and saved.
The monitor software can indicate maximum, minimum and average values, and have multiple
functions including dynamic display, real-time monitoring, alarming threshold setting, alarming
indication, data viewing/saving/printing, etc.
VII.
Battery Replacement
It is forbidden to test without battery cover set in place, otherwise it may pose
risk.
Pay attention to the battery polarity, otherwise it may cause product damage.
Do not apply new battery with used one.
1. The symbol “
” flashes if the battery voltage of primary clamp sensor is lower than 4.8V. If the
battery voltage of the tester is lower than 4.8V, the tester shows the low battery symbol to indicate
insufficient battery power, please replace the battery.
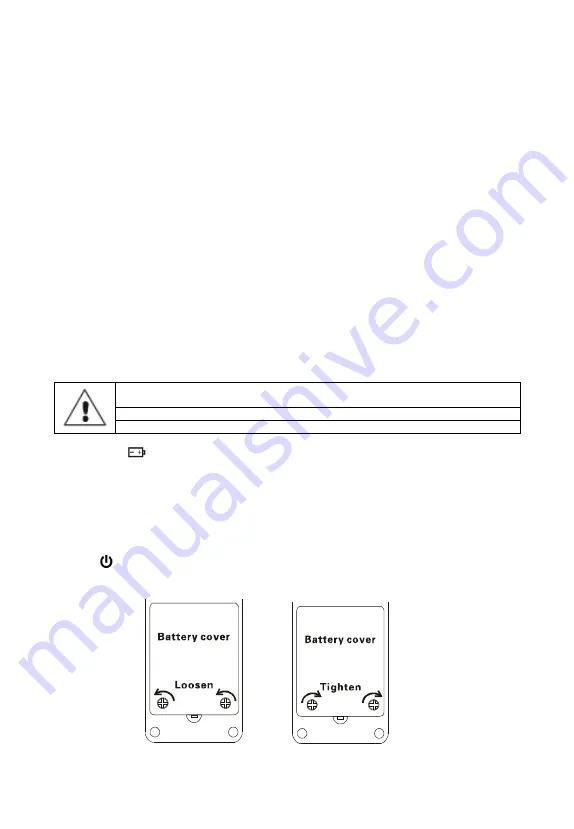
2. Power off the product, loosen the screws at the battery cover, open the battery cover, replace
with new batteries (pay special attention to the battery polarity), rejoin the battery cover, then tighten
the screws.
3. Press “
” to check if the product can be powered on normally. If the product cannot be powered
on, please repeat Step 2.
10


