EYE XO2 CALIBRATION GUIDE
5
Calibration - Continued
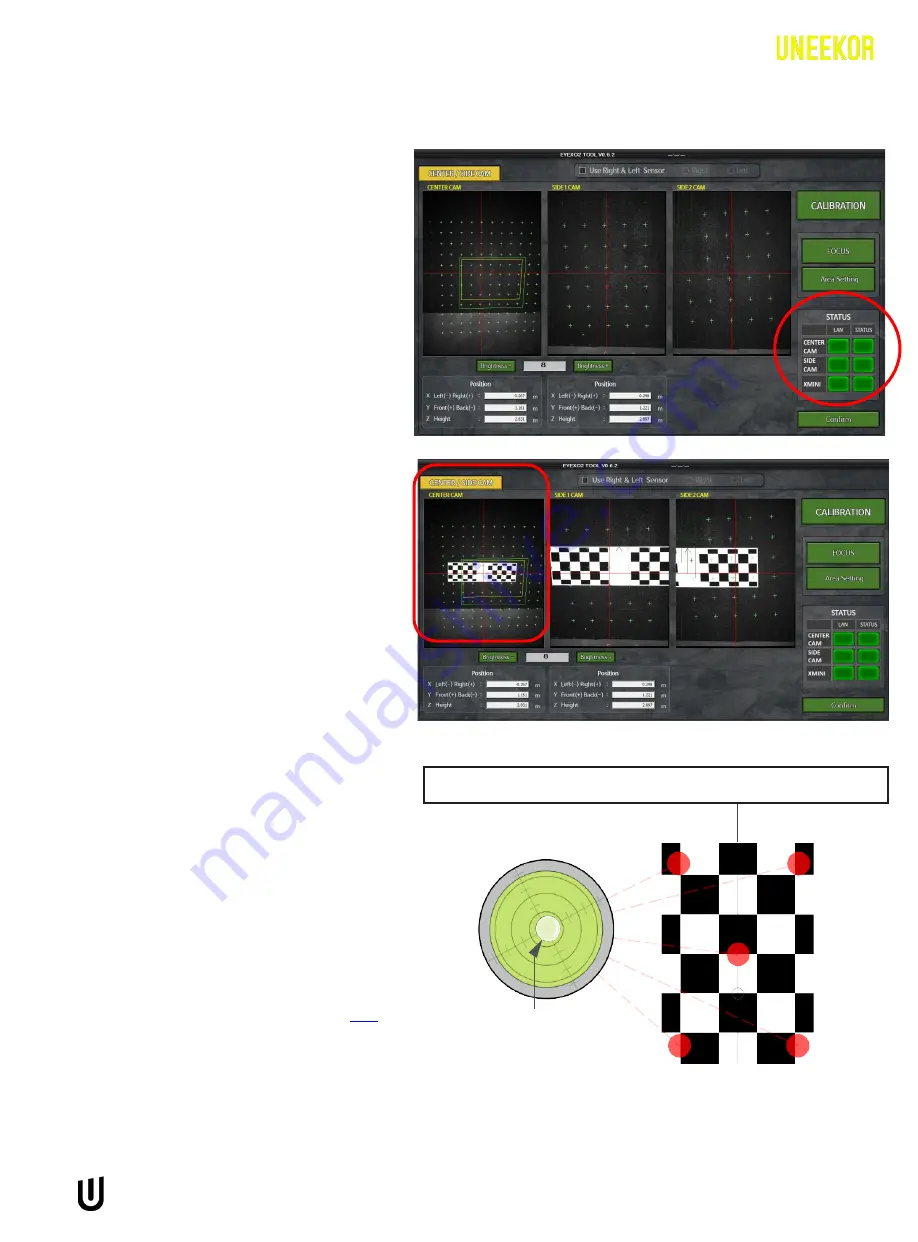
Once the “EYEXO2_Calibration” is opened you
will see this window >
*Make sure that there is nothing else white in
the screen on the right except for the
calibration board.
Confirm that you see the “STATUS” boxes for
“CENTER CAM,”
“SIDE CAM,” and “XMINI” are
all green.
(If the status is red, that means you have not
properly set the IP address. Refer to the red text
at the end of this page)
Use the “CENTER CAM” as your point of
reference. Make sure the arrow on the
calibration board is facing the impact
screen. Align the crosshair on the calibration
board with the red crosshair on the
“CENTER CAM.” (Double click the “CENTER
CAM” box to enlarge image.)
Next place the bubble level on the chart to
confirm
that the hitting mat is level front to
back and side to side.
Confirm that the top of the front facing side
of the checkerboard is parallel to the impact
screen, and then click the “CALIBRATION”
button on the top right corner.
*Make sure that your sensor is not connected
via ethernet adapter or hub.
**Confirm that the static IP of the ethernet port
is set to 172.16.1.100 before starting the
calibration process. You can use the guide
to help configure it properly.
Bubble
SCREEN
2
3
4
5
Steps 2 & 3


