26
8
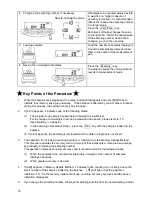
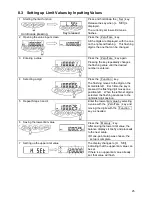
Opening the value input screen
Press the Zero/Tare key.
Follow the same procedure as
in “Step
2.
”
9
Setting the upper-limit value
Follow the same procedure as
described for the lower-limit value and
enter the upper-limit value.
10 Saving the upper-limit value
Press the Memory key.
After saving the upper-limit value, the
balance displays it briefly and
terminates setup.
☆
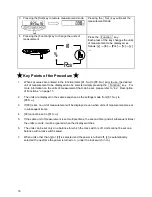
Key Points of the Procedure
☆
1.
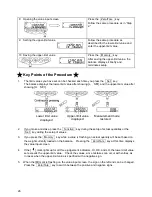
The limit values you have set can be checked each time you press the Set key.
The balance displays the lower-limit value after showing [L.
SEt
], and the upper-limit value after
showing [H.
SEt
].
2.
If you make a mistake, press the Function key during the setup of actual quantities or the
Set key during the setup of values.
3.
If you press the Memory key while a value is flashing, an actual quantity will be set based on
the weight currently loaded on the balance. Pressing the Zero/Tare key at this time displays
the value input screen.
4.
If the [ ] mark lights up for all three judgement indicators, HI, OK, and LO, the lower-limit value
set exceeds the upper-limit value. Check the values, since mistakes can occur with entries, as
in cases when the upper-limit value is specified with a negative sign.
5.
When the [M] mark is flashing on the value input screen, the sign on the left end can be changed.
Press the Zero/Tare key to switch between the positive and negative signs.
Lower limit value
displayed
Upper-limit value
displayed
Measurement mode
restored


