background image


23 


PVR (Personal Video Recorder) Function 


1.


Recording 

 
You can select a recording storage device with the following sequence :   

Menu > Configuration > Recording Option > Record Device. 

Default is set to ‘

USB’


1.1


Recording methods     

There are 3 type recording methods.   

(Instant Recording / Time Scheduled Recording / Event Scheduled Recording)


Instant Recording :


At anytime, you may press  the 

RECORD

  button to start your 

recording instantly. 


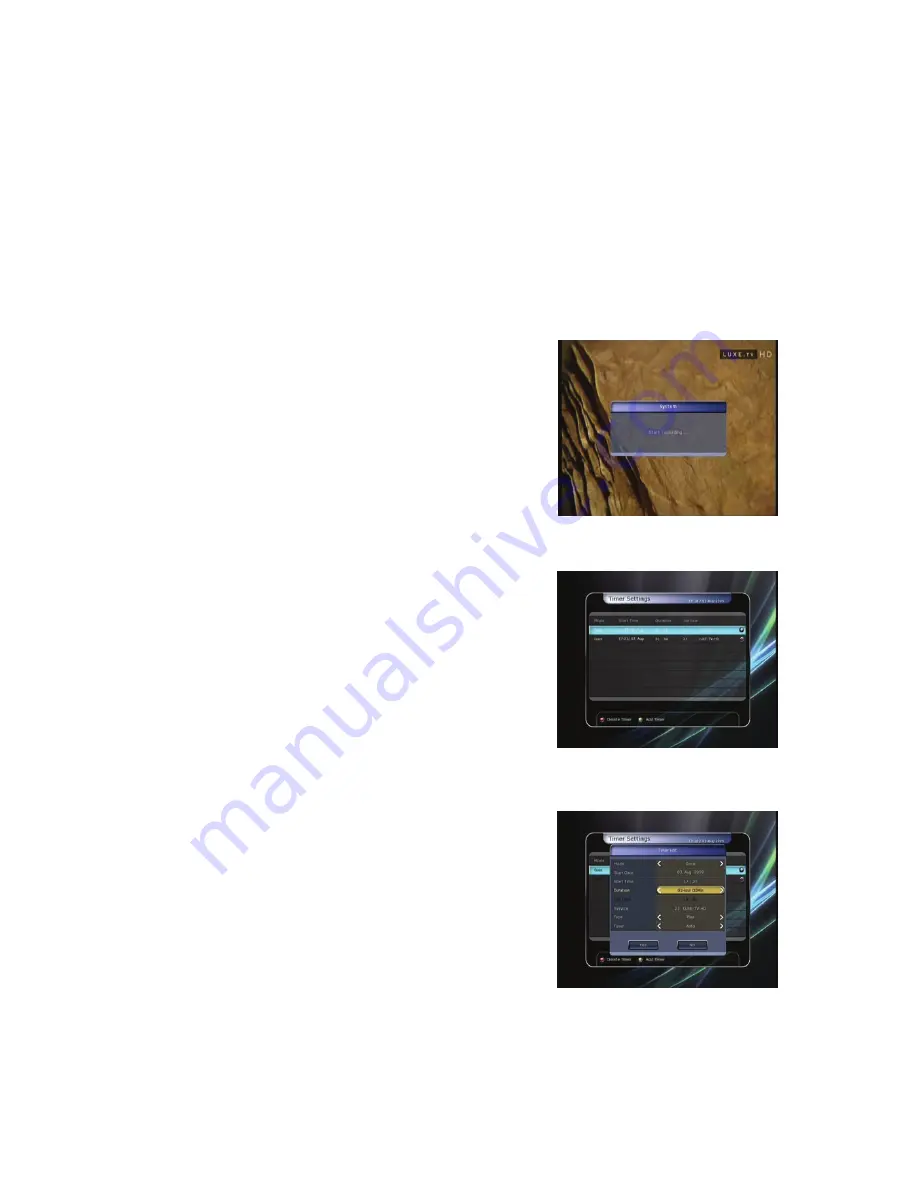
Time Scheduled Recording :


-


In Timer Settings menu, you may set the time & program to 
record your desired service program.   

(Main Menu > System Tools > Timer Settings)


-


Press the 

GREEN

 button to activate the new timer edit screen. 


-


In the Timer Edit screen,  you may choose start date/time, 
duration, service, mode, type (Recording/Play), then simply 
press  the 

Yes

  button to schedule  your  recording  event.   

Please note that the minimum offset time of 3 minutes is 
required from the Start time & current time for appropriate 
recording process to take place. 


Summary of Contents for 980HD miCro PVR

Page 1: ...User s Manual 980HD miCro PVR High Definition Digital Satellite PVR...

Page 2: ......

Page 3: ...with Digital A V Output 15 2 Receiver to TV With Analog A V Output 16 3 Connecting to Dish 16 3 1 Using Single DISH 16 3 2 Using DiSEqC switch 17 3 3 Using DiSEqC motor 17 Guide of Functions 18 1 Sel...

Page 4: ...m Tools 32 1 1 Storage Manager 32 1 2 Timer Settings 32 1 3 Service List Manager 33 1 4 Data Transfer 34 2 Configuration 35 2 1 Recording Option 35 2 2 Parental Control 35 2 3 Display Setting 36 2 4 T...

Page 5: ...paratus When a cart is used use caution when moving the cart apparatus combination to avoid injury from tip over Unplug this apparatus during lightning storms or when unused for long periods of time R...

Page 6: ...right This manual is protected by copyright laws Copy use and reproduction of this manual in part or whole without Manufacturer s prior written approval are prohibited 4 Disclaimer The manufacturers d...

Page 7: ...SEqC 1 0 1 1 1 2 and USALS Full HD On Screen Display Favorite Service Groups Powerful Service with Favorites Lock Skip Move and Delete Functions Service Sorting by Alphabet Transponder and CAS User Fr...

Page 8: ...8 2 Accessories User s Manual AAAsize Batteries X2 Remote Control HDMI Cable Option...

Page 9: ...ces in normal mode or to move the highlighted bar in menu mode 4 VFD Display The VFD consists of 8 digits and various icons These letters and icons display the current status of receiver such as the s...

Page 10: ...ndicates that the sleep timer is set up 9 Clock2 Indicates a timer has been activated 10 CARD Indicates that a smart card is inserted 11 KEY Indicates that current channel is locked 12 USB Indicates t...

Page 11: ...ow 5 AUDIO L R Connects to the TV or VCR using an RCA cable Stereo audio output White Red 6 Component Connects to the TV or VCR using a component cable YPbPr 7 USB Connects to an external USB storage...

Page 12: ...utton the resolution changes in the following sequence 576i 576p 720p 1080i 7 Page Up Down Move to the next or previous page if more than one page are available This button also is change the location...

Page 13: ...nic Program Guide Shows the TV Radio program guide 22 Color Buttons a RED Used for special functions in the menu The RED key is used to sort lists in the service list or go to the previous day search...

Page 14: ...e in MP3 play mode This button is also used to jump back to the beginning of a recording during a playback 28 STOP To stop time shifting play back or recording 29 Recording To start Recording 30 Next...

Page 15: ...NOTE Depending on the A V equipment you own there are various ways you can connect the STB To choose the best connection option please refer to the manual of the equipment you would like to connect t...

Page 16: ...ponent to the Component input of the TV Connect the RCA to the RCA input of the TV NOTE The component connection YPbPr is recommended for Digital TV The composite connection RCA cable is recommended f...

Page 17: ...17 3 2 Using DiSEqC switch Connect the cable from the DiSEqC switch to LNB IN 3 3 Using DiSEqC motor Connect the cable of the DiSEqC motor to LNB IN...

Page 18: ...small screen on the top right To watch that service press the OK button once more To watch the previous service press the EXIT button In the Service List window you can also select additional functio...

Page 19: ...by Digital Time duration of the service and so on By pressing the INFO button once again you can get more detailed information about the service 3 Multi Picture Display Press the BLUE button to displa...

Page 20: ...press the OK button for the appointed event To edit the schedule of the recording press the RECORD button for the appointed event 5 Favorite Group Select the FAV Favorite to view all favorite ten gro...

Page 21: ...of the YELLOW button toggles between additional menus 10 Teletext When the TELETEXT icon on INFO Banner is appeared Activated Press the TELETEXT button to view the teletext information 11 PIP Picture...

Page 22: ...E UP DOWN button the location of the sub picture is changed If you press the PIP SERVICE LIST button you can see the list of services of sub picture You can change the service of the sub picture from...

Page 23: ...ORD button to start your recording instantly Time Scheduled Recording In Timer Settings menu you may set the time program to record your desired service program Main Menu System Tools Timer Settings P...

Page 24: ...schedule then press OK The event will be scheduled with the BLUE play icon This BLUE play icon means that you want to just watch the event at the scheduled time Press the OK button one more time then...

Page 25: ...n you are recording 2 services you can set Primary Secondary with Left Right ARROW button Press OK button to go to the recording service NOTE STB can record up to two different services only from the...

Page 26: ...inning When recording 2 services at the same time Press the STOP button to see a message window of current recording status information If you select one of the 2 recordings and press the OK button th...

Page 27: ...ng for time shift will continue Pressing the PAUSE button once again will resume playback from the paused time While watching live TV press the PLAY TIMESHIFT button to show the play bar on your scree...

Page 28: ...iles menu press the PLAY LIST button Locate the recorded file s you wish to play with the UP DOWN button and press the OK button to playback the recorded file s To choose a particular selection of fil...

Page 29: ...c with Shuffle playback and repeat You can use the same Select Device Sorting and File Option features as in the Recorded Files 3 4 Photo If you press the RIGHT ARROW button in Music you can go to the...

Page 30: ...Forward button Press the FF button to change the speed to x2 x3 x4 and x5 If you once again press the FF button in its x5 mode it returns to normal x1 speed play You can also change the rewind speed w...

Page 31: ...a Transfer Configuration 1 Recording Option 2 Parental Control 3 Display Setting 4 Time Setting 5 Language Setting 6 A V Output Setting Installation 1 Dish Setting 2 Positioner Setting 3 Service Searc...

Page 32: ...device Free Displays free size of current device Format If you press the OK button to format current device the device will be formatted with above file system NOTE When file system is Unknown the dev...

Page 33: ...ices to be moved will be shown on the middle window Move the service to the middle window by using the ARROW and OK buttons then the middle window service will be moved to a specified location when th...

Page 34: ...he ARROW and OK buttons you can edit the name of the service with the keyboard 1 4 Data Transfer Transfer all System data to USB storage If you want to transfer BOTH the current system parameters and...

Page 35: ...tion to OFF the time shifting function is deactivated Commercial Skip You can adjust skip time in 5 second intervals 10 Sec 15 Sec 20 Sec 25 Sec 30 Sec for when you use LEFT RIGHT ARROW button to jump...

Page 36: ...aylight Saving If you want to apply daylight saving select the counter by using the ARROW buttons Manual Time Setting Date Enter the calendar date by using ARROW buttons then press the OK button to fi...

Page 37: ...TV is connected to the SCART or Composite Video output of the STB In case of HDMI your TV can display a picture for all of the resolution settings of the STB But it is also possible that your TV may...

Page 38: ...e supported at the same time And then the LNB 22KHz setting is disabled as this is used for L O switching LNB 22KHz When you use a separate 22 KHz tone switch box set the 22 KHz tone switch enabled or...

Page 39: ...ve to Dish Setting menu directly Positioner Setting Press the OK button to move to the Positioner Setting menu directly Start Search Press the OK button to start search Manual Search Mode Satellite Pr...

Page 40: ...re automatically set and you don t have to configure them manually If you select Off You have to input the configuration manually IP Address Subnet Mask Gateway First DNS Second DNS You can input the...

Page 41: ...a valid smart card into smart card slot The message of Smart card Initializing will appear on the screen After the message disappears you can watch the service you want Smart card information You can...

Page 42: ...nd no other device with the remote Check the brightness level of the TV Check the resolutions that your TV supports and set the proper resolution with the remote Resolution button to obtain a picture...

Page 43: ...ngth K 7 DVB S 1 2 3 5 2 3 3 4 4 5 5 6 8 9 and 9 10 DVB S2 MPEG Transport Stream A V Decoding Transport Stream Profile Level Input Rate Video Formats Video Resolution Audio Decoding Audio Mode Samplin...

Page 44: ...onnector 100 Mbps Front Panel Slot Display Buttons Indicators 2 Common interface PCMCIA slot 1 Smart Card Slot VFD Vacuum Fluorescent Display 8Digit 3 Buttons Standby CH UP DOWN 1 LEDs Standby Power S...

Page 45: ...45 Memo...

Page 46: ......

Page 47: ......

Page 48: ...High Definition Digital Satellite Receiver 980HD miCro PVR V 09123e...

Reviews: