


54
ULEAD VIDEOSTUDIO USER GUIDE
Mixing it up
VideoStudio has two explicit sound tracks, one for voice and one for music. If you captured
your video with sound, then in reality, you also have a third sound track that is included with
the video file. This really gives you a lot of creative freedom. Vacation shots, scenery and
nature videos, and movies of parties all lend themselves very well to music video style
productions. Or you can combine this format with a voiceover. And when someone talks to the
camera, you may want to eliminate the music all together for a short period of time. The key to
making this all work smoothly is to control the volume of the various clips. This is done with
the Options panel.
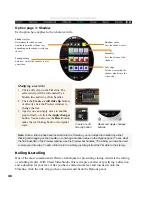
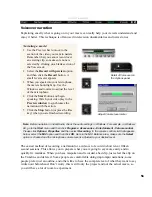
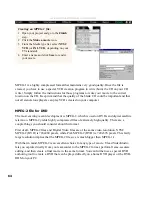
The control of your audio tracks is found on the Options panel. The panel shown below is
actually from a video clip, but you will notice that it is the same as the audio clip on the
Options panel. The first control is the volume control, expressed as a percentage of the
original. Click the control to select from a range of audio amplification options: 0 to 500%
(where 100% is no change and 0% will completely silence the clip). If you want a completely
silent part, it is probably easiest to just delete the clip from one of the audio tracks. This,
however, is not the best way to eliminate the audio part of a video clip on the Video track. Any
changes made with this control applies to the entire clip.
Ulead VideoStudio splits the audio into Voice and Music tracks for convenience as well as
simple mixing, but you shouldn’t feel limited by this. You may have noticed that you can insert
any sort of Windows audio file onto either track, regardless of the content. Music clips can go
on the Voice track and vice versa.
Volume amplification control
Audio controls for a video clip