EN
C- INSTALLATION OF YOUR FRUIT JUICE AND AYRAN COOLER
Positioning
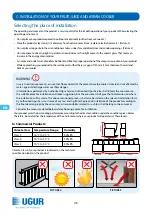
Possible placement positions:
1- In a way that the back side alone is opposite to the wall; be careful that there is a gap of 150 mm (15 cm)
between the wall and your cooler.
2- In a way that is place to a corner; when you place it to a corner, leave a gap of 150 mm (15 cm) behind. You
can lean the side, corresponding to the corner, to the wall.
The most important point to be considered in all cases of product placement is not to obstruct ventilation of
the compressor assembly.
Without exposing your product to any slope, place and operate it in a manner that it is on its feet or wheels.
The freer the compressor assembly ventilation is, the better the device will run.
Installation
Before positioning, remove and disassemble all packaging materials and bottom wooden pallet of the
cooler. (It may be necessary to lift the cooler for removing the bottom pallet).
Insert the replacement parts inside your product according to the installation instructions. Only use
genuine Uğur spare parts.
Inauthentic spare parts may constitute danger for you and damage your product.
Place the product anywhere you desire. Consider the placement rules written in the manual while
positioning the product.
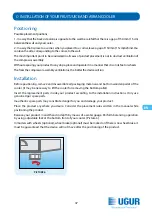
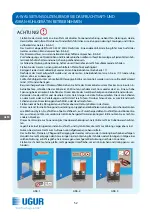
Balance your product in width and in depth by means of a water gauge. Perform balancing operation
by using adjustable feet at the bottom front of your cooler. (Picture 6)
In models with wheels (optional), wheel brake (optional) must be locked or if there is no wheel brake, it
must be guaranteed that the device will not move after the positioning of the product.
PICTURE 6
37
Summary of Contents for UAM 10
Page 23: ...TR 23...
Page 45: ...EN 45...
Page 67: ...ALM 67 Die Frischegarantie...
Page 89: ...FR 89 Garantie de la fra cheur...
Page 111: ...IT 111 Freschezza garanzia 111...
Page 133: ...ES 133 Garant a de frescura...
Page 135: ...RU U ur So utma A www ugur com tr 135...
Page 136: ...RU R134a R404a R290 R290 R600a 10 EEE 136...
Page 137: ...RU U ur So utma A U ur U ur 137...
Page 138: ...RU U ur 138...
Page 139: ...RU A B C D E F 139...
Page 140: ...RU A 1 220 240 50 2 3 17 1 2 20 1 2 3 140...
Page 141: ...RU A 24 www ugur com tr AEEE WEEE 2002 96 EC U ur WEEE 141...
Page 142: ...RU A U ur U ur U ur U ur U ur U ur U ur U ur 142...
Page 143: ...RU A 5 R600a R290 U ur 143...
Page 144: ...RU B EN23953 2 U ur So utma A 144...
Page 145: ...RU 145...
Page 146: ...RU C 1 4 5 150 15 U ur U ur U ur 3 16 C 25 C 60 Rh 4 16 C 30 C 55 Rh 5 16 C 40 C 45 Rh 4 5 146...
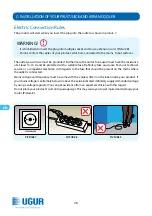
Page 147: ...RU C 1 150 15 2 150 15 5 U ur 6 6 147...
Page 148: ...RU C 7 8 9 220V 50Hz 16A 7 8 10 16 9 148...
Page 149: ...RU D 10 17 1 220 240 50 10 U ur 1 0 1 149...
Page 150: ...RU D 11 17 11 150...
Page 151: ...RU E Push Push 151...
Page 152: ...RU U ur U ur So utma A E 152...
Page 153: ...RU E 153...
Page 155: ...RU 155...
Page 157: ...AR U ur So utma A www ugur com tr 157...
Page 158: ...AR TCP BCP CFC 01 158...
Page 159: ...AR U UR SO UTMA A 159...
Page 160: ...AR 160...
Page 161: ...AR 161...
Page 163: ...AR 24 www ugur com tr AEEE WEEE EC 96 2002 WEEE 163...
Page 164: ...AR 164...
Page 165: ...AR R290 R600a 165...
Page 166: ...AR EN23953 2 U ur So utma A 166...
Page 167: ...AR 167...
Page 168: ...AR 4 1 5 15 150 3 25 16 60 4 30 16 55 5 40 16 45 4 5 168...
Page 169: ...AR 15 150 1 15 150 2 6 6 169...
Page 170: ...AR 7 8 9 220V 50Hz 16A 7 8 16 10 9 170...
Page 171: ...AR 10 20 1 240 220 10 50 0 1 1 171...
Page 172: ...AR 11 17 11 172...
Page 173: ...AR Push Push 173...
Page 174: ...AR U ur So utma A 174...
Page 175: ...AR 175...
Page 176: ...AR 26 176...
Page 177: ...AR 177...
Page 178: ......


