


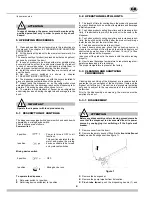

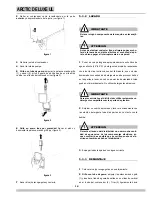


7
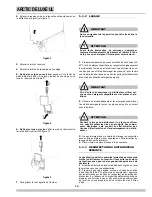
its gasket (see figure 5).
figure 5
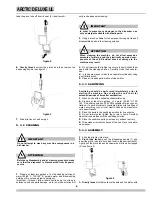
4
Fit the bowl gasket to the evaporator. Note: the largest brim
of the gasket must face against the drip plate (see figure 6).
figure 6
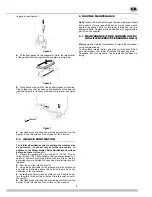
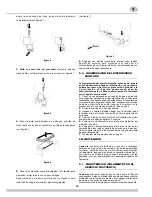
5
Place bowl on the unit. Wet the gasket for ease of insertion.
Please take care that the hook on the backside of the bowl be
inserted properly in its seat on the upper drip plate. (see figure
7).
figure 7
6
Use fresh product to chase any remaining sanitizer from the
bowl(s). Drain this solution. Do not rinse out the machine.
5. 4 IN-PLACE SANITIZATION
The In-Place Sanitization prior to starting the machine may
be performed, if needed, only as further precaution, in
addition to the Disassembled Parts Sanitization described
before, but never in lieu of it.
1
Prepare two gallons of a warm (45-60°C, 120-140 °F) sani-
tizing solution (100 PPM available chlorine concentration or 1
spoon of sodium hypoclorite diluted with two litres of water)
according to your local Health Codes and manufacturer’s speci-
fications.
2
Pour the solution into the bowl(s).
3
Using a brush suitable for the purpose, wipe the solution on
all surfaces protruding above the solution-level and on the
underside of the top cover(s).
4
Install the top cover(s) and operate the unit. Allow the solu-
tion to agitate for about two minutes. Drain the solution out of
the bowl(s).
5
Use fresh product to chase any remaining sanitizer from the
bowl(s). Drain this solution. Do not rinse out the machine.
6 ROUTINE MAINTENANCE
Daily:
inspect the machine for signs of product leaks past seals
and gaskets. If proper assembly does not stop leaks around
seals or gaskets, check for improper lubrication, worn or
damaged parts. Replace parts as needed with original spare
parts from the supplier.
6. 1 MAINTENANCE (TO BE CARRIED OUT BY
QUALIFIED SERVICE PERSONNEL ONLY)
Montly
: clean all internal components, primarily the condenser,
using compressed air.
To clean these internal parts, unplug the unit or switch off the 2-
pole wall breaker, then remove front panel (dispensing side).
Condenser fins are very sharp. Use extreme caution when cle-
aning.


