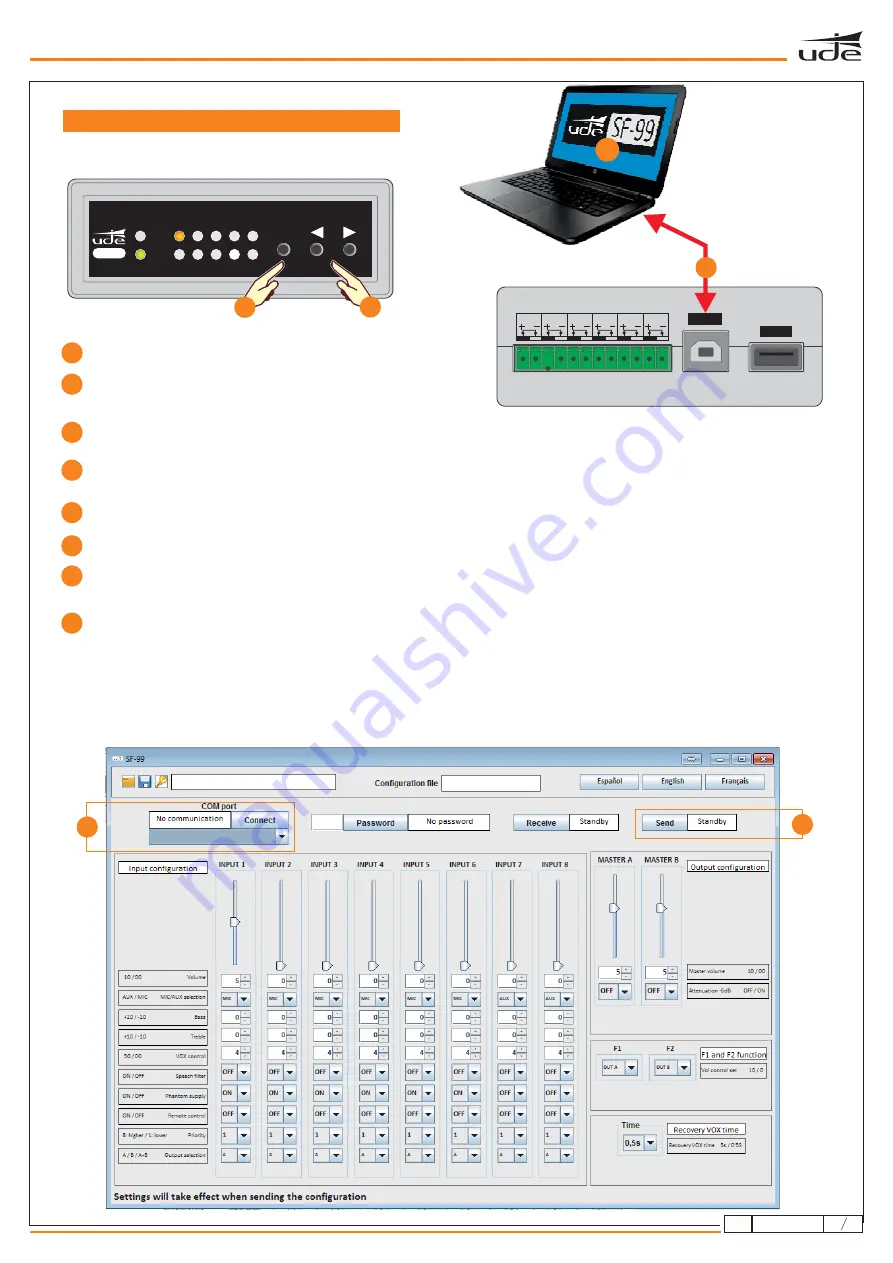
Connect the WX-99 to your computer with the SF-99 software
in read mode.
Run the SF-99 software.
Select the corresponding
and press
. If the connection is successful, the message “
”
will appear. If not, try to select a different
until the connection is successful.
COM port
CONNECT
Connected!
COM port
Once connected, press the “MODE” button on the WX-99 and
select the
. The “READ” led must light up.
READ MODE
Select the preset that you want to configure on the WX-99.
Perform the desired configuration using the SF-99 software
Then, you can proceed with the configuration of the remaining presets.
Example - Preset 1 Configuration:
For preset 1, we will set all the audio inputs volumes to zero except input number 1 (IN1), as indicated in the picture below.
Then, we send the configuration to the WX-99. Now, when the READ mode is activated, selecting the preset 1 will be
equivalent to selecting the audio input 1 (IN1) of the PX-99.
We proceed in the same way for the rest of the presets.
INSTRUCTIONS FOR READ MODE
PX-99
SF-99
TL1
TL2
TL3
TL4
TL5
TL6
P6
P7 P8
P9
P10
MODE
WRITE
READ
P1
P2 P3
P5
P4
WX-99
2
2
5
6
8
5
7
1
3
4
3
1
4
WX-99
9
8
610.532A
rev.
1
Once the preset is configured in the SF-99 send the information through the “
” button
Send
. During the
data recording appears “
and “
” when information is recorded.
Sending”
Standby
7


