9
Chapter 2: Cameras
UniFi Video User Guide
Ubiquiti Networks, Inc.
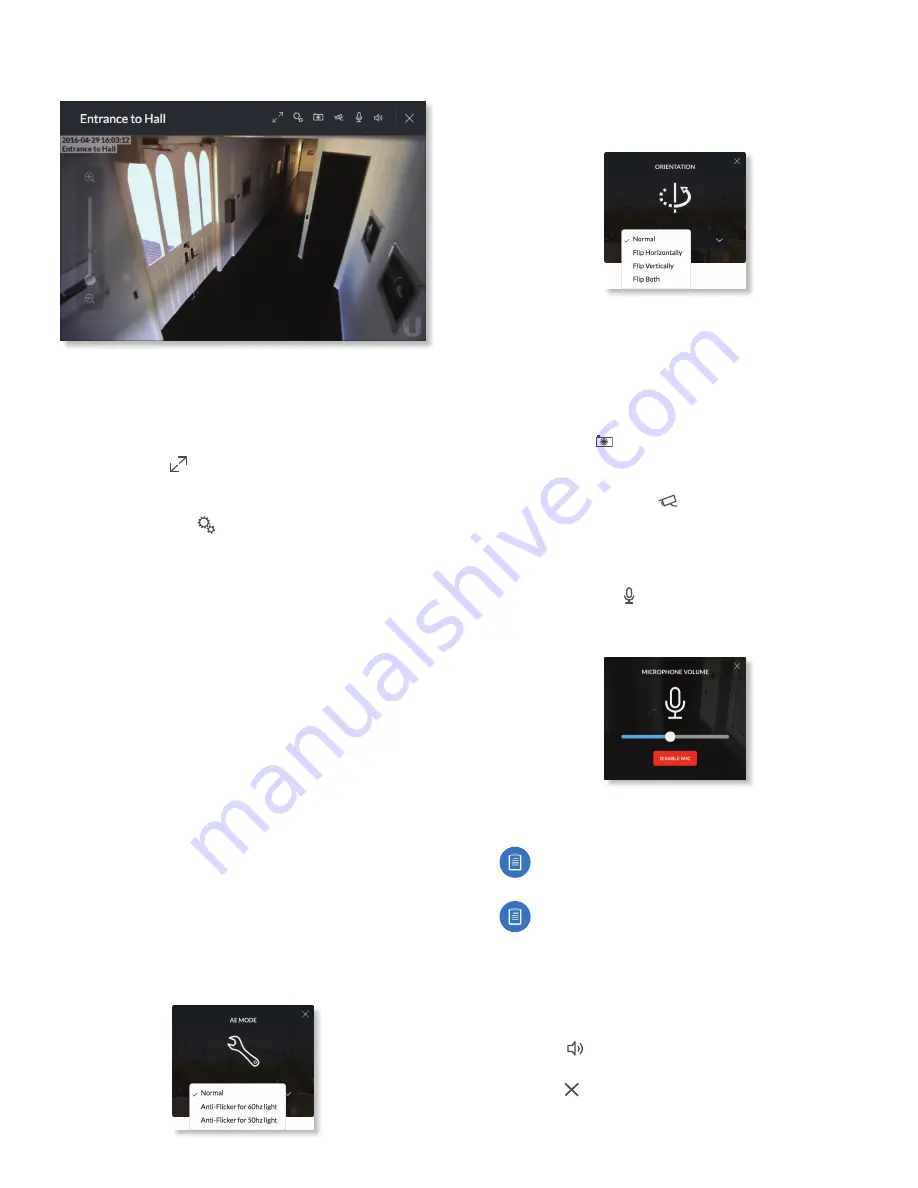
Live Stream Window
The
Live Stream
window above has a menu bar in the
upper right corner that allows you to view the camera feed
in
Full Screen
, adjust the
Image Settings
, take a
Snapshot
of the live feed, change the
Camera Resolution
, and adjust
the volume controls for audio input and output.
Full Screen
Click
to view the live stream window in
full screen. Press
esc
on your keyboard to exit full screen
mode and return to the window view.
Image Settings
Click
to view the imaging drop-down
menu that allows you to change the live view image
settings for each of the following:
•
Brightness
Adjust the brightness of the live view image
by dragging the slider control to the left or right.
•
Contrast
Adjust the contrast of the live view image by
dragging the slider control to the left or right.
•
Hue
Adjust the hue of the live view image by dragging
the slider control to the left or right.
•
Saturation
Adjust the saturation of the live view image
by dragging the slider control to the left or right.
•
Denoise
Adjust the noise level of the live view image
by dragging the slider control to the left or right.
•
Sharpness
Adjust the sharpness of the live view image
by dragging the slider control to the left or right.
•
WDR
Adjust the WDR (Wide Dynamic Range) sensitivity
of the live view image by dragging the slider control
to the left or right. WDR helps create better image and
video detail in frames that contain both light and dark
areas that would otherwise be over- or underexposed.
•
AE Mode
Choose AE (
Auto Exposure
) mode for the
live view images by selecting
Normal
,
Anti-Flicker for
60 Hz light
, or
Anti‑Flicker for 50 Hz light
from the
drop-down menu. The default is
Normal
.
•
Orientation
Change the way an image is displayed
in the live stream window by selecting
Normal
,
Flip
Horizontally
,
Flip Vertically
, or
Flip Both
from the
drop-down menu. The default setting is
Normal
.
•
Infrared
The infrared filter can be changed for the live
view image by selecting
On
or
Off
from the drop-down
menu. The default setting is
Auto
.
•
Zoom
Adjust the optical zoom (if equipped) from 1x up
to 3x
•
Focus
Adjust the focus mechanism (if equipped)
Snapshot
Click
to take a snapshot of the live video
image and save it to a file. The file name will have the
following format:
<
camera name><date and time>.jpg
Camera Resolution
Click
to set the live view image
resolution to
High
,
Medium
, or
Low
. The default setting
is
Auto
, which allows the camera to choose the best
supported setting automatically.
Microphone Volume
(Option available for cameras that
support audio.) Click to adjust the microphone volume
used to record audio input for a recording. You can adjust
the volume by dragging the slider horizontally.
•
Disable Mic
To disable the microphone, click
Disable
Mic
, and then click
Yes, Disable Microphone
to confirm.
Note:
To re-enable the microphone, the camera
must be set to its factory default settings.
Note:
UniFi Video Cameras can be reset to factory
defaults using one of the following methods:
•
Camera’s WEB UI
•
SSH
•
Camera’s Physical Reset Button
Audio Output
(Option available for cameras that support
audio.) Click to mute or unmute the live view audio
feed of the camera.
Close
Click to close the
Camera Details
window and
exit back to the home screen.
Summary of Contents for UVC-G3-AF
Page 2: ......
Page 24: ...20 Chapter 5 Timeline UniFi Video User Guide Ubiquiti Networks Inc...
Page 28: ...24 Chapter 7 Alerts UniFi Video User Guide Ubiquiti Networks Inc...
Page 36: ...32 Chapter 9 Settings UniFi Video User Guide Ubiquiti Networks Inc...
Page 54: ...50 UniFi Video User Guide Ubiquiti Networks Inc...


