Safety Notices
1. Read, follow, and keep these instructions.
2. Heed all warnings.
3. Only use attachments/accessories specified by the manufacturer.
WARNING:
Do not use this product in a location that can
be submerged by water.
WARNING:
Avoid using this product during an electrical
storm. There may be a remote risk of electric shock from
lightning.
Electrical Safety Information
1. Compliance is required with respect to voltage, frequency, and current
requirements indicated on the manufacturer’s label. Connection to a
different power source than those specified may result in improper
operation, damage to the equipment or pose a fire hazard if the
limitations are not followed.
2. There are no operator serviceable parts inside this equipment. Service
should be provided only by a qualified service technician.
3. This equipment is provided with a detachable power cord which has
an integral safety ground wire intended for connection to a grounded
safety outlet.
a. Do not substitute the power cord with one that is not the provided
approved type. Never use an adapter plug to connect to a 2-wire
outlet as this will defeat the continuity of the grounding wire.
b. The equipment requires the use of the ground wire as a part of the
safety certification, modification or misuse can provide a shock
hazard that can result in serious injury or death.
c. Contact a qualified electrician or the manufacturer if there
are questions about the installation prior to connecting the
equipment.
d. Protective earthing is provided by Listed AC adapter. Building
installation shall provide appropriate short-circuit backup
protection.
e. Protective bonding must be installed in accordance with local
national wiring rules and regulations.
Limited Warranty
ui.com/support/warranty/
The limited warranty requires the use of arbitration to resolve disputes on
an individual basis, and, where applicable, specify arbitration instead of
jury trials or class actions.
Summary of Contents for LTU LR
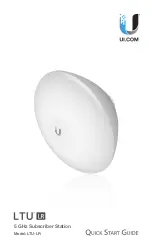
Page 1: ...5 GHz Subscriber Station Model LTU LR...
Page 5: ...Pole Mounting 1 Remove the lock nut 2 Attach the Mount Bracket...
Page 6: ...3 Replace the lock nut 4 Insert the U Bolt into the Pole Clamp 25 60 mm...
Page 7: ...5 Insert the U Bolt into the Mount Bracket Secure the U Bolt with the Washers and Flange Nuts...


