background image

12

 UBI Shell 4.0 Standard – Startup Manual

Continued!

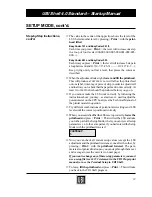
Label (w gaps):
Put a piece of paper with backing paper into the sensor. The
cursor should appear at the left side of the menu:

LABEL <103>  GAP
 

Put a piece of backing paper without any label into the sensor.
The cursor should move to the centre of the menu:

LABEL <103>  GAP


Finally remove all paper web from the sensor. The cursor should
move to the right side of the menu:

LABEL <103>  GAP

Ticket (w mark), certain models only:
Put the paper into the sensor so there is no black mark close to
the LSS. The cursor should appear at the right side of the menu:

MARK <103>TICKET

Move the paper so the black mark becomes situated between the
two parts of the sensor. The cursor should move to the left side
of the menu (the same applies when no paper is fitted):

MARK <103>TICKET

Ticket (w gaps), Fix Length Strip and Var. Length Strip:
Put the paper into the sensor, making sure there is no gap close
to the LSS. The cursor should appear at the left side of the menu:

LABEL <103>  GAP
 

In case of tickets, move the paper so the gap becomes situated
above the sensor. In case of strip, remove the paper completely.
In both cases, the cursor should move to the left side of the menu:

LABEL <103>  GAP
             

If the cursor does not behave as described, the LSS must be
adjusted.

Step-by-Step Instructions,
cont'd.

SETUP MODE, cont'd.

Summary of Contents for EasyCoder 101

Page 1: ...ell 5 Options in UBI Shell 6 Overview 9 Setup Mode Step by Step Instructions 10 Setup Overview 14 Terminal Setup Starting Terminal Setup 15 Solving Communication Problems 15 Using Terminal Setup 16 Se...

Page 2: ...UBI Printer AB Copyright UBI Printer AB 1995 All rights reserved Published in Sweden EasyCoder and LabelShop are trademarks of United Barcode Industries UBI Apple and Macintosh are registered tradema...

Page 3: ...ted options Print Setup printing setup on label Testfeed formfeed auto adjust of the LSS Test Label printing of test labels Ser Com Reset resetting communication to default Clear RAM Memory erasing th...

Page 4: ...EasyCoder printers without keyboard the Print key has been givendualfunctionsinUBIShellbycombiningitwiththeprinthead lift handle This is used for navigating between the menus in UBI Shell and for sele...

Page 5: ...e opened This implies that if you use the same application all the time you will only need to turn on the power once the application has been selected Ifnootherapplicationhasbeenselectedyet thedefault...

Page 6: ...d IN OUT channel and sets up the printer for the UBI LabelShop label design program which you can run on a personal computer with Microsoft Windows 3 1 Refer to the UBI LabelShop User s Manual UBI Win...

Page 7: ...want to use for communication between the printer and the computer or termi nal Normally select uart1 default Refer to the UBI Direct Protocol Programmer s Guide Line Analyzer is a UBI Fingerprintprog...

Page 8: ...d to perform at least two Testfeed operations Test Label The TestLabeloptionallowsyoutoprintaseriesoffourtestlabels in order to test the printout quality and printhead alignment The labels are present...

Page 9: ...nt key Proceed to next menu Legend UBI SHELL SEL APPLICATION SEL APPLICATION Direct Protocol SEL APPLICATION optional applic SEL APPL rom LINE_ALY PRG HU PP SET HD PP VIEW UBI Shell for EasyCoder Prin...

Page 10: ...he display shows UBI SHELL SETUP With the printhead down press Print HU PP SET HD PP VIEW There are two alternative ways to go on 1 Pressing Print with the printhead lifted allows you to change the pr...

Page 11: ...he display shows LSS ADJUST Lifttheprintheadandpress Print andthedisplaychanges to show the LSS indicator menu e g LABEL 103 GAP Often it will suffice just to perform a couple of TESTFEED operations w...

Page 12: ...ould appear at the right side of the menu MARK 103 TICKET Movethepapersotheblackmarkbecomessituatedbetweenthe two parts of the sensor The cursor should move to the left side of the menu the same appli...

Page 13: ...make the LSS work correctly by following the instructionsabove youmay asalastresort needtoadjustthe potentiometer on the CPU board see the Technical Manual of the printer model in question Try differe...

Page 14: ...3 000 or 0 7 15 23 31 39 47 55 119 127 0 7 UART1 BAUDRATE 9600 UART1 PARITY NONE UART1 CHAR LEN 7 UART1 STOPBITS 2 UART1 RTS CTS DISABLE UART1 ENQ ACK DISABLE U1 XO FROM HOST ENABLE U1 XO TO HOST ENAB...

Page 15: ...nsetup of the printer Setup This option allows you to read the communication setup Print Setup Here you can print the current setup on one or more labels Ser Com Reset Thisoptionallowsyoutoresetthecom...

Page 16: ...eterscanbefoundintheTechnicalManual for the printer model in question When you transmit the triple T TTT to the printer the following message will appear on printer s display SETUP FROM TERMINAL On th...

Page 17: ...SHELL SEL APPLICATION Y N Y SEL APPLICATION LABELSHOP Y N N SEL APPLICATION WINDOWS DRIVER Y N N SEL APPLICATION MACINTOSH DRIVER Y N N SEL APPLICATION UBI Fingerprint 6 0 Y N Y STD I O CHANNEL UART1...

Page 18: ...00 2 600 3 1200 4 2400 5 4800 6 9600 7 19200 6 Comment Youmustspecifythebaudratebyadigit 1 7 according to the displayed list of options and then press enter UART1 PARITY NONE New value 1 NONE 2 EVEN 3...

Page 19: ...ELL TEST LABEL Y N N UBI SHELL SER COM RESET Y N N UBI SHELL CLEAR RAM MEMORY Y N N UBI SHELL REBOOT Y N Y If you answer N No here you will return to the Select Application option but if you answer Y...

Page 20: ...80 New value 0 127 Press F CR for testfeed Press CR when OK DETECTION FEEDADJ STARTADJ 0 New value 9999 thru 9999 DETECTION FEEDADJ STOPADJ 0 New value 9999 thru 9999 MEDIA SIZE XSTART 0 New value 0...

Page 21: ...r label At the bottom of each label the following informa tion is printed Page number Number of characters printed on the label Total of characters received so far If the whole label is not filled bef...

Page 22: ...22 UBI Shell 4 0 Standard Startup Manual NOTES...

Reviews: