background image

16

II. Function


(MulitMedia Duplicator)

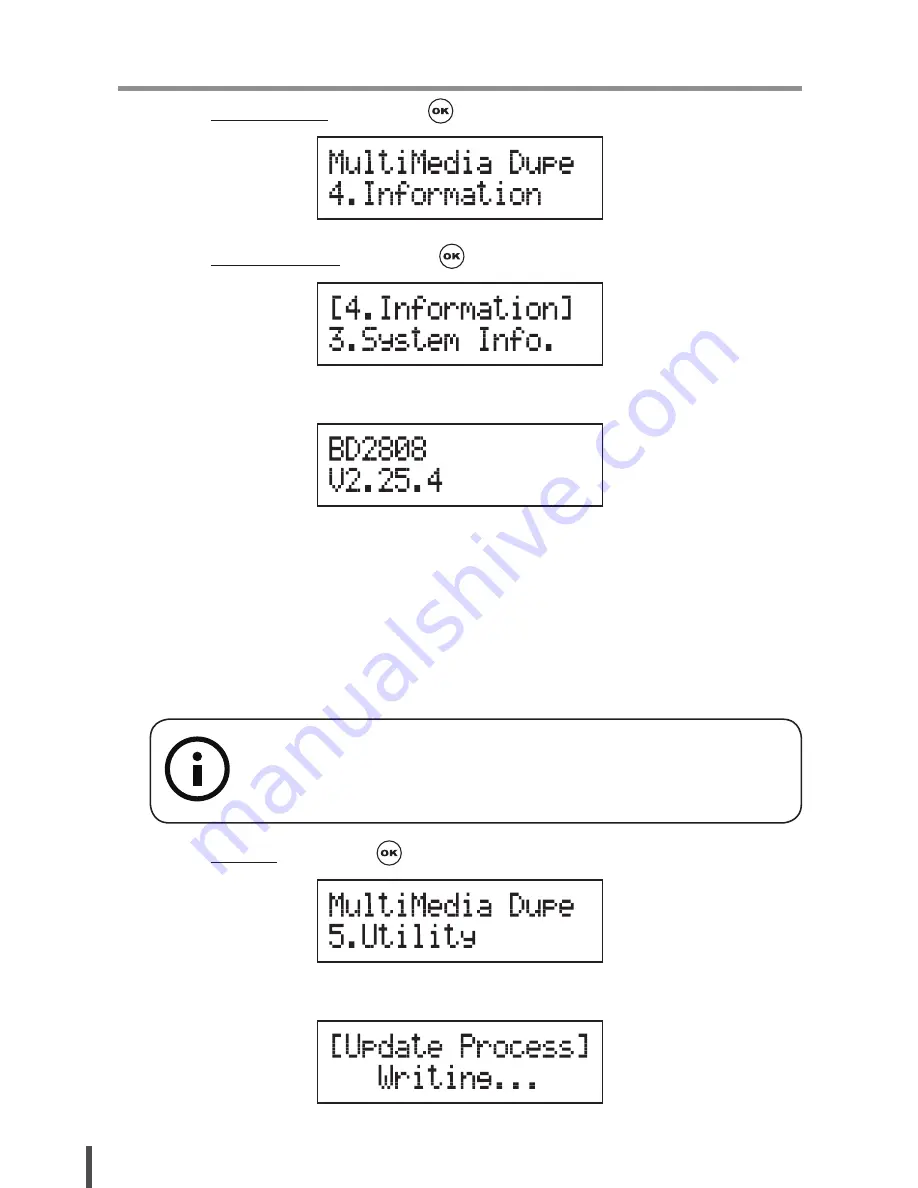
1. Select 4.Information and press  .

2. Select 3.System Info. and press   to check the system’s information.

3.  The system information will show on the LCD.

5. Utility

This function will update the firmware of this system by using certified update 
firmware which released by manufacturer. 

1.  Apply for the firmware from your local distributor.
2.  Unzip the firmware and save it in a USB drive.

3. Select 5.Utility and press  .

4.  The system will start to execute updating task.

**Note
DO NOT save the firmware in a folder. The system can not detect 
the firmware if you save it in a folder.

Summary of Contents for MD801

Page 1: ...MD Series Duplicator User Guide V3 10 www ureach inc com the Expert of Duplicators...

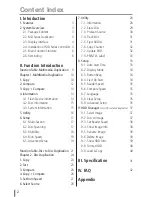
Page 2: ...tion Table Disc to Disc Duplication 21 Chapter 2 Disc Duplication 24 1 Copy 24 2 Test 25 3 Compare 26 4 Copy Compare 26 5 Set Burn Speed 27 6 Select Source 28 7 Utility 28 7 1 Information 28 7 2 Erase...

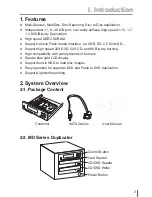
Page 3: ...h speed 20X DVD 52X CD and 8X Blu ray burning High compatibility with variety brands of burners Special blue light LCD display Support built in HDD to load disc images Easy operation for separate DVD...

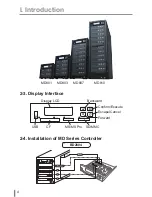
Page 4: ...4 I Introduction 2 3 Display Interface 2 4 Installation of MD Series Controller BD2804 MD810 MD807 MD803 MD801 Display LCD Forward SD MMC MS MS Pro CF USB Confirm Execute Escape Cancel Backward...

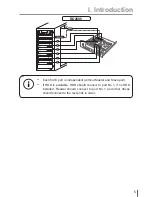
Page 5: ...ach SATA port is independent without Master and Slave port If HDD is available HDD should connect to port No 1 if no HDD installed Reader should connect to port No 1 and other drives should connect to...

Page 6: ...copy to CD DVD disc Multi Session Allows all different types of memory cards with small data to backup to one disc Ex Note Only ONE Flash device can be applied per time Disc to Disc Duplication Please...

Page 7: ...can copy to several discs Ex MultiDisc Allows you to duplicate discs from one Flash device Ex USB 4GB data Disc 1 4 Disc 3 4 Disc 2 4 Disc 4 4 USB 300M data Disc 1 Disc 3 Disc 2 Disc 4 Note Disc Span...

Page 8: ...o disc spanning 2 6 Reminding 1 Disc Spanning does not support copy the Flash device with only ONE single big file 2 Disc spanning can not execute with Multidisc mode at the same time when both modes...

Page 9: ...burning speed format and capacity System Info To show the duplicator s model No firmware version Burn Speed To adjust the burning speed of disc 5 Utility Update BIOS To update the system firmware 6 Se...

Page 10: ...7 1 Plug a Flash device ex USB SD MMS into the proper slot as source and place a disc into burner as target for duplication If you like to copy many discs at the same time you can place more than one...

Page 11: ...Note 1 As long as the disc was a multi session disc it will not support disc spanning copy 2 If the data size is larger than the disc s capacity the system will require you to put more than one disc P...

Page 12: ...nction has two different displays for the disc copied by Multi Session and Disc Spanning 1 Plug a Flash device ex USB SD MMS into the proper slot as source and place a disc into burner as target for d...

Page 13: ...ner as target for comparison 2 Select 2 Compare and press to start comparison 3 The system will detect the source and the target disc automatically 4 After detecting the system will start to compare N...

Page 14: ...mended to use this function to check each memory card USB or CD DVD s content information You can check Flash device s information ex used space file quantity and disc s information ex burn speed supp...

Page 15: ...tion and press 3 Select 2 Disc Info and press to check the disc s information 4 The system will detect the disc automatically 5 After detecting the information of the disc will show up The information...

Page 16: ...nction will update the firmware of this system by using certified update firmware which released by manufacturer 1 Apply for the firmware from your local distributor 2 Unzip the firmware and save it i...

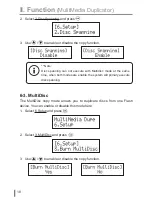
Page 17: ...ot it 6 Setup This section allows you to setup the multi session disc spanning multidisc disc burning speed and advanced setup 6 1 Multi Session 1 Select 6 Setup and press 2 Select 1 Multi session and...

Page 18: ...y mode allows you to duplicate discs from one Flash device You can enable or disable this mode here 1 Select 6 Setup and press 2 Select 3 MultiDisc and press 3 Use to enable or disable the copy functi...

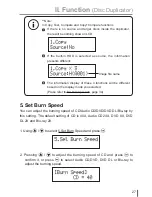
Page 19: ...ss 4 Use to adjust the proper speed of the disc duplication The burning speed of CD is from 1 to MAX The default setting of burning speed of CD is 40X DVD is 8X and Blu ray is 4X 6 5 Advanced Setup CD...

Page 20: ...Zone This setting allows you to setup the proper time zone of working place Language You can set the language you prefer to use during operation Factory Default You can reset all the setting to manuf...

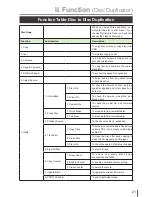
Page 21: ...a size 2 Drive Info To check the version model No and brand name 3 System Info To check the model No and firmware version 2 Erase Disc 1 Quick Erase To erase data from rewritable disc 2 Full Erase To...

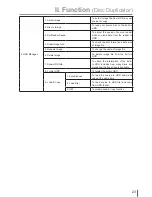
Page 22: ...drive 6 Compare Speed To adjust the speed of drives while comparing 7 Language 8 Clear Setup To reset all the function back to manufacturer s default setting 9 Advanced Setup 1 Power On Time To set a...

Page 23: ...disc format and data size of image file 5 Rename Image To change the name of image file 6 Delete Image To delete image file from the built in HDD 7 Show HDD Info To check the information of the built...

Page 24: ...der by function 6 Select Source plase refer to 6 Select Source page 28 1 Select 1 Copy and place source disc and blank discs into the proper trays Then the system will detect the source disc and show...

Page 25: ...ing left in the recordable discs 1 Using to select 2 Test and press 2 Press to start test 3 Once the test task is finished the discs will be ejected and the result of the pass and fail discs for the t...

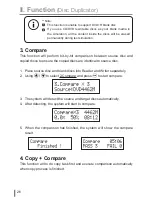
Page 26: ...will detect the source and target discs automatically 4 After detecting the system will start to compare 5 When the comparison has finished the system will show the compare result 4 Copy Compare This...

Page 27: ...CD and press to confirm it or press to select Audio CD DVD DVD DL or Blu ray to adjust the burning speed Note In Copy Test Compare and Copy Compare functions 1 If there is no source and target discs...

Page 28: ...r is selected press to confirm the setting and back to the menu list 7 Utility 7 1 Information You can check the information of disc drive and system by this function By pressing each disc or drive s...

Page 29: ...he model No and firmware version can be checked here 7 2 Erase Disc This function will erase the rewritable discs in WRITER tray there are two erase modes available Quick Erase It will erase the INDEX...

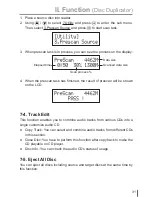
Page 30: ...e erase task has finished the O stop blinking the disc will be ejected automatically 7 3 PreScan Source This function will scan and detect any bad sectors existing in the source disc which helps you t...

Page 31: ...n the LCD 7 4 Track Edit This function enables you to combine audio tracks from various CDs into a single customize audio CD Copy Track You can select and combine audio tracks from different CDs in th...

Page 32: ...this function 1 Using to select 7 Utility and press to enter the sub menu Then select 6 Copy Counter and press 2 Using to select 1 Show Count 3 Pressing to check the calculation of successful and fai...

Page 33: ...eration 8 Setup 8 1 Auto Start Time This setting will allow the system to do the Copy Test Compare and Copy Compare functions automatically in a few seconds once the source and blank discs are placed...

Page 34: ...how the speed of burning during copy process 8 3 Button Beep This setting will allow you to set up to hear a beep when a button is pressed or not 8 4 Eject On Start You can set the trays or discs ejec...

Page 35: ...the reading speed of discs The default setting of CD s compare speed is 40X DVD is 8X 8 7 Language You can set a proper language for interface during operation 8 8 Clear Setup This setting will reset...

Page 36: ...Or you can set No to keep buffer not be used Boot Password This setting allows you to enable or disable the user administrative password Users have to login when the system is booted on Setup Passwor...

Page 37: ...ource reader automatically 1 Pressing to select 9 HDD Manager and sub menu 1 Select Image 2 Pressing to select the image you need and press to confirm 9 2 Disc to Image This function will load your so...

Page 38: ...ge Info You can check the disc format and data size of image file in this function 1 Pressing to select 9 HDD Manager and sub menu 4 Show Image Info 2 Press check the disc format and data size of the...

Page 39: ...source image file is unable to delete if the file is selected as source Therefore before you delete an image file please check if it is selected as a source and change a new one source by 9 1 Select...

Page 40: ...DD Info This intelligent HDD management technology is much easier for HDD management than the old way 9 9 Load Copy This function is for the system to load the source to HDD and make copy synchronousl...

Page 41: ...SB File Format Support FAT12 FAT16 FAT32 Disc Format Support BD ROM BD R BD RE DVD ROM DVD Video DVD Audio DVD R DVD RW DVD R DVD RW Dual Layer DVD R CD ROM CD RW CD I Audio CD Video CD CD G CD TEXT B...

Page 42: ...D burner Q4 How long does it take to do a Memory Card or USB to disc copy A The speed of copy will depend on your Memory Card or USB s speed and the data size Q5 Can MD800 erase source disc A MD800 on...

Page 43: ...cribe Operation Step 1 Install Lightscribe template software to PC Download LightScribe software from www lightscribe com and install below software A LIGHTSCRIBE SYSTEM SOFTWARE LSS B LIGHTSCRIBE TEM...

Page 44: ...ist 4 If the duplicator s Lightscribe drive is not on the list please follow below steps to add new lightscribe drive to the support list Plug the new lightscribe drive you will use for Duplicator to...

Page 45: ...1 Click to launch the LightScribe Template on our PC 2 Follow procedure to create your label image 3 Make sure the lightscribe drive is selected Note If Lightscribe template can not be executed norma...

Page 46: ...side is face down and data side is face up 4 Click the Print to save the lightscrbe image LSI le to a USB stick or a Disc 5 Plug the USB drive or Disc into Duplicator 6 Select the utility function 7...

Page 47: ......

Page 48: ......
Reviews: