background image


30 


8.3 Set Burn Time 


User can set the Burn-In test interval. The test time ranges 
from 30 mins to 30 days. 


8.4 Set Loop Count 


Sets the flash media’s Burn

-in test loop quantity. Each loop contains 3 processes: writing, 

power off, and comparing. The loop quantity can be set from 0 to 99999.     


Note


Loop 0 is equal to Loop 99999   


The duplicator will abide by the last setting picked if users chose both 

“Burn Time” and “Loop Count.”


8.5 Set Test Range


Sets the flash media test range. The range can be set from 1% 
to 100%.   


8.6 Set Bad Limit


Sets the error tolerance. Tolerance can be set from 1-10000 bad sectors. The system will 
count per whole test, not per loop. 


Note


“Test Range” setting is only available 

in [8.2 Burn-In (Auto Data)].


[Set Test Range] 

100% 

[Set Bad Limit] 

[Set Burn Time]       

30 min 


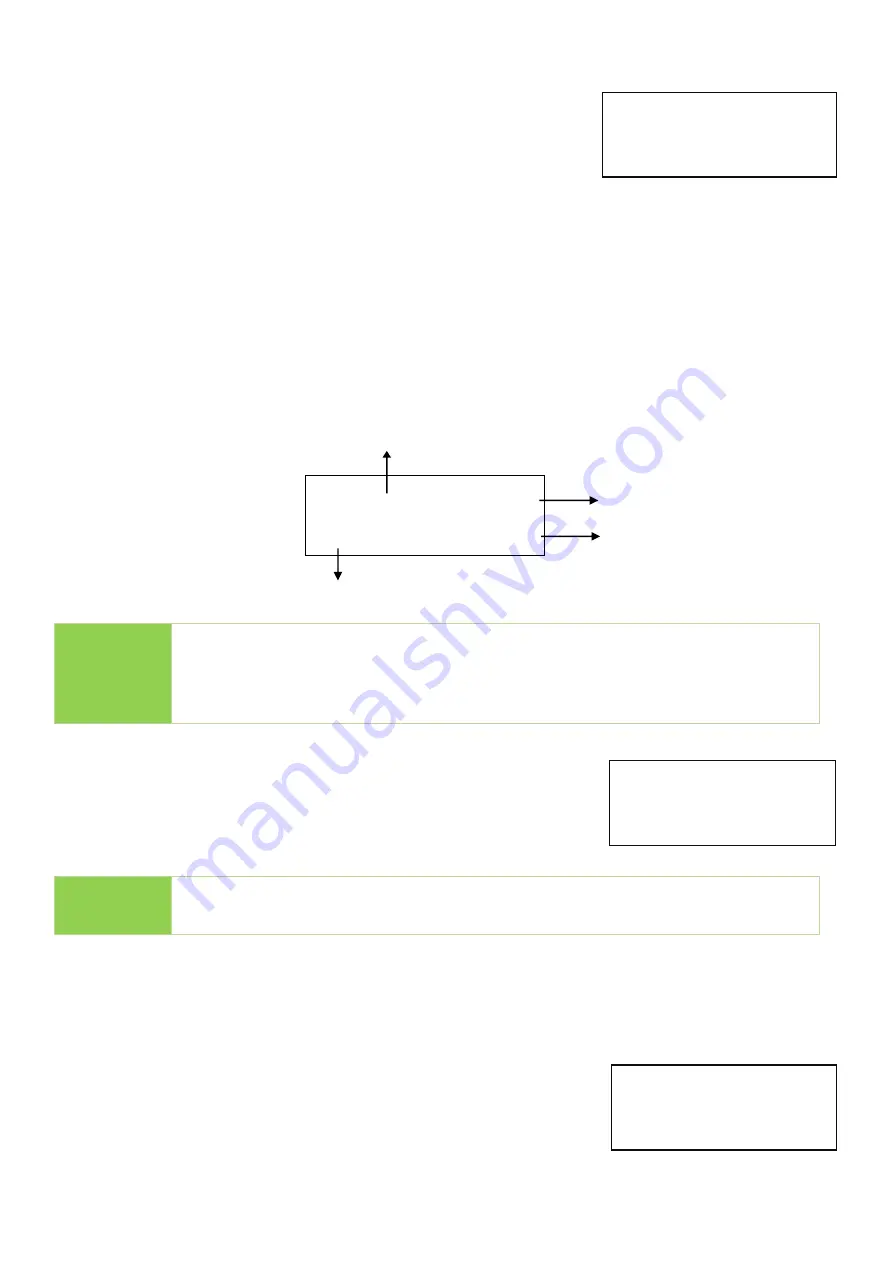
#04]L35R3E0          500MB


[


Writing…                  120MB


L35: The 35

th

 Loop. 

R3: The 3

th

 compare in the 35

th

 loop. 

E0: Total error quantity.   


Working status 


Total burn- in capacity   

Processed   


Summary of Contents for Intelligent 9 Series

Page 1: ...Intelligent 9 Series CF CFast CFast Native Duplicator Tester User Manual v A 01...

Page 2: ...8 Function Description 15 1 Copy 15 2 Compare 16 3 Copy Compare 16 4 Media Check 16 5 Information 20 6 Utility 20 7 Setup 24 8 Burn In Available in CF CFast Golden Series 28 9 Log Manager Available i...

Page 3: ...ration of U Reach product and or software program or hardware issues can cause loss of data defective formatting or data loading U Reach will make efforts to resolve or repair any issues recognized by...

Page 4: ...le the firmware is updating Use only approved stable power sources Use product only in a clean dry dust free and ventilated area Liquids or foreign debris can severely damage your duplicator It is typ...

Page 5: ...rint reduction Ultra high transmission speed Real multitask processing capability Whether copy compare media check or format each feature is independently executed Each flash slot has an independent p...

Page 6: ...6 2 Hardware Overview Front View Back View Souce Port LED Indicator Green Pass Working Red Fail Control Buttons Forward Backward OK Confirm ESC Escape Power Switch Power Supply USB Port for PC Link...

Page 7: ...g reference table illustrate adapter requirements for each series Reference table CF CFast CFN Ports Adapter Adapter volume needed when copying CF 4 32 12V 5A 1 40 60 12V 9A 1 80 120 12V 12 5A 1 12V D...

Page 8: ...ading and writing This function will change the flash s content and format 4 3 H6 Test Checks the flash s quality by writing and reading its empty space This function will not change the flash s conte...

Page 9: ...t FAT 32 Cluster Size Sets FAT 32 Cluster size 6 2 Measure Speed This function measures the flash reading and writing speed This function will damage the format and content 6 3 Capacity Check Availabl...

Page 10: ...cating 7 7 Power Off Time Between Copy Compare Sets the power off time between Copy and Compare 7 8 Auto Start After Fill Device Sets automatic start of copy compare once all targets have been inserte...

Page 11: ...n test writing pattern 8 8 Compare Count Per Loop Sets the data reading count per loop 8 9 Power Off Between Loop Sets the power off time between each data writing and reading loop 8 10 Compare Count...

Page 12: ...H5 Format Checks the flash s quality by writing and reading and then executes format 4 4 Setup Range Sets the flash s checking range percentage 4 5 Setup Range MB Sets the flash s checking range in M...

Page 13: ...Speed This function measures the flash reading and writing speed This function will damage the format and content 6 3 Quick Erase Erases flash media content It will keep the FAT format 6 4 Full Erase...

Page 14: ...Sets system language 7 10 Monitor Device After Copy Allows user to set a device status check after duplication 7 11 Use Port 2 as Compare Source Available in Golden Series Double source setting When...

Page 15: ...played on the LCD after duplication completes Note Recommendation Target device s capacity must be equal to or larger than the source device capacity Note The number of working connected targets will...

Page 16: ...setting will not execute this function on the master device CF CFast Series 4 1 H3 Safe This function reads the flash media to assess its quality After executing this function the flash s bad sector q...

Page 17: ...te 4 3 H6 Test This function performs a read and write test on the empty space to determine the flash s quality The flash s original data will not be erased during this test Note This function support...

Page 18: ...lash s quality After H5 Test it will execute format 4 4 Setup Range This function sets the quality check capacity range Use the buttons to set the range from 1 to 100 The higher the percentage the lon...

Page 19: ...indicate that an error has occurred use the buttons to view the error information 4 9 Low Speed Tolerance Time Available in CFast Native CFN Series This function can set the tolerance time for minimum...

Page 20: ...6 1 Do Format 6 1 1 Auto Format This function formats flash into FAT Plug in the flash media and press OK The system will automatically detect its capacity then format the media per its capacity If th...

Page 21: ...eed This function measures the read and write flash media speed Plug flash media into the slot select function 3 Measure Speed then press OK to start this function Use the keys to view the exact Read...

Page 22: ...ng format and content This task takes longer Pressing ESC during this process will abandon the task but the original format and content will no longer be readable Note This function supports asynchron...

Page 23: ...nzip the BIOS firmware then save it to the root directory in the Flash drive Note The format must be FAT16 or FAT32 Step 2 Proceed to update firmware Connect the Flash drive to the source port of the...

Page 24: ...will copy the data only rather than the entire flash Note If the file format is not recognized the whole flash card including empty space will be copied even if you specify copy area in System and Fi...

Page 25: ...s can activate Asynchronous copy by selecting Enable or deactivating it by selecting Disable For Asynchronous copy to run the source s data must be smaller than the system s buffer memory and set to E...

Page 26: ...t of copy compare task upon insertion of all targets Users can also choose to confirm tasks first by pressing Ok 7 9 Language Sets the system s language English or Japanese 7 10 CF Transfer Mode Avail...

Page 27: ...7 12 Adjust Clock Available in Golden Series Adjusts the duplicator s time clock displayed on the LCD monitor 7 13 Use Port 2 as Compare Source Available in CF CFast Golden Series This function desig...

Page 28: ...etecting devices Factory Mode 1 All lights off after press OK and successfully detecting devices Factory Mode 2 All lights on after press OK and successfully detecting devices 7 15 Set to Default Rest...

Page 29: ...etting picked if users chose both Burn Time and Loop Count 8 2 Burn In Auto Data 8 3 Set Burn Time No physical Source needed Choose 8 7 Set Data Pattern to automatically run test 8 4 Set Loop Count 8...

Page 30: ...ng picked if users chose both Burn Time and Loop Count 8 5 Set Test Range Sets the flash media test range The range can be set from 1 to 100 8 6 Set Bad Limit Sets the error tolerance Tolerance can be...

Page 31: ...ower Off Between Loop Sets the power off time range between loops This can be set from 0 to 15 seconds 8 10 Compare Count Per Copy Sets the compare count in each loop during Copy Compare burn in test...

Page 32: ...your PC Step 2 Connect the USB cable from computer to the duplicator Step 3 Power On the duplicator Step 4 Launch LV07B by double clicking on software icon LV07B Caution Before Step 4 make sure the du...

Page 33: ...33 Step 6 If the screen above does not appear please repeat steps 1 thru 4 Note If the system requests Run the program as an Administrator right click LV07B then set it in Properties Compatibility...

Page 34: ...Recent Report Step 1 Insert flash media into Port 1 Step 2 Go to Out Recent Report and press OK to output the log records from the last 28 days Step 3 Remove flash media and read the log report on PC...

Page 35: ...tinuously record log reports If user executes clear log records on the duplicator while LV07 is still running the conflict between LV07 and duplicator might lead a serious system error Note During you...

Page 36: ...date of log report Model The duplicator s model info F W Ver The duplicator s firmware version Machine ID The ID number of duplicator Start No The beginning log record in the log report End No The las...

Page 37: ...Executes H5 reading writing test FORMAT AUTO Formats the flash media automatically FORMAT FAT16 Formats the flash media as FAT16 FORMAT FAT32 Formats the flash media as FAT32 CAPACITY CHECK Capacity...

Page 38: ...ore inspecting or replacing the socket Use your hand or a flat head screw driver to remove the faceplate screws Caution Please use extreme caution while using a screwdriver to remove the screws as the...

Page 39: ...lash duplicator which contributes to the fast and easy process Q2 Can the flash duplicator copy any kind of file format i e NTFS A Yes our flash duplicator supports Whole Area function to copy whole f...

Page 40: ...rmat errors It is strongly recommended that target and source be in close range of capacity If source capacity is LARGER than the target for example 16GB copy to 8GB There are two results as shown in...

Page 41: ...Sanitization Modes Quick Erase Full Erase and DoD Erase Format Functions Formats device to FAT16 or FAT32 Special Features Burn in Test Time ranges from 30 minutes to 30 days Available in CF CFast Gol...

Reviews:

Related manuals for Intelligent 9 Series