


www.U-LineService.com
12
06/2006
2175DWRWC — Drawer Model Wine Captain
®
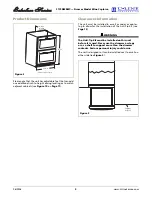
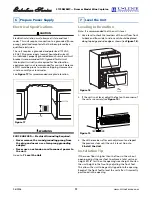
Installation of the 2175DWRWC
1. Plug in the power cord.
2. Gently push the unit into position. Be careful not to
entangle the electrical cord.
3. Re-check the leveling, from front to back and side to
side. Make any necessary adjustments. The unit’s top
surface should be approximately 1/8" below the
countertop.
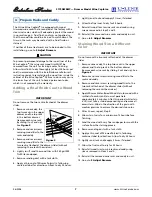
Anti-Tip Kit Installation
WARNING
• The Anti-Tip Kit must be installed on this unit
before it is used.
• Additional blocking or special fasteners may be
required for installation. Installer is responsible
for secure attachment to prevent the unit from
tipping.
• Make sure the mounting screws attaching the
unit to the counter, cabinet or wall are deep
enough into the mounting surface to support the
weight of the drawers and the items that will be
inside the drawers.
• Never use the drawers as steps or as a shelf to
support more than the drawers’ content. Serious
personal injury could occur.
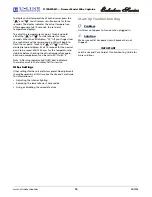
After leveling, the unit must be secured to a counter, a
cabinet or a wall to prevent tipping.
1. Open the upper drawer to expose the six screws (A)
installed at the top two corners (three at each corner).
Remove the appropriate screws for horizontal or
vertical mounting (see
Figure 20
). Do not discard.
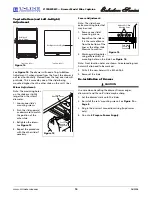
8 Install the Unit
A
B
Countertop or Wall Header
C
Cabinet or Wall Stud
A
C
B
Figure 20
Horizontal Mounting
(Left Side Shown)
Vertical Mounting
(Left Side Shown)